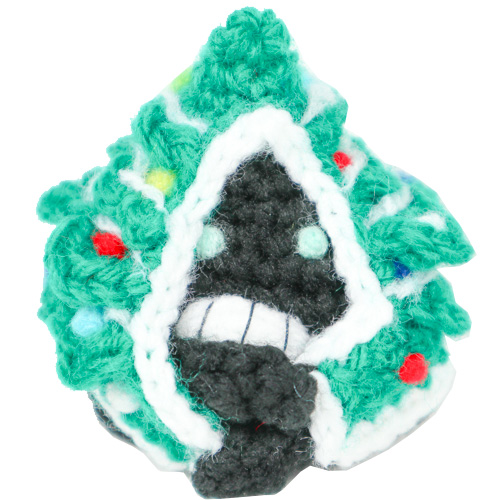
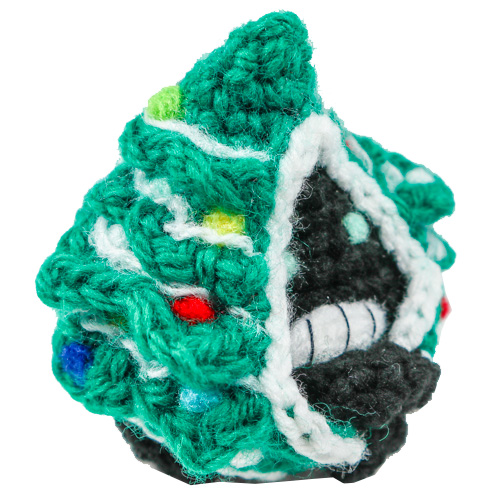
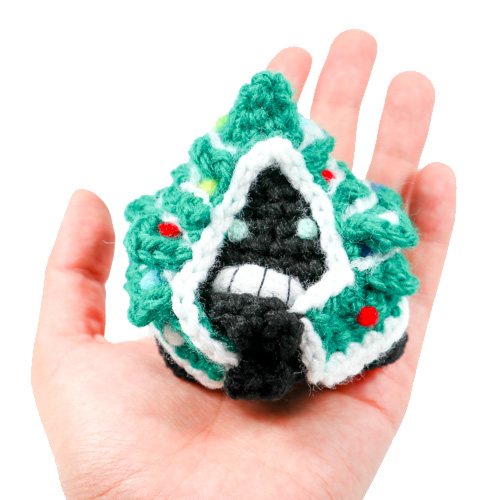
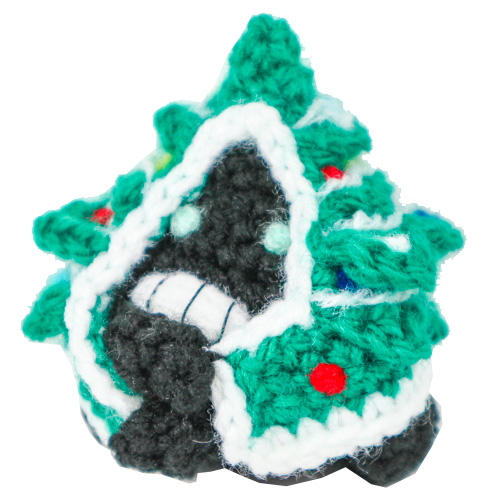
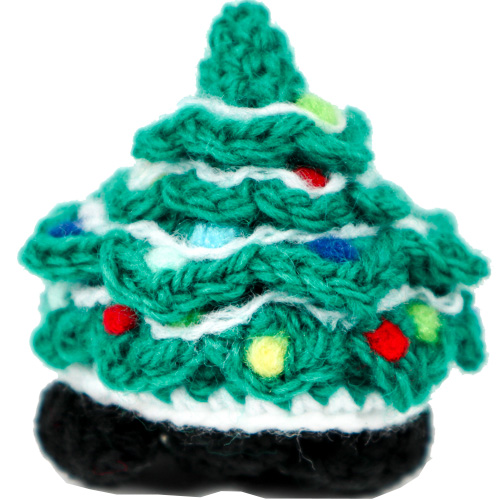
What a nicely decorated Christmas Tree! Hey, wait a second- that’s not a tree, it’s a Snorunt! It is wearing a new Christmas-tree coat!
Here is another pattern to continue with my festive Holiday streak. It is the same as the normal Snorunt pattern, except for the coat. Happy Crocheting, enjoy your Christmas tree Snorunt!
Materials
- Yarn: Black, White, Green
- 3.5 mm crochet hook – fiber-fill stuffing
- Felt- many color- and Felting Needle – for details
- Embroidery thread/ sewing needle (for teeth)
- Scissors, yarn needle for assembly
Abbreviations
R(#): Round number
MR: magic ring
Sc: single crochet
Inc: increase (2 sc in same stitch)
Dec: decrease (decrease 2 sc into one)
I recommend using Invisible Decrease
tch: turn chain (chain 1 and switch directions)
sl st: slip stitch
f/o: fasten off
Check out my Learn to Crochet page for video tutorials on how to do the types of stitches listed above.
Head
Using black:
R1. 4 sc in MR (4)
R2. Inc, Sc 1 around (6)
R3. Inc, Sc 2 around (8)
R4. Inc, Sc 3 around (10)
R5. Inc, Sc 4 around (12)
R6. Inc, Sc 3 around (15)
R7. Inc, Sc 4 around (18)
R8. Sc 2, inc around (24)
R9-R12. Sc around (24) four times
R13. Sc 2, dec around (18)
R14. Sc 1, dec around (12)
R15. Dec around (6) close and f/o.
Hands
Make 2. Using black:
R1. 4 sc in MR (4)
R2. Inc, sc 1 around (6)
R3. Dec, Sc 1 around (4)
F/o and close loop.
Feet
Make 2. Using black:
R1. 6 sc in MR (6)
R2. Inc, Sc 2, inc, Sc 2 (8)
R3-R4. Sc around (8) two times
R5. Dec, Sc 2, around (6) f/o and close loop.
Coat
Here is where the fun starts. Every few rows, you will work in front loops only to create branches on the outside of the coat. After a row of creating branches, you will then make the next row by working in the (unworked/’left over’) back loops of the previous row. If a row does not specify to work in front or back loops, then you may crochet in both loops as usual.
Using Green:
R1. 4 sc in MR (4)
R2. Inc, Sc 1 around (6)
R3. Inc, Sc 2 around (8) chain 1,
turn work (tch)
At each tch: begin the next row on the last stitch that was just completed (ie change directions on that round)
R4. Sc, inc, Sc 4, inc, Sc (10) tch,
R5. ‘Chain 3, sl st to FRONT LOOP ONLY of 2nd sc on base’ Repeat until end of row (makes 5 small branches), tch
R6. In (unworked) Back Loops: Sc, inc, Sc 6, inc, Sc (12) tch,
R7. Sc, inc, Sc 8, inc, Sc (14) tch,
R8. ‘Chain 3, sl st to FRONT LOOP ONLY of 2nd sc on base’ Repeat until end of row (makes 7 small branches), tch
R9. In (unworked) Back Loops: Sc, inc, Sc 10, inc, Sc (16) tch,
R10. Sc, inc, Sc 12, inc, Sc (18) tch,
R11. For this entire row, work in FRONT LOOPS ONLY:
In first sc: [Sc, Hdc] , ch 2
In second sc: [Hdc, Sc]
In third sc: sl st
Repeat along the entire row (makes 6 larger branches)
R12. In (unworked) Back Loops: ‘Sc 5, inc’ 3x (21) tch,
R13. Sc 21 , ch 4, turn work (24)
R14. sc 3, then repeat as R11- working In Front Loops Only: [sc, Hdc, ch 2] in 1st sc; [Hdc, Sc] in 2nd sc; [Sl st] in 3rd sc, repeat along entire row (makes 7 larger branches), chain 4, turn work.
R15. (In both loops) Sc 3, then in unworked back loops: Sc across the whole row (27), tch
R16. Sc across entire row (27), tch
R17. Switch to white: Sc 22, Sl st in the last 5 stitches (27), at this point you may continue on ‘up’ the front lining of the coat , Slip Stitching the White Border around the front of the coat (where the face peeks out.) F/o and weave in yarn end.
Assembly of crochet Christmas Snorunt
Body: Attach the feet – widely spaced apart for balance and for the coat to have a fuller fit. Attach the coat to the body- I only attached the front part of the coat to the body and left the back open/unattached. Attach arms- either crossed and holding the edges of the coat, or simply laying free at the front of Snorunts body.
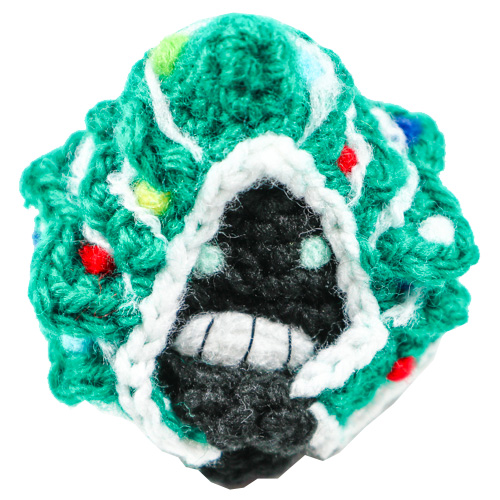
Facial details (eyes, mouth) were added using colored felt and needle felting, and embroidery for the teeth.
Finally: the fun part: Decorate your Snorunt Tree! I used more needle felting of unwound colored yarn ends. I also liked adding a bit of ‘icing’ to the tree by unraveling white yarn strands and needle felting these between the branches. This would be a great project to use up any broken shiny jewelry, colored beads, or other craft supplies to make ornaments. You can even top off your Snorunt with a little star! I left mine plain because (I was tired after decorating, and) I wanted a ‘natural outdoor tree’ look.
I hope you enjoyed making your Christmas Tree Snorunt!

Thank you for trying this crochet pattern – I hope you enjoy your Christmas Amigurumi Snorunt!
This pattern by StringsAway is for personal use only. Please do not sell or redistribute the pattern as your own.