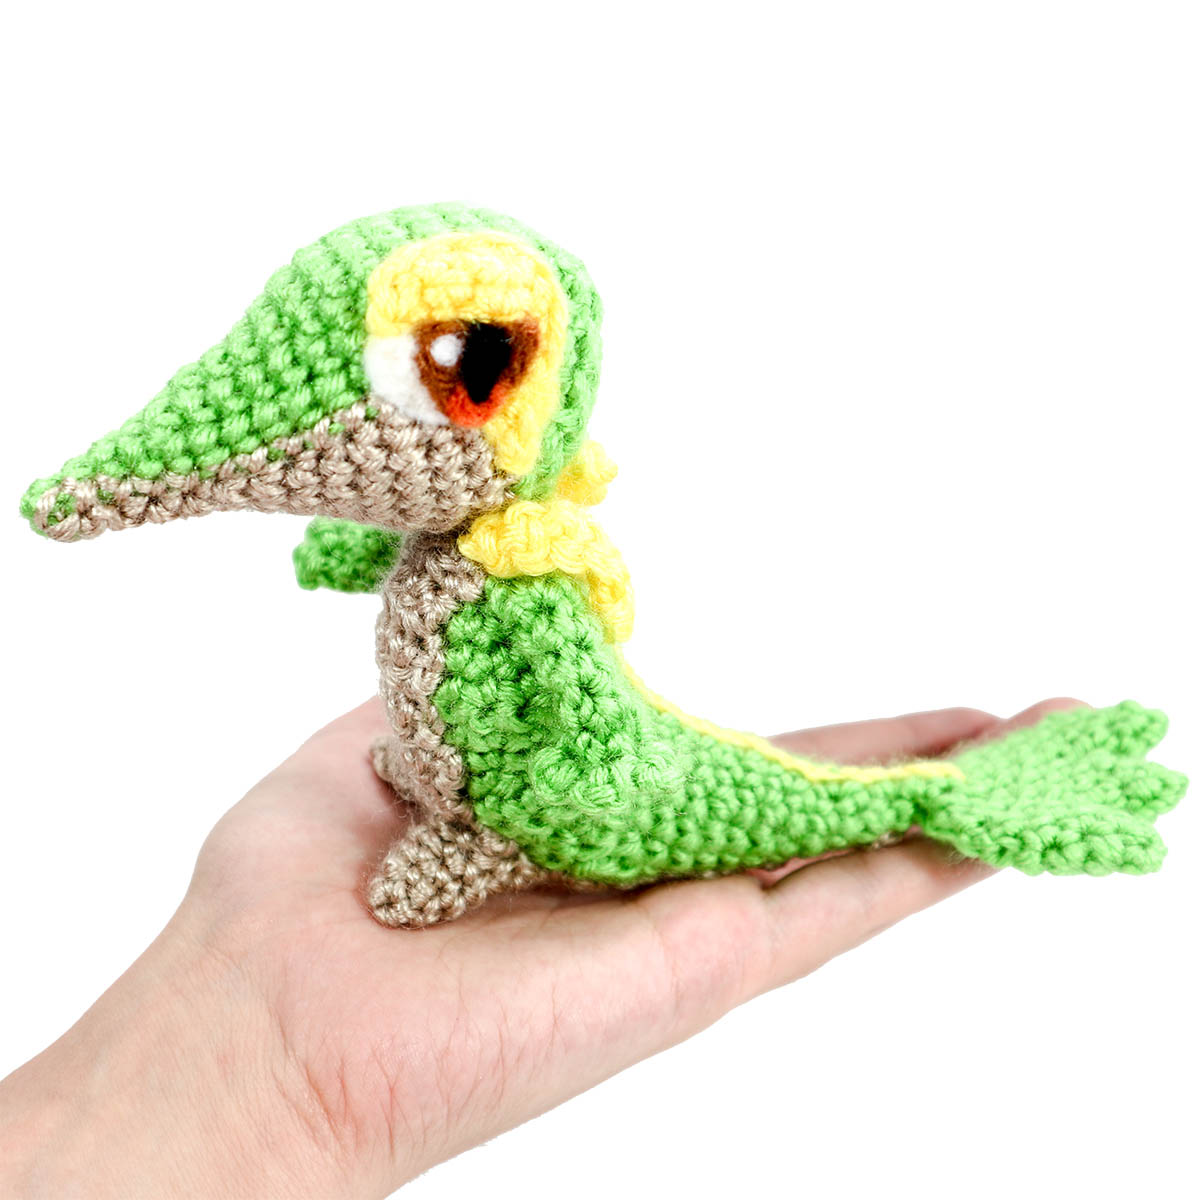
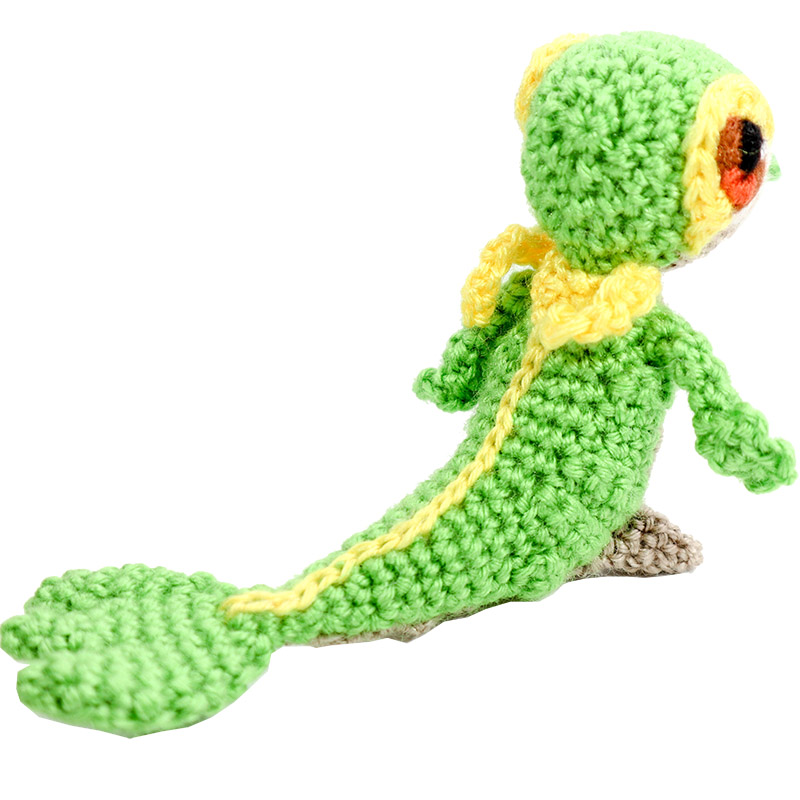
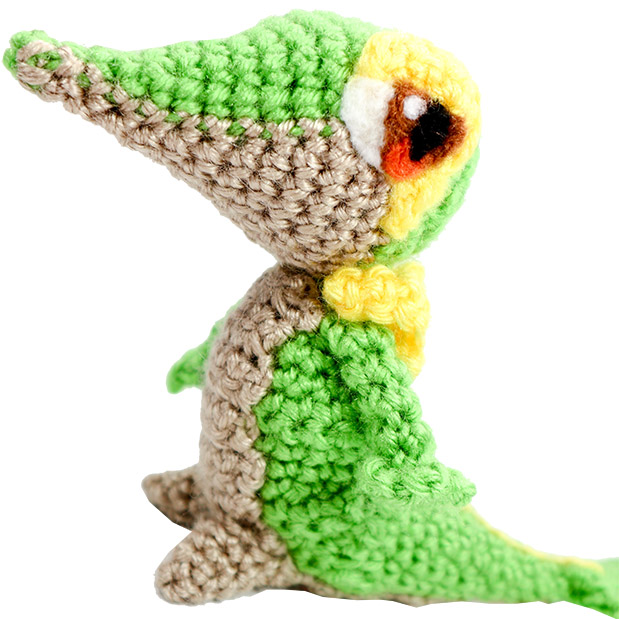
Snivy is the grass-type starter from Unova region. Snivy is a slim lizard who stands with it’s point nose held high. Is it snooty or confident? Bored, or cunning? Make your own and decide for yourself!
This pattern involves color changes, surface crochet, crocheting in front/back loop crochet, and inserting rows within rounds. Therefore, I would describe it as intermediate level amigurumi, but by no means let that deter you if you’re ready to give it a try!

Materials
- Yarn: light green, tan, yellow,
- 3.5 mm crochet hook
- fiber-fill stuffing
- felt (white, black, brown, orange) for eyes
- Scissors, yarn needle for assembly, felting needle if desired.
Abbreviations
R(#): Round number
MR: magic ring
Sc: single crochet
dc: double crochet
inc: increase (2 sc in same stitch)
dec: decrease (decrease 2 sc into one). I recommend the Invisible Decrease
tch: turn chain
sl st: slip stitch
ch: chain
f/o: fasten off
Check out my Learn to Crochet page for video tutorials on how to do the types of stitches listed above.
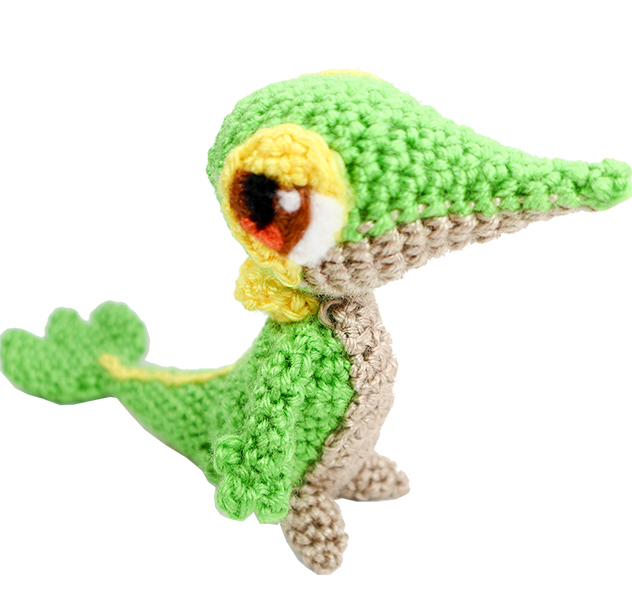
Head
You will be switching colors between tan and light green:
R1. Tan: Sc 2, Green: Sc 2 in MR (4)
R2. Tan: Sc 2, Green: Sc 2 (4)
R3. Tan: Sc 1, inc, Green: Sc 1, inc (6)
R4. Tan: Sc 3, Green: Sc 3 (6)
R5. Tan: Sc 2, inc, Green: Sc 2, inc (8)
R6. Tan: Sc 3, inc, Green: Sc 3, inc (10)
R7. Tan: Sc 4, inc, Green: Sc 4, inc (12)
R8. Tan: Sc 5, inc, Green: Sc 5, inc (14)
R9. Tan: Sc 6, inc, Green: Sc 6, inc (16)
R10. Tan: Sc 7, inc, Green: Sc 7, inc (18)
R11. Tan: ‘Sc 2, inc’ three times, Green ‘Sc 2, inc’ three times (24)
R12. Tan: Sc 7, inc, Sc 4, Green: Sc 3, inc, Sc 7 inc (27)
R13-R14. Tan: Sc 13, Green Sc: 14 (27) two times
R15-R16. (Continue the rest with only green) Sc around (27) two times
R17. ‘Sc 7, inc’ around (24). Stuff well
R18. ‘Sc 2, dec’ around (18)
R19. ‘Sc 1, dec’ around (12)
R20. Dec around (6) Close loop and f/o
Tail & Body
Using light green:
R1. 4 Sc in MR (4)
R2. Sc around (4)
R3. ‘Sc 1, inc’ around (6)
R4. Sc around (6)
R5. ‘Sc 2, inc’ around (8)
R6. Sc around (8)
R7. ‘Sc 3, inc’ around (10)
R8. Sc around (10)
R9. ‘Sc 4, inc’ around (12)
R10. Sc around (12)
R11. ‘Sc 3, inc’ around (15)
Here we will be adding some rows in between the rounds to curve the body upward. You can reference the following video for clarification on adding the rows within the rounds and surface crocheting the stripe:
R12. Sc around (15), tch, sc 7, tch, sc 7 (should end at same place as the row began.)
R13. Sc around (15), tch, sc 7, tch, sc 7
R14. ‘Sc 4, inc’ around (18) then tch, Sc 8, tch, sc 8
R15-R16. Sc around (18) two times
R17. Sc around (18), tch, sc 8, tch sc 8
R18. Sc around (18)
R19. ‘Sc 4, dec’ around (15)
R20. ‘Sc 3, dec’ around (12)
R21. ‘Sc 1, dec’ around (8)
F/o, leave a long tail to attach head. Note: before stuffing- surface crochet a line of yellow down Snivy’s back.
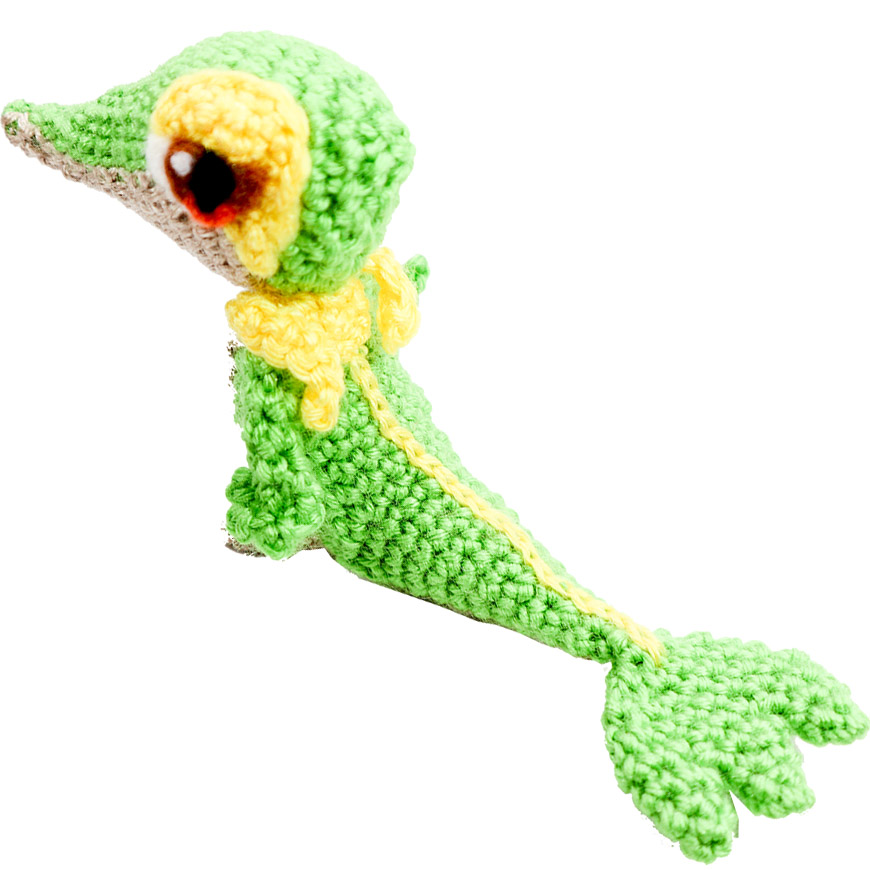
Tail Spikes
Using light green, begin making three pieces:
R1. 4 Sc in MR (4)
R2. Sc around (4)
R3. ‘Sc 1, inc’ around (6)
R4. Sc around (6)
On two pieces, f/o. On the third, continue:
R5. Sc around across all 3 pieces (18)
R6. ‘Sc 7, dec’ around (16)
R7. ‘Sc 6, dec’ around (14)
R8. ‘Sc 5, dec’ around (12)
R9. Dec around. f/o leaving tail to sew to end of tail.
Arms
Make 2: Using light green:
R1. 6 Sc in MR (6)
R2. Working in front loops only:
sl st onto next st. Then ch 2, sl st on the same base.
repeat above twice more
continue in both loops as usual: sc 3 (6)
R3. In unworked back loops : sc 3, then in continue on in both loops as usual sc 1, dec (5)
R4. Dec, sc 3 (4)
R5-R7. Sc around (4) three times.
F/o and close loop. Leave a tail to sew to body
Feet
Make 2. Using tan:
R1. 4 Sc in MR (4)
R2. Sc around (4)
R3. ‘Sc 1, inc’ around (6)
R4-R5. Sc around (6) twice
F/o, do not close loop. Leave a tail for sewing.
Tummy
Using tan:
R1: Ch 3, tch (3)
R2-R4: Sc 3, tch (3) three times
R5: Sc 2, inc, tch (4)
R6-R7: Sc 4, tch (4)
R8: Sc 3, inc, tch (5)
R9-R14; Sc 5, tch (5)
R15: Sc 3, dec, tch (4)
R16: Sc 4, tch (4)
R17: Dec, Sc 2, tch (3)
R18: Sc 3, tch (3)
R19: Dec, Sc, tch (2)
R20-R23: Sc 2, tch (2) four times
R24: Dec, tch (1)
R25-R27: Sc , tch (1) three times
F/o and leave a long tail for sewing onto the body.
Collar
Using yellow:
Row 1: Chain 8, tch (9)
Row 2: Sl st 8
Repeat above to form second half of collar. F/o, leave a tail for sewing to the body.
Eyelid Piece
Make two: Using yellow:
R1. 6 Sc in MR (6)
R2. ‘Sc 1, inc’ around (3)
R3. ‘Sc 1, inc’ three times, leave the rest unworked (9)
On one piece (Snivy’s right eyelid) Chain 2, sl st to same sc on base. f/o leave tail to sew to head.
On other eyepiece (Snivy’s left eyelid) sl st to next on base, ch 2, in 2nd from hook sc, on same sc as base: hdc, sl sti into next on base. f/o leaving tail to sew to head.
Assembly of Crochet Snivy
I pin all pieces in place before sewing – this ensures that Snivy will be able to stand on it’s own (balanced) when completely assembled.
Head: Sew the eye-lid pieces in place- the straight edge of the eyelids should line up flush with the jaw.
Body: Sew the tummy piece onto the front of the body. Attach the feet to the bottom of the body where the curve for the stomach begins. Sew the tail piece onto the back of the body- I used an embroidery needle to extend the yellow stripe onto the tail piece slightly. Attach the arms to either side of the body below the neck opening, and the head to the top, angled slightly upward for a snooty look. Finally drape the collar across the back of the neck, attaching only the middle part of the collar to the neck and leaving the ends free.
Details: the eyes were added by using needle felting technique and leftover yarn ends.
I hope you enjoy your amigurumi Snivy!
 Snivy with his nose held high
Thank you for trying this pattern – I hope you enjoy your Amigurumi Snivy!
A downloadable pdf version of this crochet pattern will be coming soon to my shop!
This pattern by StringsAway is for personal use only. Please do not sell or redistribute the pattern as your own.
