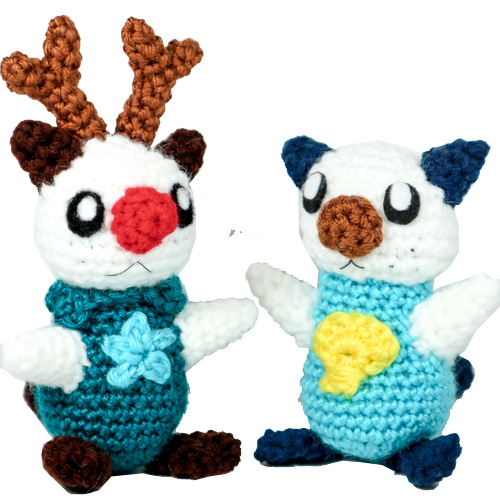
According to the song, all of the Otter Reindeer used to laugh and call Rudolph names. That’s pretty hypocritical, seeing as they also have bright red noses. And anyway, who’s ever heard of an Otter Reindeer!?
Even if they are a little rude, they are still cute! I hope you enjoy this Pokemon Christmas Crochet pattern!
Are you trying to make a ‘normal’ Oshawott? Click here!
Materials
- White, Red, Dark Brown, Light Brown, Light Blue, and Teal yarn
- 3.5 mm crochet hook
- Fiber-fill stuffing
- Black and white felt and felting needle (for eyes)
- Black embroidery thread and needle (mouth, freckles)
- Scissors, yarn needle for assembly
Abbreviations
R(#): Round number
MR: magic ring
Sc: single crochet
dc: double crochet
inc: increase (2 sc in same stitch)
dec: decrease (decrease 2 sc into one)
I recommend using Invisible Decrease
tch: turn chain
sl st: slip stitch -ch: chain – f/o: fasten off
ch: chain – f/o: fasten off
Check out my Learn to Crochet page for video tutorials on how to do the types of stitches listed above.
Antlers
Using light brown:
Long Branch (Make 2)
R1. 4 sc in MR (4)
R2-4. Sc around (4) three times
R5. Inc, Sc 3 (5)
R6-8. Sc around (5) three times
F/o, leave a tail for sewing to head
Short Branch (Make 2)
R1. 4 sc in MR (4)
R2-3. Sc around (4) two times
F/o, leave a tail for sewing onto long branch
Head
Using white:
R1. 6 sc in MR (6)
R2. Inc around (12)
R3. ‘Sc 1, inc’ around (18)
R4. ‘Sc 2, inc’ around (24)
R5. ‘Sc 7, inc’ around (27)
R6-9. Sc around (27) four times
R10. ‘Sc 7, dec’ around (24)
R11. ‘Sc 2, dec’ around (18)
Don’t forget stuffing
R12. ‘Sc 1, dec’ around (12)
R13. Dec around (6) f/o
Body
Using Teal:
R1. MR 6
R2. Inc ar (12)
R3. Sc 1 inc ar (18)
R4. Sc 2 inc ar (24)
R5. Sc 3 inc ar (30)
R6-9. sc ar (30) four times
R10. Sc 3 dec ar (24)
R11-13. Sc ar (24) three times
R14. Sc 2 dec (18)
R15-16. Sc ar (18) two times
(Neck frills) In outer loops:
*[ch2, dc in same base] [ch2, sl st into next ch on base] sl st,
[ch2, dc in same base] [ch2, sl st into next ch on base]sc 4 times, *
repeat above (between **) f/o, leave a tail to sew the head on.
Ears
Make 2, using dark brown:
R1. Sc 4 in MR (4)
R2. Sc 1, inc, sc 1, inc (6)
R3. Sc 1, inc, sc 2, inc, sc 1 (8) f/o.
Arms
Make 2, using white:
R1. 4 sc in MR (4)
R2. Sc around (4)
R3. Inc, sc 1, inc, sc 1 (6)
R4. Sc around (6)
R5. Sc 1 , Inc, sc 2, inc sc 1 (8)
R6. Sc around (8) f/o.
Tail
Using dark brown, being by crocheting an oval:
R1. Ch 5. In 2nd ch from hook sc 3, inc in last ch. Continue working on other side of foundation chain: sc 3 (8)
R2-R3. Sc around (8) 2 times
R4. Dec, Sc 6 (7)
R5-6. Sc around (7) 2 times. f/o (flatten)
Leave a tail to sew to body.
Feet
Make 2, using dark brown, begin by crocheting an oval:
R1. Ch 4. In 2nd ch from hook sc 2, inc in last ch. Continue working on other side of foundation chain: sc 2 (6)
R2-R3. Sc around (6) 2 times
R4. Dec, Sc 4 (5)
R5. Sc around (5) f/o. (flatten)
Leave a tail to sew to body
Nose
Using red:
R1. Sc 6 in MR (6)
R2. ‘Sc 1, inc’ around (9) f/o
Star
This star is from Repeat Crafter Me! She has a great tutorial with pictures for these mini stars.
Using light blue:
Working in a Magic Ring: chain 2, SC in second chain, sl st to join to magic ring loop, chain 2 and repeat around until you have 5 points. Pull the ring tight and f/o, leaving a tail to sew to the body.
Assembly Notes
Antlers: attach the short branches to one side of the long branch, spanning approximately R4-R5 on the long branch.
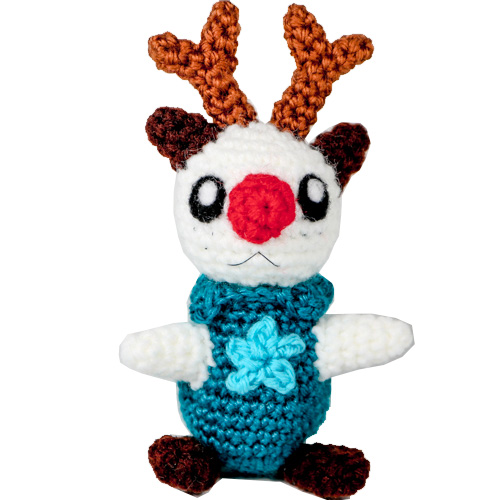
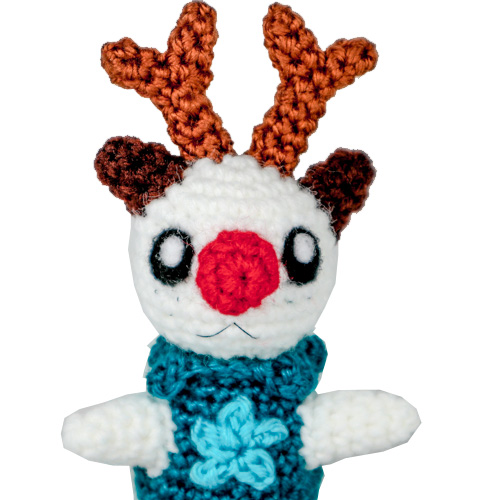
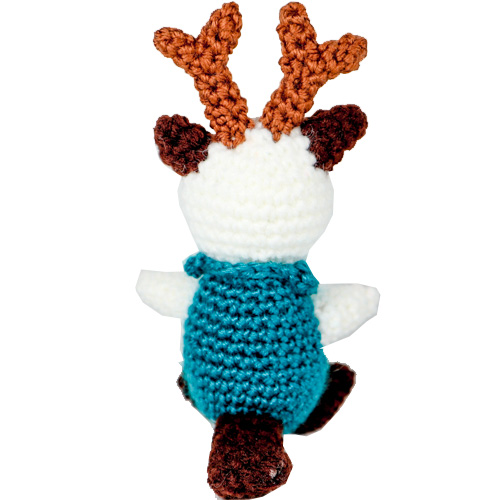
Head: I strongly recommend pinning all pieces to the head before sewing on. The antlers are placed at the top of the head at approximately R2. Then, the ears are placed to either side of the antlers, leaving only about one row of space (or even less/half a row) in between. The nose is attached to the front of the head, just below R5. The eyes were made by Needle Felting Loose Yarn ends, and the mouth and freckles with embroidery.
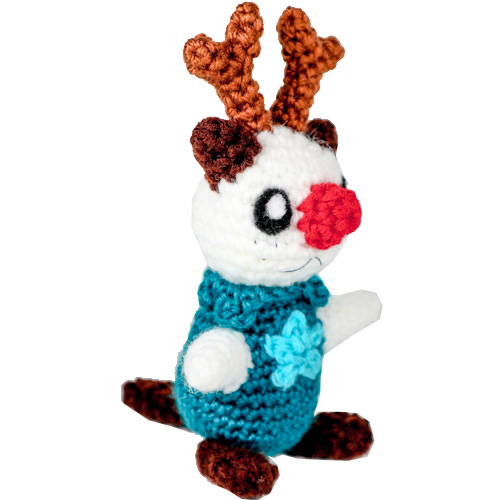
Body: Sew the entire head onto the body, the arms to either side of the head (below the neck frills) and feet and tail at the bottom of the body (the feet and tail are what balance Oshawott to to sit.) Finally sew the star in between the arms- placing all body parts as shown in the pictures.
This pattern by StringsAway is for personal use only. Please do not sell or redistribute the pattern or product.