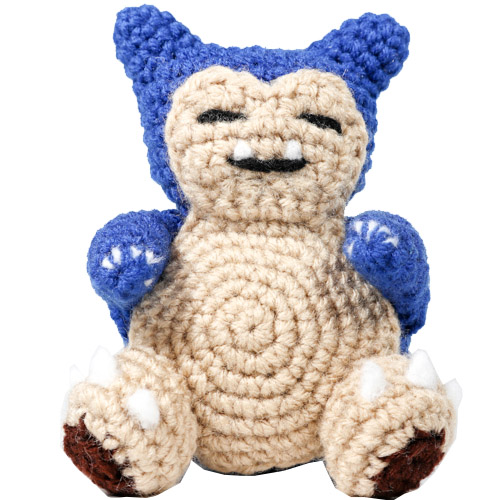
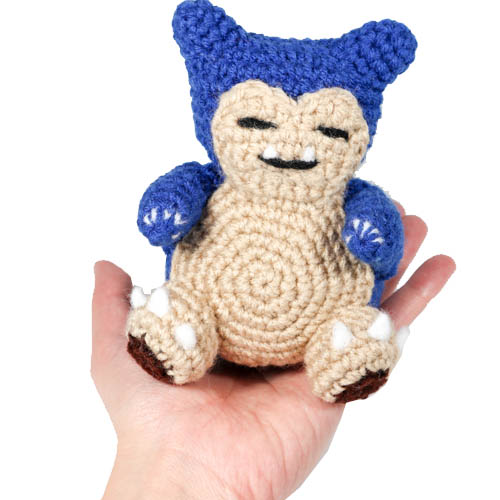
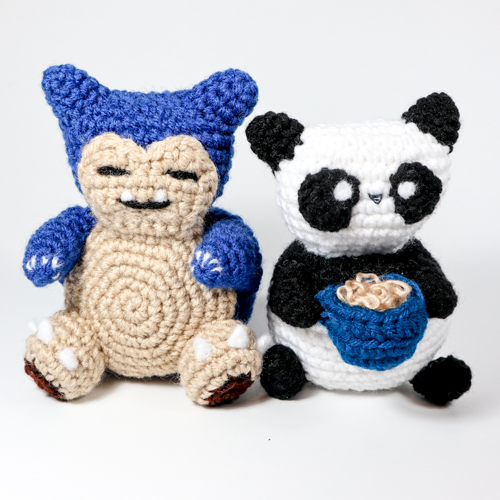
He’s a big Pokemon, and not just in size. Snorlax is an iconic classic favourite from the original Pokemon series. I’ve seen so many amazing huge Snorlax plushies- from huggable pillows to entire bean-bag beds! My version is a lot smaller than these, but still cute and fat! I was inspired by my panda pattern to modify the colors and make this version- possibly the Smallest Snorlax you’ve ever seen. I mean if you really think about it- isn’t Snorlax exactly like a big fat lazy panda?
I hope you enjoy this crochet pattern!
Materials
- Yarn: Dark blue, tan, dark brown
- 3.5 mm crochet hook – fiber-fill stuffing
- Felt or yarn ends: black, white (for the eyes, mouth, teeth, claws) and felting needle if desired
- Scissors, yarn needle for assembly
Abbreviations
R(#): Round number
MR: magic ring
Sc: single crochet
Inc: increase (2 sc in same stitch)
Dc: double crochet
Tr: triple/treble crochet
Dec: decrease (decrease 2 sc into one)
I recommend using Invisible Decrease
Ch: chain
tch: turn chain
Sl st: slip stitch
f/o: fasten off
BLO Back Loops Only
Check out my Learn to Crochet page for video tutorials on how to do the types of stitches listed above.
Head
Using Dark Blue:
Begin by crocheting an oval
R1. Ch 9.
In 2nd ch from hook: Sc 7, In last ch: Inc and Sc (there are 3 sc total in the last chain.)
Continue working on other side of foundation chain: Sc 6, Inc in last chain (18)
R2. ‘Sc 2, inc’ around (24)
R3. ‘Sc 3, inc’ around (30)
R4-8. Sc around (30) five times
R9. ‘Sc 3, dec’ around (24)
R10. ‘Sc 2, dec’ around (18)
F/o and do not close opening.
Ears
Make 2 – Using Dark Blue:
R1. 6 Sc in MR (6)
R2. ‘Sc 2, inc’ around (8)
R3. ‘Sc 3, inc’ around (10)
R4. Sc around (10)
F/o and do not close opening. Leave a yarn tail to sew to head.
Body
Using Dark Blue:
R1. 6 Sc in MR (6)
R2. Inc around (12)
R3. ‘Sc 1, inc’ around (18)
R4. ‘Sc 2, inc’ around (24)
R5. ‘Sc 3, inc’ around (30)
R6. ‘Sc 4, inc’ around (36)
R7. ‘Sc 5, inc’ around (42)
R8-14. Sc around (42) seven times
R15. ‘Sc 5, dec’ around (36)
R16. ‘Sc 4, dec’ around (30)
R17. ‘Sc 3, dec’ around (24)
R18. ‘Sc 2, dec’ around (18)
R19. ‘Sc 1, dec’ around (12)
R20. Dec around (6)
F/o and close loop.
Arms
Make 2- using Dark blue:
R1. 6 in MR (6)
R2. Sc around (6)
R3. ‘Sc 2, inc’ around (8)
R4. Sc around (8)
R5. ‘Sc 3, inc’ around (10)
R6. Sc around (10)
R7. ‘Sc 4, inc’ around (12) tch
Make a shoulder by crocheting a few rows:
Row 1. Sc 7 (7) tch
Row 2. Sc 7 (7) tch
F/o do not close hole. Leave a yarn tail for sewing to the body.
Feet
Make 2- Begin with dark brown:
R1. 6 in MR (6)
R2. Inc, Inc, then switch to tan color, Inc in the 4 remaining stitches of the round around* (12)
*Note: I did my tan inc of this row in BLO because I liked the way it looked (optional.)
R3. ‘Sc 1, inc’ around (18)
R4. Sc around (18)
R5. ‘Sc 4, dec’ around (15)
R6. ‘Sc 3, dec’ around (12)
F/o, do not close hole. Leave a yarn tail for sewing to the body.
Stomach and Face
Using Tan:
R1. 6 Sc in MR (6)
R2. Inc around (12)
R3. ‘Sc 1, inc’ around (18)
R4. ‘Sc 2, inc’ around (24)
R5. ‘Sc 3, inc’ around (30)
For the next row I recommend using markers to mark the location of each increase if you aren’t able to tell by looking at your work where increases are. The locations of these increases will be important later. Mark the ‘second stitch’ of the increase, and mark all increases except the last one (you should have 5 marked places.)
R6. ‘Sc 4, inc’ around (36)
Now work in Rows to make the face.
Row 1. Sc 4 (4) tch
Row 2. Sc 4, inc (6) tch
Row 3. Sc 5, inc (7) tch
Row 4. Sc 6, inc (8) tch
Row 5. Sc 8 (8) tch
Row 6. Sc 8 (8) tch
Eyebrows:
Note [ ] denotes all stitches within brackets are worked in the same foundation stitch:
Row 7. Sc, [Dc, Tr], [Dc, Sc], sl st, [Sc, Dc], [Tr, Dc], Sc, sl st.
Finally, you will crochet a final round around the side of the face and body until you reach the ‘other side’/ beginning of Row 7.
Sc ‘down’ the side of the face working in whatever spaces are available (see this video about crocheting along the sides of work- but use Sc instead of slip stitches.) On my work I reached the bottom of the face in 4 sc.
When you reach the body, Sc in the round but add an Inc at every marked stitch from above. As you work around you should increase 5 times.
When you reach the other side of the body/bottom of the face, Sc up the side of the face until you reach the place where the ‘eyebrow’ begins. On my work I used 4 sc to reach this location.
F/o and leave quite a long tail for sewing to the body and head.
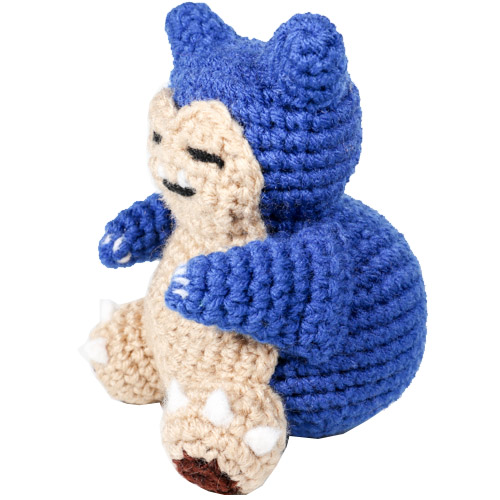
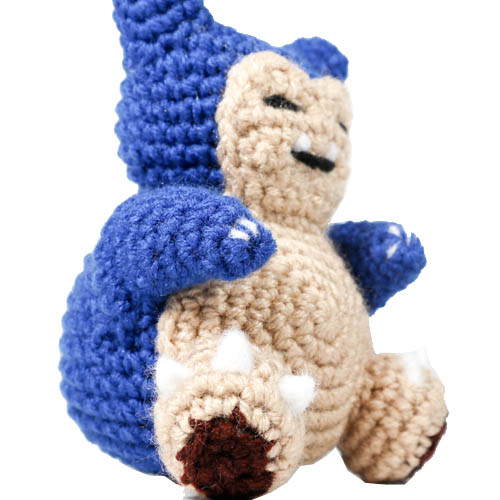
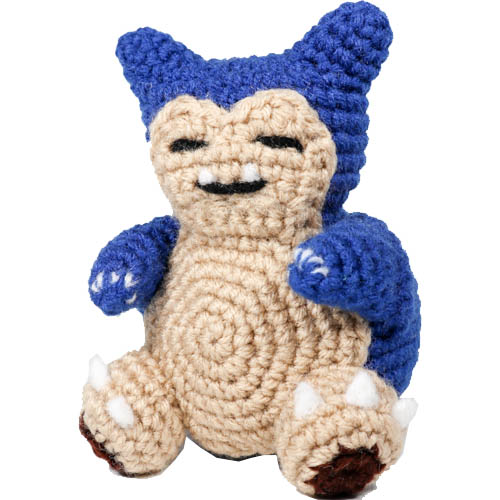
Assembly of Crochet Snorlax
Assemble as shown in pictures- be sure to pin limbs in place before sewing to properly adjust position.
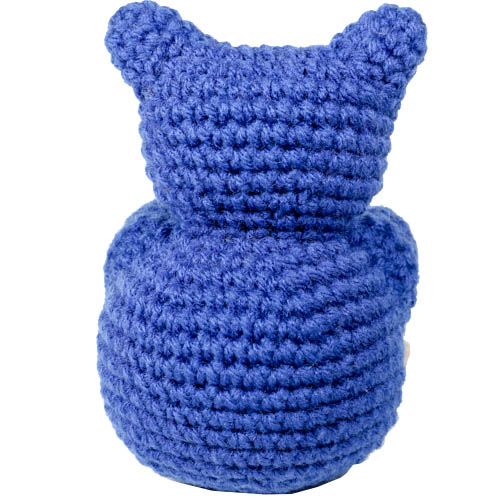
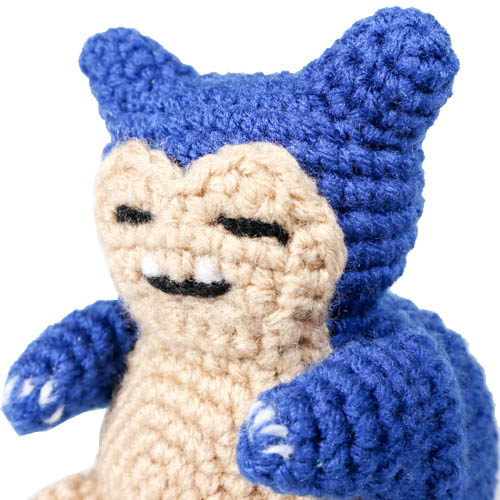
Head: Attach the ears to the head, covering the ‘corners’ of the head. Attach the head to the top of the body.
Body: Sew on the tan stomach and face. There is a part of the stomach/face where the work narrows at the ‘neck’ area. Use this location to line up the stomach/face piece at Snorlax’s neck (where you attached the head to the body.) After attaching this piece, sew on the arms to either side (the underside of the arms is placed at the junction of the stomach to the body) and the feet (the outer edges of the feet line up with the outer edge of the stomach.)
Facial details, claws, and teeth were added by needle felting loose yarn ends .
Thank you for trying this pattern – I hope you enjoy your Amigurumi Tiny Snorlax!
This pattern by StringsAway is for personal use only. Please do not sell or redistribute the pattern as your own.