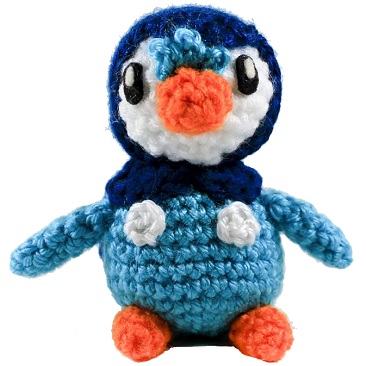
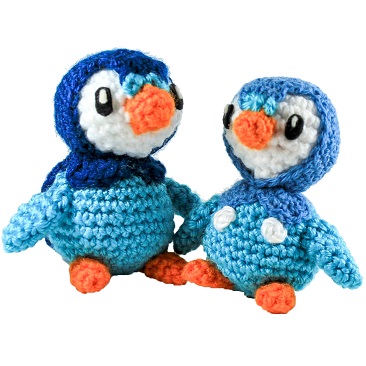
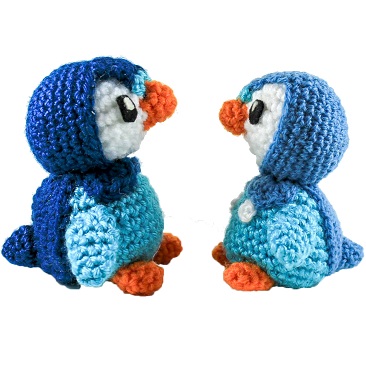
Surprise, it’s Piplup, the penguin pokemon! And with this free pokemon crochet pattern you can make your own to join your lineup. Enjoy crocheting your Piplup!
Prefer a pdf version to download and print? Buy one here!
Want to buy an already made amigurumi Piplup plush toy? Click here !

Materials
- Dark blue, Light blue, white, and orange yarn
- 3.5 mm crochet hook
- fiber-fill stuffing
- Black and white felt and fabric glue
- Scissors, yarn needle for assembly
Abbreviations
R(#): Round number
MR: magic ring
Sc: single crochet
dc: double crochet
inc: increase (2 sc in same stitch)
dec: decrease (decrease 2 sc into one)
I recommend using Invisible Decrease
tch: turn chain
sl st: slip stitch
ch: chain – f/o: fasten off
Check out my Learn to Crochet page for video tutorials on how to do the types of stitches listed above.

Head
Using white:
R1. 6 Sc in MR (6)
R2. Inc around (12)
R3. ‘Sc 1, inc’ around (18)
R4. ‘Sc 2, inc, around (24)
R5-R7 Sc around (24) 3 times
R8. ‘Sc 2, dec’ around (18)
R9. ’Sc 1, dec’ around (12) (Don’t forget to add stuffing!)
R10. Dec around (6) and f/o
Body
Using light blue:
R1. 6 sc in MR (6)
R2. Inc around (12)
R3. ‘Sc 1, inc’ around (18)
R4. ‘Sc 2, inc’ around (24)
R5-R10 Sc around (24) 6 times
R11. ’Sc 2, dec’ around (18)
R12. ‘Sc 1, dec’ around (12) (Don’t forget to add stuffing)
R13. Dec around (6)

Blue Hood for Head
Using dark blue:
R1. 6 Sc in MR (6)
R2. Inc around (12)
R3. ’Sc 1, inc’ around (18)
R4. ‘Sc 2, inc’ around (24)
R5. ‘Sc 3, inc’ around (30)
R6-R9. Sc around (30) 4 times
R10. ‘Sc 3, dec’ around (24)
Continue on to part above beak:
Row1: Sc 6 tch (6)
Row 2: Dec, sc 2, Dec, tch (4)
Row 3: Sc 1, dec, sc 1, tch (3)
Row 4: Sc 3 (3) f/o.
Beak Crest
Using light blue:
Row 1: ch 2, tch (2)
Row 2: Sc 2, tch (2)
Crests: ch 2 and sl to first ch on base
ch 3 and sl st to first ch on base
Ch 3 and sl st to last ch on base. f/o.
In assembly: attach after hood is in place and before beak.
Wings
Using light blue:
R1. 4 sc in MR (4)
R2. Inc, Sc 1, Inc, Sc 1 (6)
R3. Sc around (6)
R4. Inc, Sc 3, inc, Sc 1 (8)
R5. Sc around (8)
R6. Dec, Sc 3, Dec, Sc 1 (6) f/o.
Feet
Using orange:
R1. 4 Sc in MR (4)
R2. Inc, Sc1, Inc, Sc 1 (6)
R3. Sc around (6)
R4. Dec, sc 4 (5) and f/o.
Tail
Using light blue:
R1. 4 Sc in MR (4)
R2. Sc 1, inc, Sc 1, inc (6)
R3. Sc 1, inc, Sc 2, inc, Sc 1 (8)
R4-R5. Sc around (8) two times, f/o.
Back and Collar
Using dark blue:
Crochet an oval-
R1: Ch 4
Sc in 2nd ch from hook and in each of the next 2 chains (3sc)
Inc in last chain (3sc in last chain)
Continue along the other side of the foundation chain: Sc 1, Inc. End of R1 (8 sc total)
R2: inc, sc, inc, inc, inc, sc, inc, inc (14)
R3: inc, sc 2, ‘inc, sc’ 3 times, sc, ‘inc, sc ’ 2 times (20)
R4: inc, sc 5, ‘inc, sc’ 3 times, sc 4, ‘inc, sc’ 2 times (26)
R5: inc, sc 7, ‘inc sc 2’ 3 times, sc3, ‘inc, sc 2’ 2 times (32)
R6: inc, sc 15 tch (17 – a partial round)
Continue on to Collar:
Row 1: sc 4 tch (4)
Row 2: sc 4, tch (4)
Row 3: ch 2, sl st in second chain on base*, sl st in third chain on base, ch 3, sl st in last chain on base**
*- this forms loop 1
**- this forms loop 2
Row 4: ch 2 (turn work), 5 dc into loop 1, ch 2 and sl st into loop 1. sl st into loop 2, ch 2, 5 dc into loop 2, ch 2 and sl st into loop 2. f/o
In assembly: attach to body before attaching head.
Buttons
Using white:
R1. Ch 4, sl st to join with first stitch. F/o
Beak
Using orange:
R1. 6 sc in MR (6)
R2. ‘Inc, sc2’ around (8)
R3. Sc around (8)
Assembly of Crochet Piplup
The most important assembly notes to keep in mind are: the Back/Collar (dark blue) MUST be attached to body BEFORE head is attached! Beak crest (light blue) MUST be attached to head BEFORE beak is attached!
Head: Attach the blue hood onto the head. Then, the beak crest and beak on top of that.
Body: Attach the back and collar to the body. Then attach the head (with hood, beak, etc) on top. To the sides beneath the collar- attach the wings. Attach the feet and tail in such a way that Piplup can stand balanced without falling over. Attach the white buttons to the breast just below the collar.
I hope you enjoy your amigurumi Piplup!
 Piplup enjoys ice-skating on a cold winter day in the great white north (Canada.)
Thank you for trying this pattern – I hope you enjoy your Amigurumi Piplup!
Click here to purchase a downloadable pdf version of this crochet pattern
This pattern by StringsAway is for personal use only. Please do not sell or redistribute the pattern as your own.

4 Responses
Anthony
Hi i appreciate your work and I’ve made one of your turtwigs before and it was perfect! Now I am making a Piplup and I’ve made the head and body but when I got to the blue hood for head it’s way too big and I don’t know what to do again I appreciate it!!
Lisa
Hi Anthony – Uh oh, I’ll have a look at the pattern and do some trouble shooting in the next few days and will let you know if I modify the instructions for the head or hood!
Lisa
Hi Anthony! I’ve had a chance to look at and re-work the pattern- it’s been updated now so the hood should fit the head when using yarns of the same weight. What had happened was I used a really thick white yarn for the head originally and then a really thin blue yarn for the hood when first writing the pattern- it was one of my firsts lol. Thank you so much for bringing this to my attention and let me know if you notice any more problems! Happy crocheting!
Anthony
It turns out the body is the right size for the head