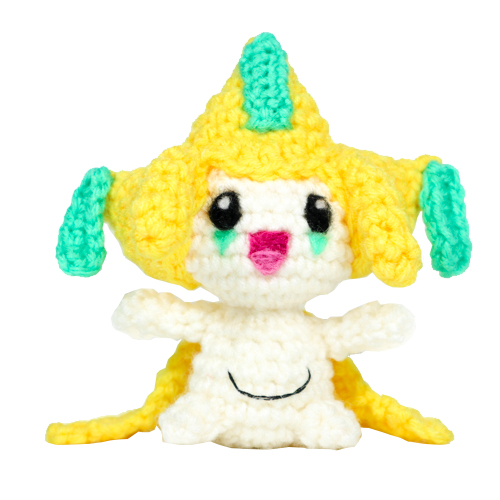
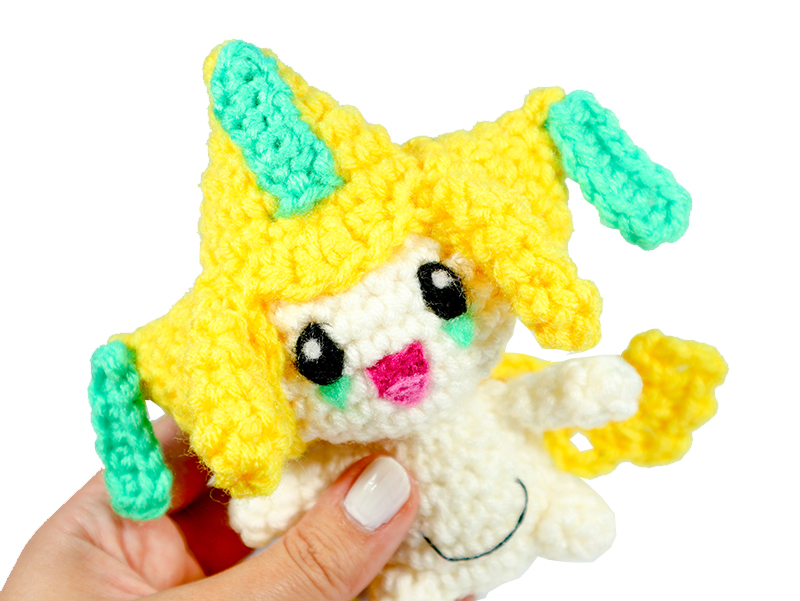
Jirachi is here! This cute mythical Pokemon is said to awaken for one week every one-thousand years, granting wishes written on it’s green tags. I’ve always wanted to crochet one -and now with the Pokemon Go Jirachi event, I thought this would be the perfect time. Jirachi looks so cheerful and festive- it’s headdress reminds me of Philippines parols- which are decorative star lanterns that are put up during the Christmas season.
Whatever reason you have for crocheting Jirachi I hope she brings you feelings of cheer and happiness. When complete, this Jirachi stands approximately 5.5 inches tall by 5.5 inches wide (to end of headdress points.) Enjoy your crochet Jirachi!
Prefer to work by paper? Purchase a pdf print out of this pattern here!
Materials
- Yarn: White, yellow (jumbo acrylic yarn was used, 6/7ply, 10 wpi weight: 4, worsted)
- Yarn: Green (acrylic yarn , 4ply, 12 wpi weight: 3, DK)
- 4.5 mm crochet hook – fiber-fill stuffing
- Felt: black, white, green (for the eyes), pink, dark pink (for mouth) felting needle if desired
- Black thread, embroidery needle
- Scissors, tapestry yarn needle for assembly
Abbreviations
R(#): Round number
MR: magic ring
Sc: single crochet
Inc: increase (2 sc in same stitch)
Hdc: half double crochet
Dc: double crochet
Dec: decrease (decrease 2 sc into one)
I strongly recommend the using invisible decrease
Tch: turn chain (chain one and switch directions)
Ch: chain
Sl st: slip stitch
f/o: fasten off
If you’re not sure how to do any of the above stitches, check out my Learn-to-Crochet Video Series !
Jirachi Amigurumi Pokemon Crochet Pattern by StringsAway
Body and Head
The body and head are made continuously from the bottom up. Begin using white:
R1. 6 sc in MR (6)
R2. Inc around (12)
R3. ‘Sc 1, inc’ around (18)
R4-R7. Sc around (18) four times
R8. ‘Sc 1, dec’ around (12)
R9. Sc around (12)
R10. Dec around (6)
R11. Inc around (12)
R12. ‘ Inc 3, Sc 3 ‘ around (18)
R13. Sc 1, Inc 3, Sc 6, Inc 3, Sc 5 (24)
R14-R17. Sc around (24) four times
R18. Sc 1, Dec 3, Sc 6, Dec 3, Sc 5 (18)
R19. ‘ Dec 3, Sc 3 ‘ around (12)
R20. Dec around (6)
F/o and close loop.
Feet
Using white- make 2:
R1. 4 sc in MR (4)
R2. Inc, Sc 3 (5)
R3. Inc, Sc 4 (6)
F/o, do not close loop, leave a tail to attach to body.
Arms
Using white- make 2:
R1. 6 sc in MR (6)
R2. Sc around (6)
R3. Dec, Sc 4 (5)
R4. Dec, Sc 3 (4)
R5. Sc around (4)
F/o, close loop, leave a tail to attach to body.
Star Headpiece
Using yellow:
R1. 4 sc in MR (4)
R2. ‘Sc 1, inc’ around (6)
R3. ‘Sc 2, inc’ around (8)
R4. ‘Sc 1, inc’ around (12)
R5. ‘Sc 1, inc’ around (18)
R6. Sc around (18)
Repeat R1-R5 above twice more to make two more smaller head pieces. The largest piece is the middle piece of the headdress.
When completing the middle piece and one of the side pieces, F/o and leave a tail to sew ends together. When you are finishing the last side piece, do not f/o after R5, but proceed to join all three pieces together as follows:
R7. *Note: I found it helpful to use stitch markers on each piece to identify which stitches to leave unworked for this round* Join with large piece: Sc 7 across the front, then, join with other small piece: Sc 16 around.
Leave the final two Sc unworked on the small side piece. Continue once again onto the back of the large piece, leaving 2 sc unworked parallel to the unworked sc of the side piece.
Sc 7 across the back of the large piece, leaving the final 2 sc of the large piece unworked as well.
Finally, join with the back of the remaining side-piece: leave 2 sc unworked parallel to those unworked on the large piece: Sc 14, Dec 1.
The round should have (45) total stitches.
R8. Front bangs : Skip over the first Sc. Across the middle: Sl st, Hdc, [Dc, Dc] (two dc in same sc) Hdc, Sl st, skip over the next sc
Continue to side piece: ” Dec, Sc 3 ” three times.
Continue across the back: Dec x 4
Continue to side piece: ” Dec, Sc 3 ” two times, then Dec, Sc 2, Sl st into last stitch.
The round should have (34) total stitches. F/o and leave a very long thread to attach the headpiece to the head.
Back of headpiece
*Optional* If you are OCD like me, you’ll want to make a back side to this headpiece so that the back of Jirachi’s head is not showing. If you feel ok with how the headpiece looks as-is, you can skip this part. Use the following picture (or video above) as a guide:
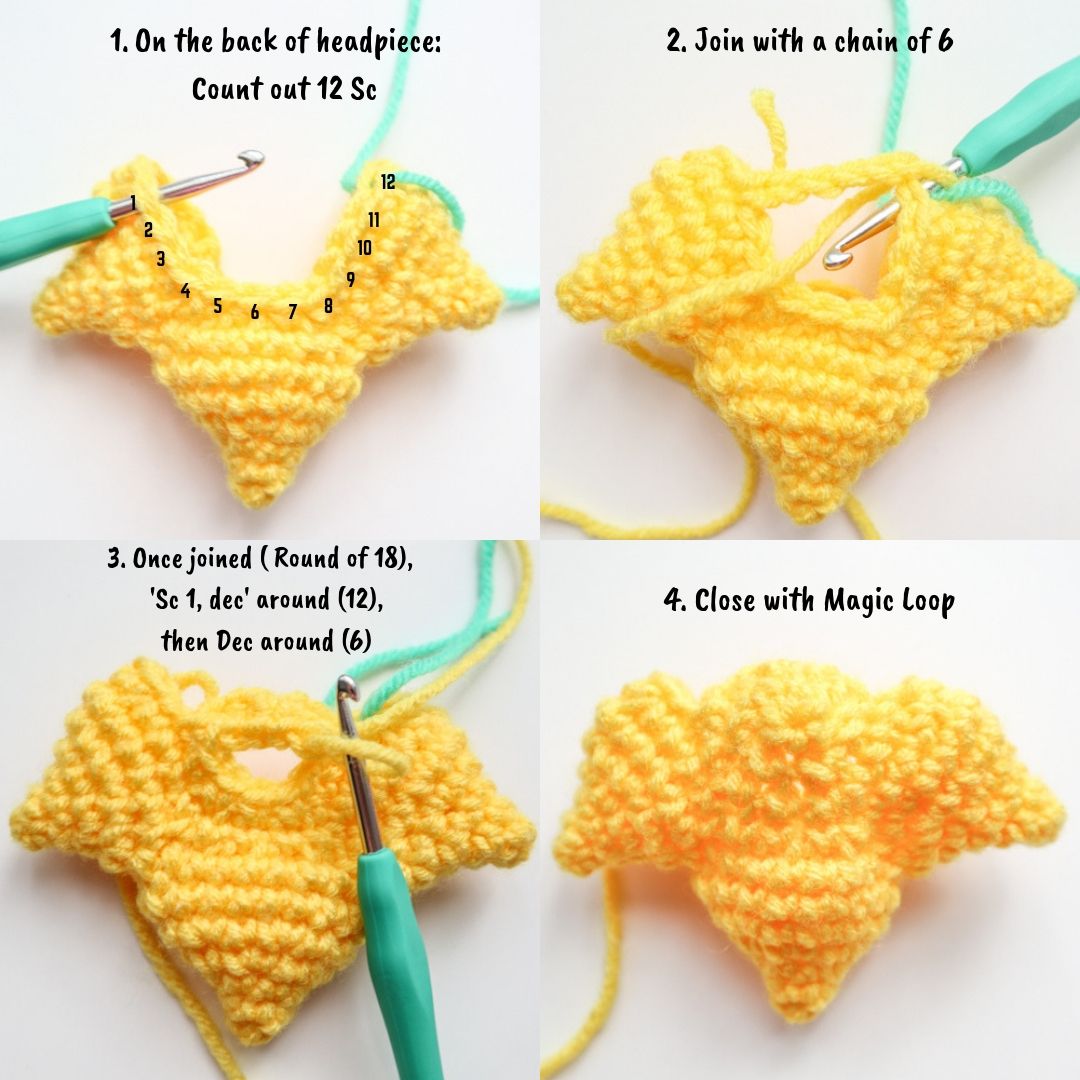
On the back of the headpiece, count out 12 Sc that you will be joining together (with a chain of 6.) On my work, I added my chain of 6 between stitch #26 and #15. After joining with ch6, you should have a circle with (18) stitches. ‘Sc 1, dec’ around (12), then Dec around (6) and close loop with a Magic Circle
Yellow Tassels
Make 2 using yellow:
R1. 5 sc in MR (5)
R2. Sc around (5)
R3. Dec, Sc 3 (4)
R4-R5. Sc around (4) twice.
F/o and close loop with a Magic Circle . Leave a tail to attach to the headdress.

Green Tags
Make 3 using green:
Row 1: Chain 5, tch
Row 2: Sc 5, chain 2.
Continue working onto the other side of the foundation chain:
Sl st x 5, and final Sl st x 2 across the top of the tag.
F/o leaving a long tail to attach the end to the headpiece.
Yellow Ribbon
Note: [ ] – Denotes all in the same foundation sc. Using yellow:
Row 1: Chain 24, Tch
Row 2: Sc 11, Dec, Sc 11 (23)
Row 3: The frills:
In the next 5 stitches:
[Ch 3, Sc]
[Ch 2, Sc],
Sc,
[Ch 3, hdc, hdc] ,
[Ch 3, Sc ],
Then Sl st across the next 7, Dec, sl st across the next 7, then in the next 5 stitches:
[Sc, Ch 3 ]
[Hdc, Hdc , Ch 3]
Sc,
[Sc, ch 2]
[Sc, ch 3]
Sl st onto last stitch of row.
Assembly of Crochet Jirachi
Head Piece: I attached the green tags- one at each point of the headress- and the yellow tassels-to either side of the face opening- before stuffing the headdress and sewing it onto the head. Note that when I attached the green tassel to the middle point of the headpiece I sewed it completely on- I realized later I should have only attached it at one end and left it to ‘dangle’ to be more physiologically accurate (next time!)
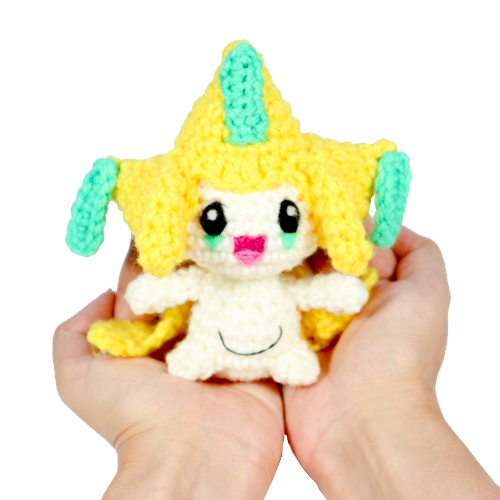
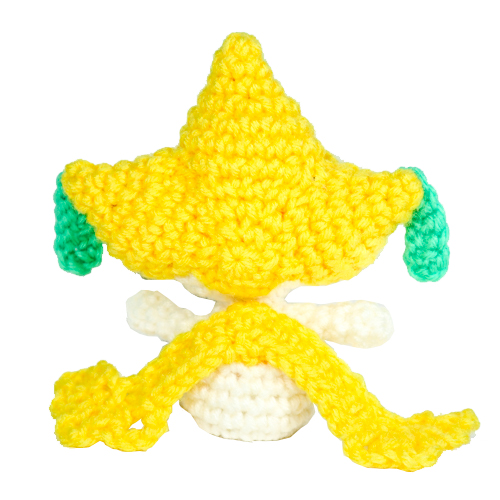
Body: As shown, sew the arms to the side of the body under the head, and the feet to the bottom of the body – do your best to spread the feet so that Jirachi can balance sitting up. Mine is quite a bit top-heavy because of the weight of the head and headpiece. Finally, attach the yellow ribbon to the back of the body by the ‘V’ created by the decreases in the ribbon rows.
Details: I used needle felting and leftover yarn ends to create the details for Jirachi’s face, and embroidery for the line across Jirachi’s stomach which apparently is an eyelid concealing a third eye (what the heck, Pokemon?)
And, you’re done! I hope you enjoy celebrating with your amigurumi Jirachi !
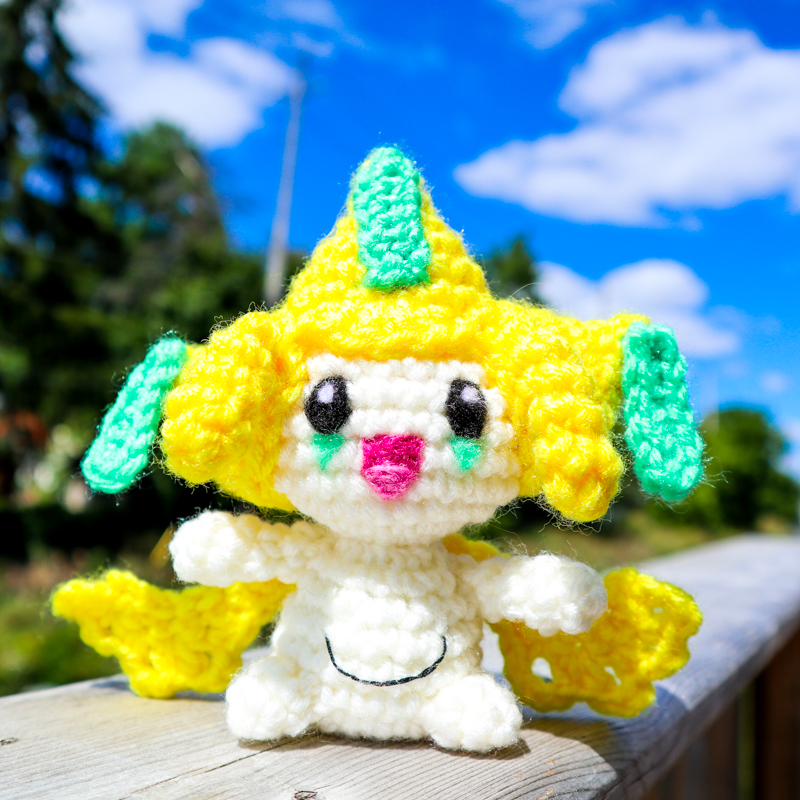 Jirachi enjoys the summer sunshine- which in Canada feels like it comes for 1 week every 1000 years.
Thank you for trying this pattern – I hope you enjoy your Amigurumi Jirachi!
Click here to purchase a downloadable pdf version of this crochet pattern!
This pattern by StringsAway is for personal use only. Please do not sell or redistribute the pattern as your own.
2 Responses
Leslie Leon
Hello StringsAway, I love using your patterns for Pokemon because they are easy to understand and very creative! I’ve been working on your pattern for Jirachi and I’ve been stuck on the Star Headpiece for 2 weeks now. I’ve been having difficulty understanding how to connect the three separate cones together with your instructions. I always get lost at R7. I’ve been trying and trying but haven’t gotten the hang of it. I also checked your Instagram and YouTube to see if you may have posted more detailed instructions on this portion of the pattern.
When you have time and if you want, can you please contact me so you can explain this part of your pattern for me? I really look forward to see the end result! Your projects are truly amazing and I mean this pattern too!
Lisa
Thank you so much for your feedback! After reading your comment I’ve uploaded a video on how to proceed with R7 and added it to this pattern page. Hopefully that can help (visually) explain it a bit more clearly! Take care!