I’ll let you in on a personal secret- I am afraid of monkeys. I think of them as little immoral humans- they’re too smart for their own good. But I have a long term goal of creating crochet patterns for all of the starters, and with Chimchar’s feature Community Day on the horizon, I decided it was time to try and tackle this one.
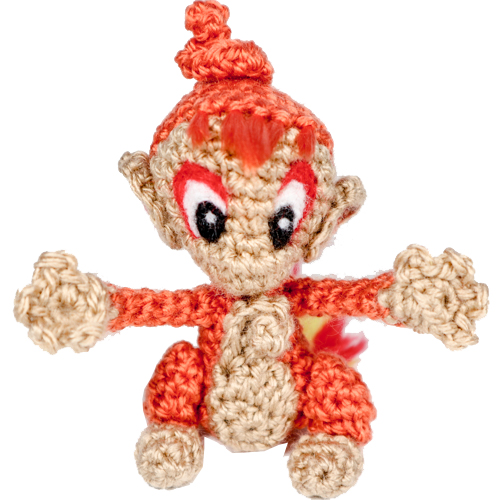
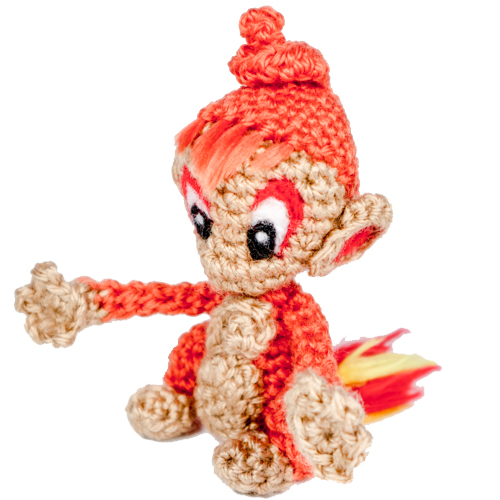
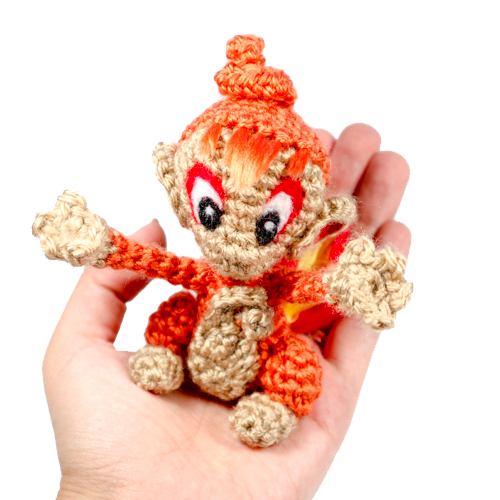
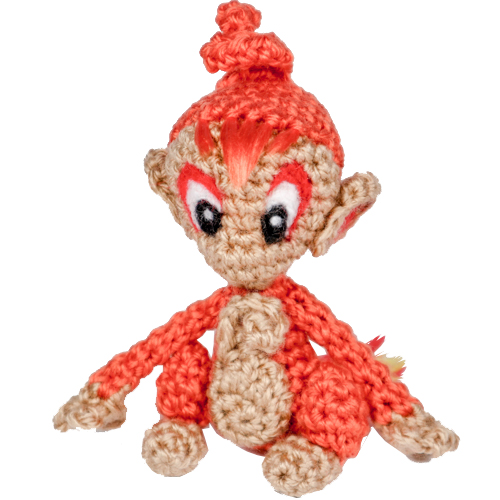
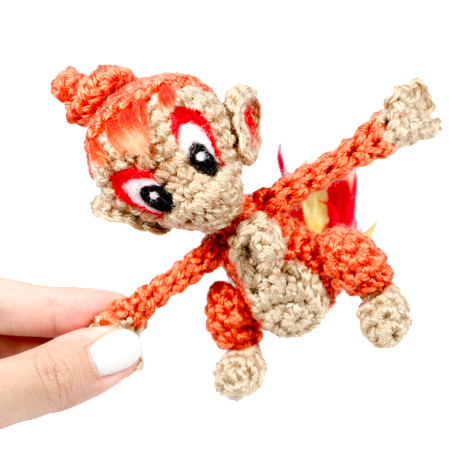
I’m pleased to say I feel very proud of how this little Chimchar turned out! I think it’s pretty cute- the arm wiring makes it seem like he wants to be picked up and hugged. The completed Chimchar is approximately 4 inches tall and 3.5 inches wide. Grab your hair-brushes and straighteners too if you plan on doing the hair details!
I hope you enjoy this little Chimchar pattern. Happy crocheting!
Materials
- Yarn: Burnt Orange, Tan (silky, 4ply, 12-14 wpi, approximate weight: 2 fine/light weight)
- Yarn Pieces: Red, yellow (for flame)
- 3.5 mm crochet hook
- Fiber-fill stuffing
- Felt: black, white, red (for the eyes)
- Scissors, tapestry yarn needle for assembly
- Fine comb or yarn brush, hair straightener (if desired) (for flame, bangs)
Abbreviations
R(#): Round number
MR: magic ring
Sc: single crochet
Inc: increase (2 sc in same stitch)
Dec: decrease (decrease 2 sc into one)
I strongly recommend the using invisible decrease
Hdc: half double crochet
Dc: double crochet
Tr: Treble/Triple crochet
Ch: chain
Sl st: slip stitch
f/o: fasten off
If you’re not sure how to do any of the above stitches, check out my Learn-to-Crochet Video Series !
Chimchar Amigurumi Pokemon Crochet Pattern by StringsAway
Head and Face
Using tan:
R1. 6 sc in MR (6)
R2. Inc around (12)
R3. ‘Sc 1, inc’ around (18)
R4. ‘Sc 2, inc’ around (24)
R5-R8. Sc around (24) four times
R9. ‘Sc 2, dec’ around (18)
R10. Sc 7, Inc 3, Sc 8 (21)
R11. ‘ Sc 1, Dec’ twice, Sc 3, Inc, Inc, Sc 2, ‘Dec 1, Sc ‘ twice, Dec (18)
R12. ‘Sc 1, Dec’ around (12)
As you stuff, ‘pinch’ the nose (increases in R10) out to shape it more distinctly.
R13. Dec around (6)
F/o and close loop, leave a tail for sewing.
Body
Using burnt orange:
R1. 6 sc in MR (6)
R2. ‘Sc 2, Inc’ around (8)
R3. ‘Sc 3, inc’ around (10)
R4. ‘Sc 4, inc’ around (12)
R5-R7. Sc around (12) three times
R8. ‘Sc 1, inc’ around (18)
R9. Sc around (18)
R10. ‘Sc 1, Dec’ around (12)
R11. Dec around (6) f/o and close loop.
Legs
Using burnt orange- make 2:
R1. 6 sc in MR (6)
R2. ‘Sc 2, inc’ around (8)
R3. ‘Sc 3, inc’ around (10)
R4. Sc around (10)
R5. Dec around (5)
F/o, do not close loop, leave a tail to attach to feet.
Hands & Arms
Make 2, begin using tan:
R1. 6 sc in MR. (6)
Sl st to join in the front loop only of the next stitch (this is not counted in the round.)
R2. Working in front loops only: ch 2, sl st into same sc on base.
Sl st into the next front loop on round. Ch 2, sl st into same sc on base.
Repeat twice more to make 4 fingers, then
Sc in final 2 on round (‘normal’ Sc in both loops.)
R3. Sc in the unworked backloops of first 4 stitches in round, then Sc2 in final 2 (both loops/as normal) on round (6)
Switch to burnt orange:
R4. Sc around (6)
R5. Dec, Sc 4 (5)
R6. Dec, Sc 3 (4)
R7-R10. Sc around (4) four times
F/o, do not close loop, leave thread for sewing to body.
Belly
Using tan:
R1. 6 sc in MR (6)
R2. Inc around (12)
R3. Hdc,
In next stitch: 2 Dc (“Dc Inc”),
Hdc, ch1 and sl st into next stitch on base,
Sc in the rest of the 9 stitches in the round (14)
R4. Sl st in first 3 stiches of the round, then:
Chain 6. Working back (starting in 2nd ch from hook): inc, sc, inc, sc inc
Join to base with a sl st.
F/o, leave a very long tail to sew belly to body.
Ears
Make 2, using tan. Crochet an oval:
R1. Begin by crocheting an oval:
Ch 4
Sc in 2nd ch from hook and in each of the next 2 chains (3sc)
Inc in last chain (3sc in last chain)
Continue along the other side of the foundation chain: Sc 1, Inc.
End of R1 (8 sc total)
R2: inc, sc, inc, inc, inc, sc, inc, inc (14)
F/o, leave a tail for sewing to head.
Feet
Using tan:
R1. 6 sc in MR (6)
R2. ‘Sc 2, Inc’ around (8)
R3. Sc around (8)
R4. Dec around (4)
F/o and lightly stuff.
Scalp and Bangs
Using burnt orange:
R1. 6 sc in MR (6)
R2. Inc around (12)
R3. ‘Sc 1, inc’ around (18)
R4. ‘Sc 2, inc’ around (24)
R5. ‘Sc 7, inc’ around (27)
R6. Sc around (27)
R7. ‘Sc 8, inc’ around (30)
R8. Sc around (30)
F/o leaving a tail for sewing onto the head.
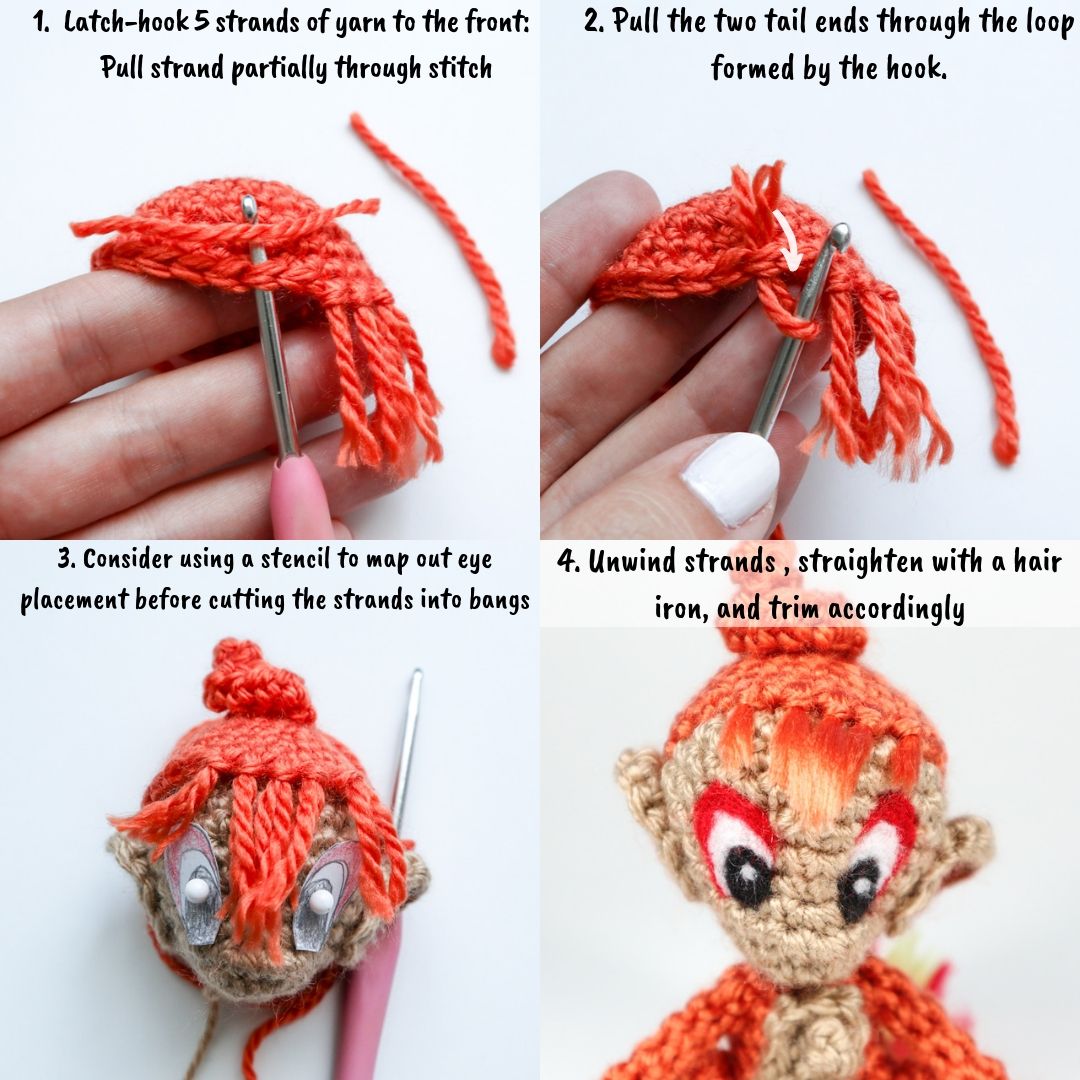
Bangs: Cut 5 strands of burnt orange yarn approximately 2 inches long. Latch hook these onto the front of the head (exactly opposite where you finished off the round.) Comb out the yarn, straighten, and trim to resemble Chimchar’s bangs.
Curly Hair Tuft
Using Burnt orange:
Row 1: Chain 15
Row 2: Working back (beginning in 2nd ch from hook): Sl st, Sc 4, inc, Hdc3, In next stitch (Hdc Hdc or “Hdc Inc”), Dc 3, Tr .
F/o leaving a tail to sew to top of head.
Tail Flame
The tail flame was made using the same method as described above to make the bangs.
Cut several strands of red and yellow yarn approximately 2 inches long. I made a small base (MR5, Sc around 5) and latch hooked the pieces to this base. As with the bangs, brush, straighten, and trim to appropriate length. This base will be attached to Chimchar’s back.
Assembly of Crochet Chimchar
Legs: Sew the feet to the legs, using the foot to cover the hole at the end of each leg.
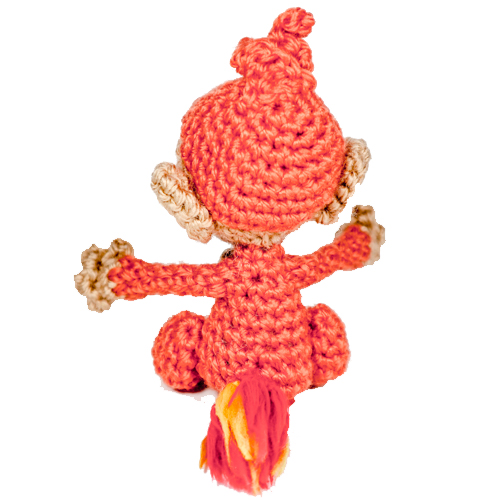
Body: The thicker part of the body is the bottom. Sew the tummy to the body, I sewed the oval on, but the top ‘curli-cue’ of the tummy is left free. Attach the legs to either side of the bottom and the tail flame to the back – these 3 pieces are what should be used to make Chimchar sit balanced.
Head: Sew the scalp to the head and then the ears to either side at the junction of the scalp and face. Sew the curly hair tuft to the top/back of the scalp (mine was attached just above R1 of the scalp.)
Facial details: needle felting was used -I used a stencil /paper drawing of the eyes to map out where to do the felting. The eyes were placed approximately 1 stitch away from the center of the face and one stitch above the row with the nose. The eyes span approximately 5 rows in height (including the red part.)
Arms: I added a bit of wiring to make the arms moveable. Cut one piece of garden wire ~ 5 inches long, roll in the sharp ends with pliers. Insert one end into one arm, and the other end through the body and into the other arm. Note- if you wire this way, the arms will both move in the same direction – ie both up or both down- rather than independently.
Chimchar has a surprising amount of parts and steps, but I hope you found it all worth it in the end. Enjoy your little Chimchar monkey!
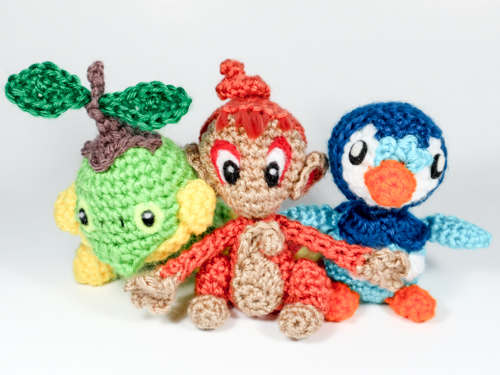 The Sinnoh Starters are Complete! Make your own set – check out the Turtwig and Piplup Patterns!
Coming soon to my shop: a downloadable pdf version of this crochet pattern
This pattern by StringsAway is for personal use only. Please do not sell or redistribute the pattern as your own.