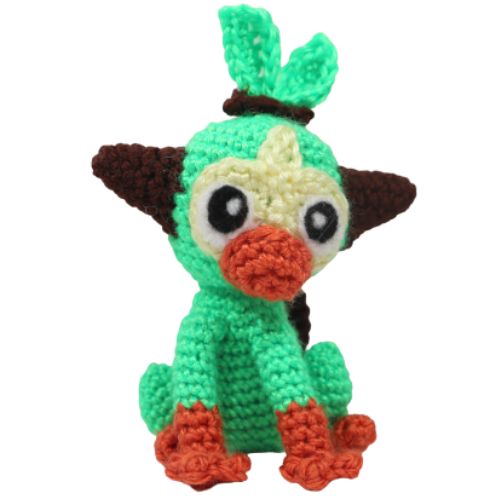
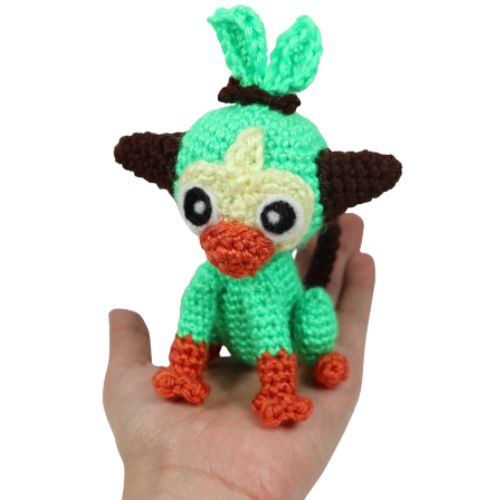
Grookey is parrot-monkey grass type starter from Pokemon Sword and Shield! Make your own little Grookey Amigurumi now!
Materials
- Yarn: Light Green, Brown, Orange, Yellow
- 3.5 mm crochet hook – fiber-fill stuffing
- Felt: yellow, black, and white (for the eyes) and felting needle if desired
- Scissors, yarn needle for assembly
Abbreviations
Need Help? Check out my Learn to Crochet page for video tutorials on how to do the stitches below.
R(#): Round number
MR: magic ring
Sc: single crochet
Hdc: half double crochet
Dc: double crochet
Ch: chain
Sl st: slip stitch
Inc: increase (2 sc in same stitch)
Dec: decrease (decrease 2 sc into one) *Try the Invisible Decrease*
f/o: Fasten Off
Note: Instructions written in quotations are to be repeated as many times as indicated. For example: “Sc 1, Inc” x 2 is equivalent to : Sc 1, Inc, Sc 1, Inc.
“Sc 1, Inc” around means keep repeating Sc 1, Inc, Sc 1, Inc, Sc 1, Inc, etc. until the end of the round is reached.
Don’t forget to add stuffing as you go!
Head
Using Light Green:
R1. 6 Sc in MR (6)
R2. Inc around (12)
R3. “Sc 1, Inc” around (18)
R4. “Sc 2, Inc” around (24)
R5. “Sc 3, Inc” around (30)
R6. Sc around (30)
R7. “Sc 4, Inc” around (36)
R8-R11. Sc around (36) for 4 rounds
R12. “Sc 4, Dec” around (30)
R13. Sc around (30)
R14. “Sc 3, Dec” around (24)
R15. “Sc 2, Dec” around (18)
R16. “Sc 1, Dec” around (12)
R17. Dec around (6)
F/o, close the opening.
Body
Using Light Green:
R1. 6 Sc in MR (6)
R2. Inc around (12)
R3. “Sc 1, Inc” around (18)
R4. “Sc 5, Inc” around (21)
R5-R14. Sc around (21) for 10 rounds
R15. “Sc 5, Dec” around (18)
R16. “Sc 1, Dec” around (12)
R17. Dec around (6)
F/o, close the opening.
Thighs
Make 2 – Using Light Green:
R1. 6 Sc in MR (6)
R2. “Sc 2, Inc” around (8)
R3. “Sc 3, Inc” around (10)
R4-R6. Sc around (10) for 3 rounds
R7. Dec around (5)
F/o, close the opening.
Beak
Using Orange:
R1. 6 Sc in MR (6)
R2. Inc around (12)
R3. Sc around (12)
F/o, do not close opening. Leave a yarn tail to sew onto head.
Ears
Make 2 – Using Brown:
R1. 4 Sc in MR (4)
R2. “Sc 1, Inc” twice around (6)
R3. “Sc 2, Inc” twice around (8)
R4. Sc around (8)
R5. “Sc 3, Inc” twice around (10)
R6. “Sc 4, Inc” twice around (12)
F/o, do not close opening. Leave a yarn tail to sew onto head.
Feet
Using Orange – Make 2:
R1. 4 Sc in MR (4)
R2. “Sc 1, Inc” twice around (6)
R3. Sc around 6)
R4. “Sc 1, Dec” around (4)
F/o and close opening. Leave a yarn tail to sew to thigh.
Arms
Begin using Orange:
R1. 5 Sc in MR (5)
R2. Work in front loops only (FLO) of the first 3 stitches:
In the first sc (FLO) [Sl st, hdc] ,
In the second sc (FLO): [sl st, hdc, sl st],
In the third sc (FLO): [sl st, hdc, sl st]
Now work in both loops as usual for the final 2 stitches: 2 sc (5)
R3. Sc around (5) – for the first 3 stitches, work in the unused back loops of the previous round.
R4. Sc around (5)
R5. Inc, Sc 4 (6)
R6. Sc around (6)
Switch to green color:
R7-R11. Sc around (6) for 5 rounds
R12. “Inc, Sc 2” twice around (8)
R13. Sc around (8)
F/o, do not close opening. Leave a yarn tail to sew arms to body.
Tail
Using Brown:
R1. 4 Sc in MR (4)
R2. “Sc 1, Inc” twice around (6)
R3-R4. Sc around (6) for 2 rounds
R5. Sc 4, Dec (5)
R6-R18. Sc around (5) for 13 rounds
F/o, do not close opening. Leave a tail to sew to body. Option- insert a small bent wire inside the tail to allow for bending/positioning of the tail.
Leaf Hair
Make 2- Using Light Green:
Ch 6. In 2nd Ch from hook:
Sc, Sc, Hdc, Hdc,
In the last sc work all of the following:
[Hdc, ch 2 , Hdc, Hdc]
turn work and continue working onto the other side of the foundation chain:
Hdc, Hdc, Sc, Sl st, Sl st.
F/o. Leave a tail to sew onto head.
Stick
Using Brown:
Ch 6. In 2nd Ch from hook:
Sl st x 5 – you can hold up the base of the leaves against the foundation chain and work the sl stitches through the leaves to attach them to the stick. Alternatively, sew the stick onto the leaves after the fact.
F/o, hide end.
Eye Sockets
Make 2 – Using Yellow:
R1. 6 Sc in MR
R2. Inc around (12)
F/o the first piece. Repeat above a second time, but instead of F/o:
Join with the first piece as shown (instructions continue below):
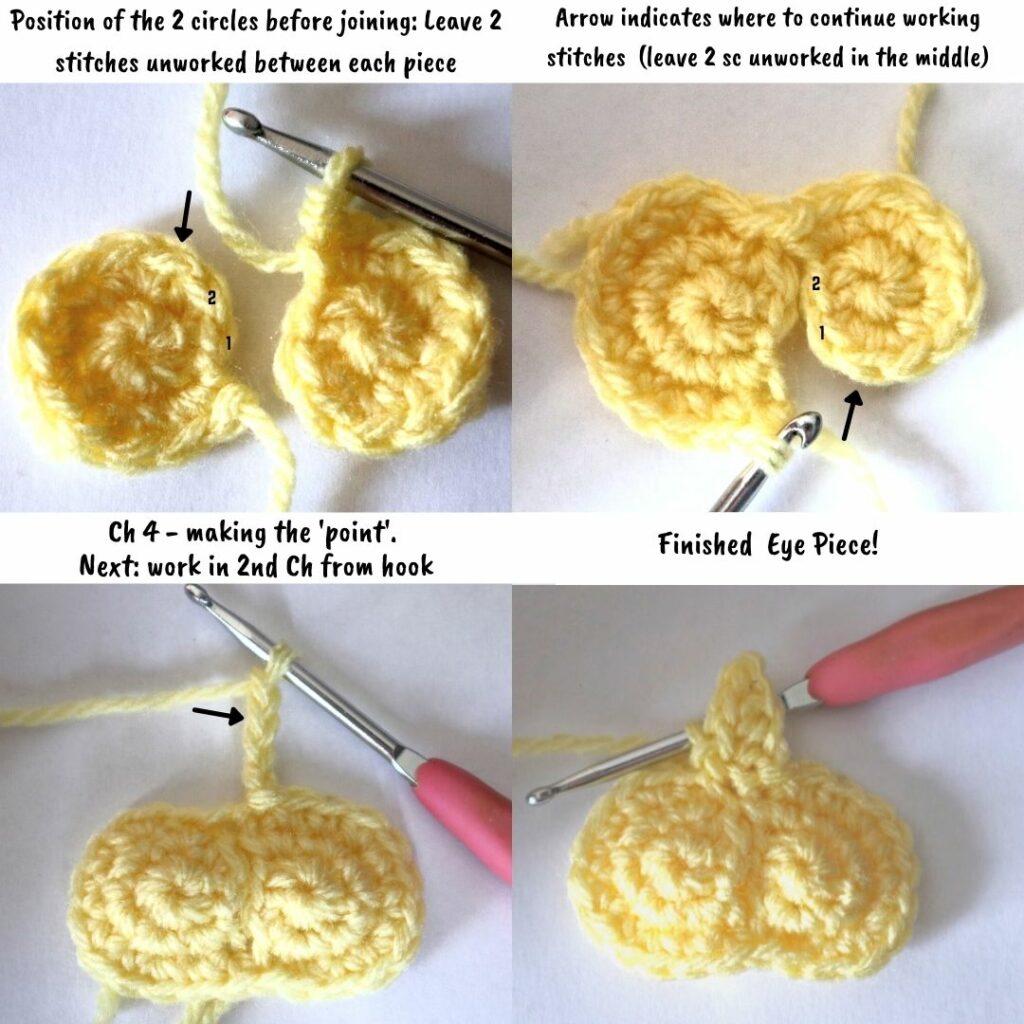
Hold the two circles together with open ends facing each other. Join the current work with the first piece that was made such that 2 stitches are left unworked in between. Working along the perimeter of the circles:
Sl st, Sc 1, Inc, Sc 4, Inc, Sc 2, sl st, [continue onto perimeter of the next piece]: sl st, sc 2, Inc, sc 2, Inc, sc 2, sl st.
Then (this makes the ‘point’ between the eyesockets):
Chain 4, in 2nd from hook: Sl st, Sc, Hdc , then sl st to next stitch on base
F/o leave a tail to sew onto head.
Assembly of Crochet Grookey
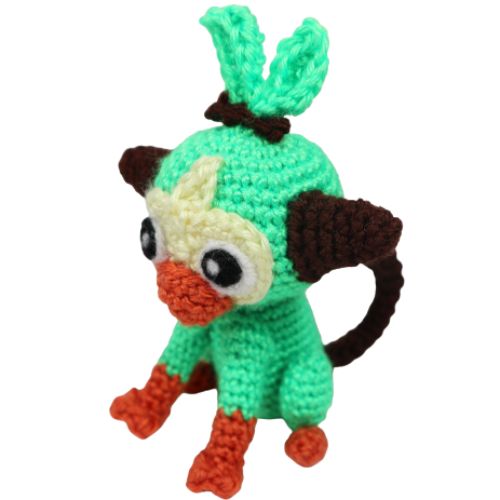
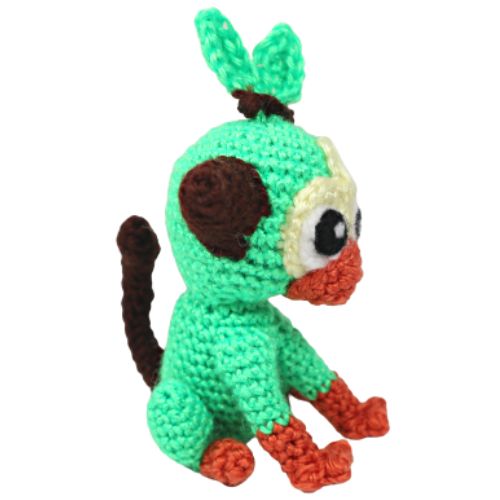
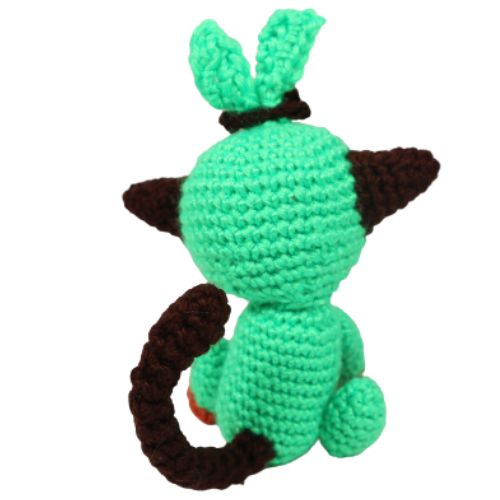
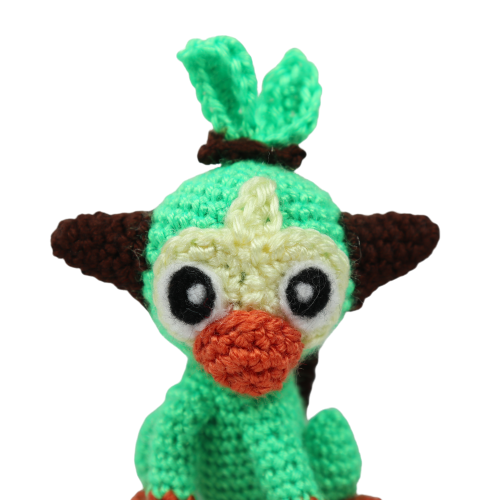
Assemble as shown in pictures- be sure to pin limbs in place before sewing in place.
Leaves: If not already done, sew the stick across the bottom of the 2 leaves.
Head: Sew the bottom of the leaves to the top of the head. On either side, attach the ears. On the front – sew on the yellow “eye sockets” piece. Finally, slightly overlapping the bottom of the eyesocket piece and the head – sew on the orange beak.
Body: Sew the head on top of the body. Sew the two arms to the front of the body- cover the arm openings by pressing them onto the body. Sew the feet over the thighs, then sew each thigh to one side of the body. Sew the tail onto the back of the body- hiding the end of the tail wire inside the body- if one was used.
Facial details (eyes) were added by needle felting loose yarn ends . Alternatively, felt pieces can be cut out and glued on. These were worked directly onto the ‘eye’ pieces on the head.
Thank you for trying this pattern – I hope you enjoy your Amigurumi Grookey!
A downloadable version of this pattern is coming soon to my shop!
This pattern by StringsAway is for personal use only. Please do not sell or redistribute the pattern as your own.
