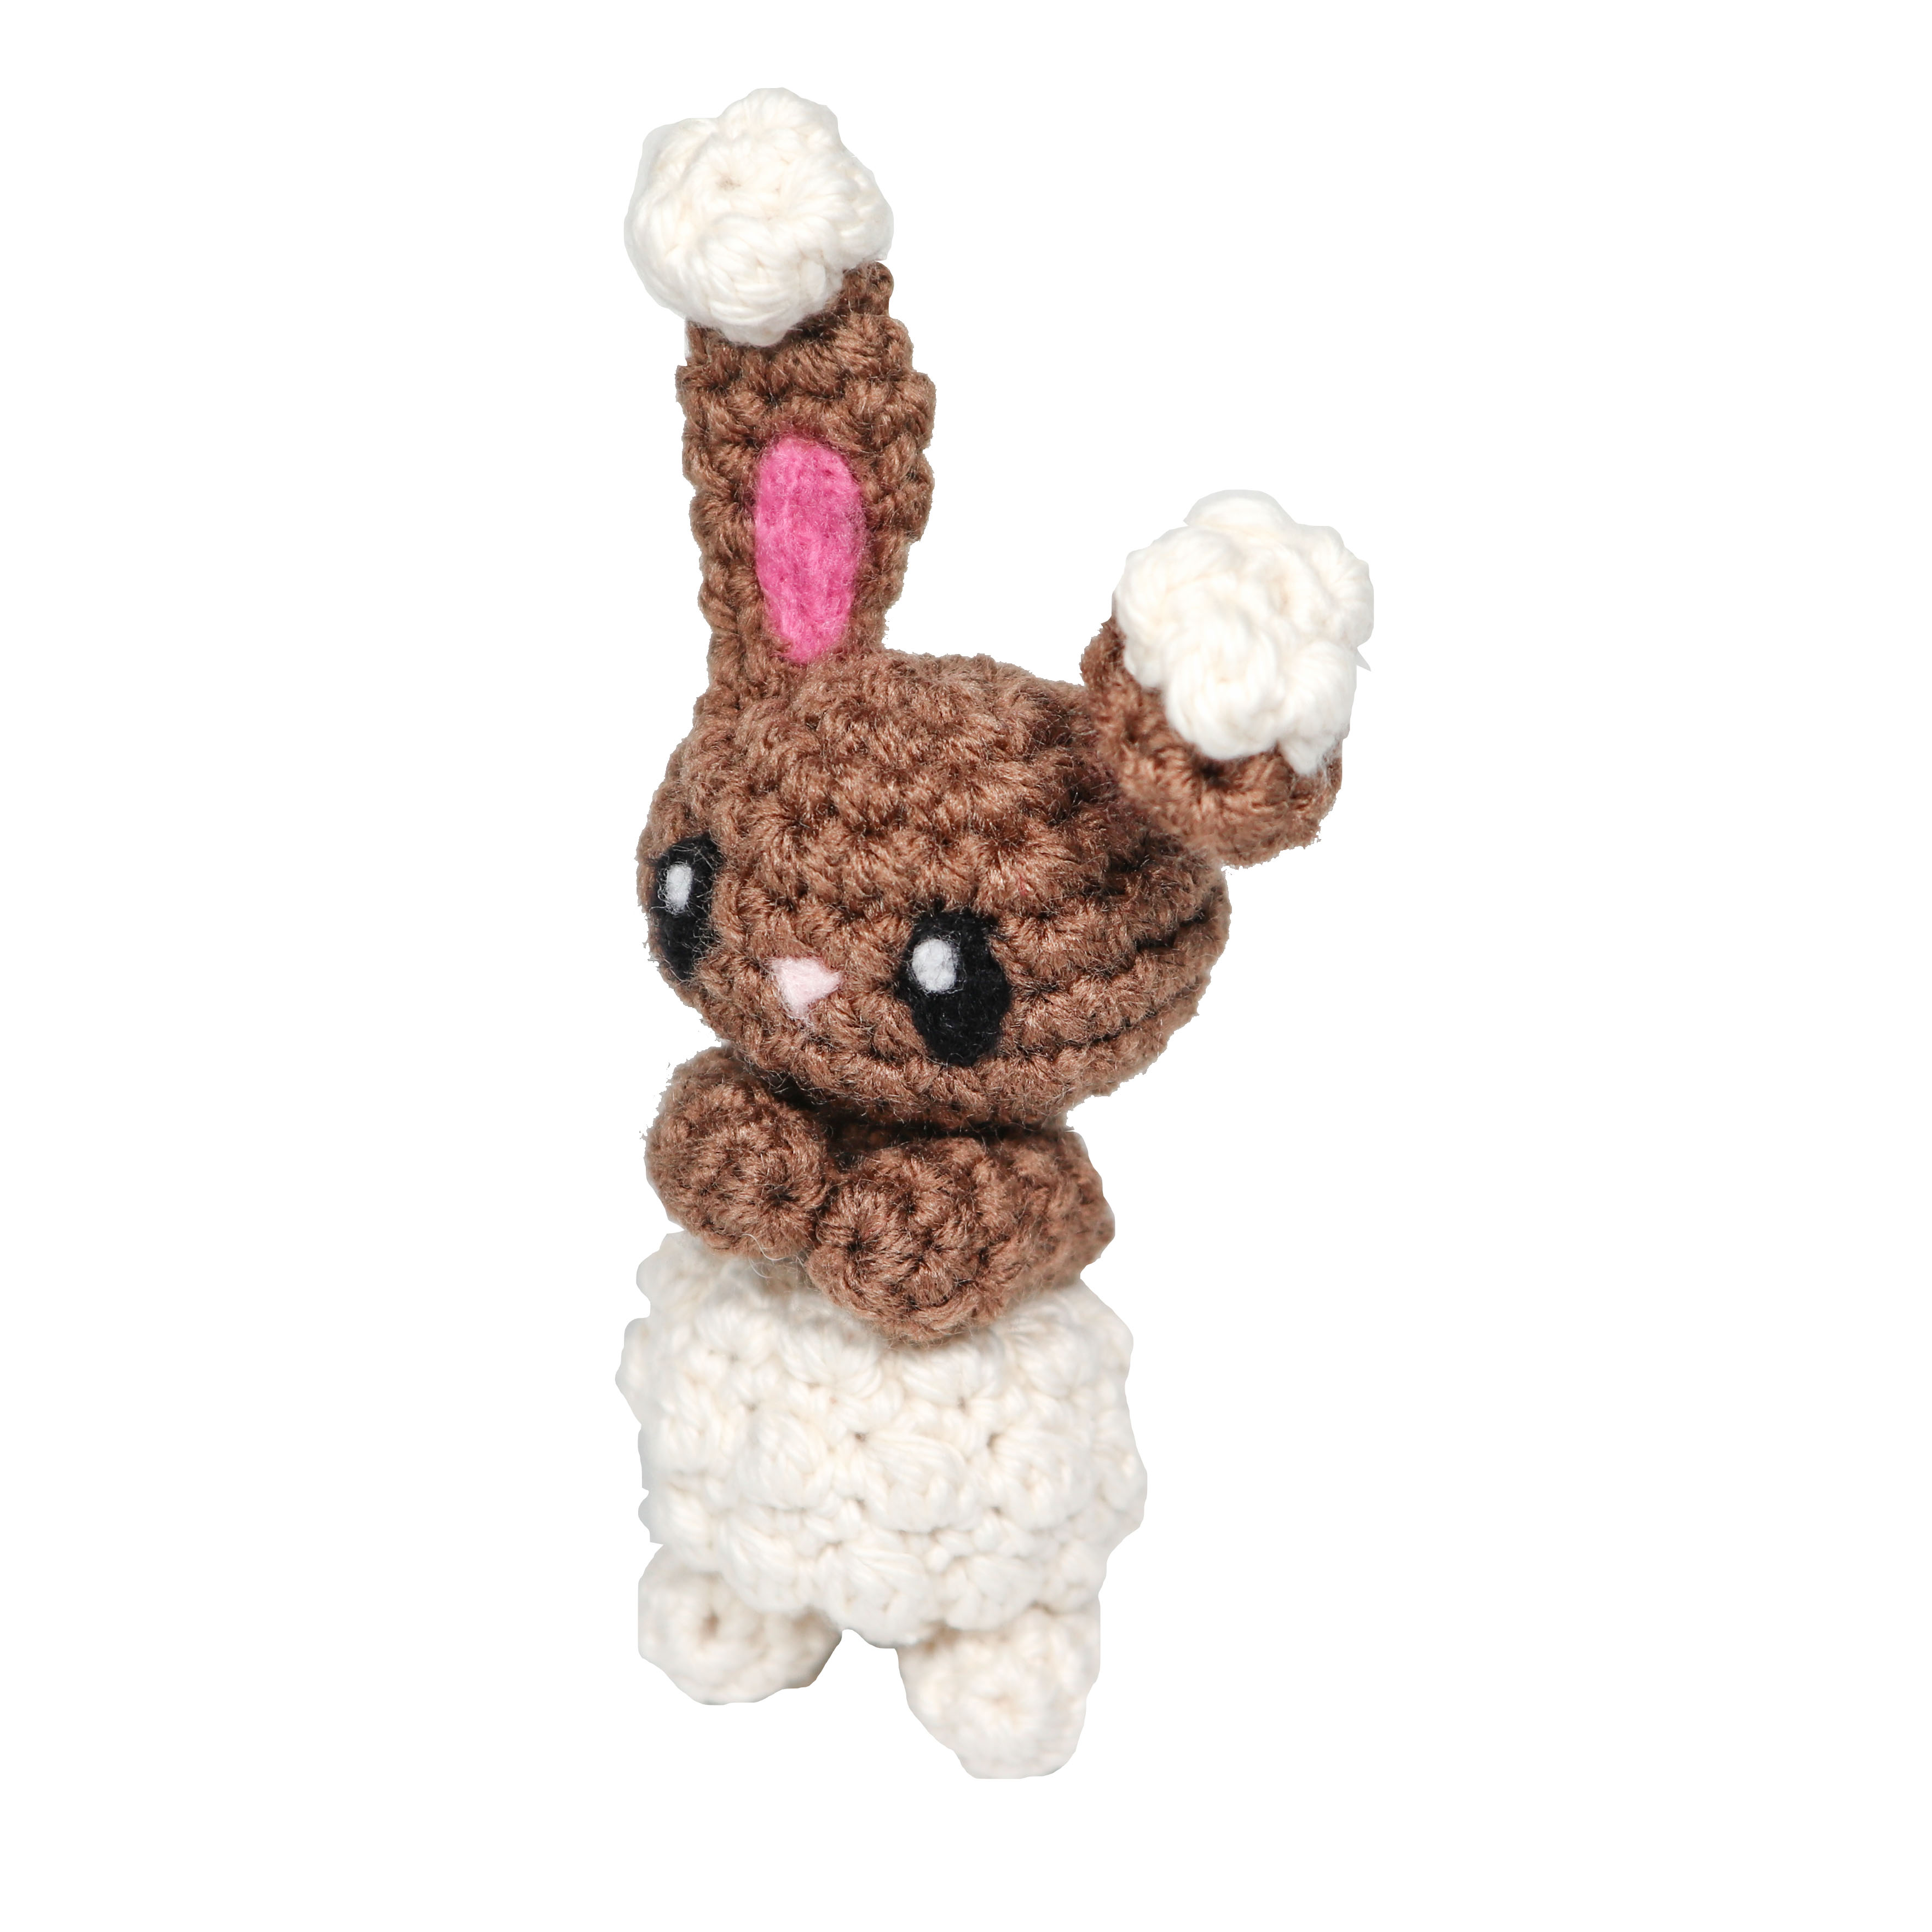
Little Buneary is too cute and shy! Maybe she needs chocolate eggs and carrots? Maybe she just needs friends? Why don’t you crochet your own Buneary and welcome her to your team with this free amigurumi pattern!
Looking for a downloadable version of this pattern to print? You can purchase one in my shop here!

Materials
- Yarn: brown, creamy white (medium was used)
- 3.5 mm crochet hook – fiber-fill stuffing
- Felt: black, white, pink for details (eyes, nose, ears, eyebrows)
- Scissors, yarn needle for assembly
Abbreviations
R(#): Round number
MR: magic ring
Sc: single crochet
Inc: increase (2 sc in same stitch)
Dec: decrease (decrease 2 sc into one)
I recommend using Invisible Decrease
Bo: bobble stitch
f/o: fasten off
Check out my Learn to Crochet page for video tutorials on how to do the types of stitches listed above.

Head
Using Brown:
R1. 6 sc in MR (6)
R2. Inc around (12)
R3. Sc 1, inc around (18)
R4. Sc 2, inc around (24)
R5-R7. Sc around (24) three times
R8. Sc 2, dec around (18)
R9. Sc 1, dec around (12)
R10. Dec around (6) close ring and f/o
Ears
Make 2- using brown:
R1. 5 sc in MR (5)
R2. Sc 1, inc, Sc 2, inc (7)
R3. Sc 1, inc Sc 5 (8)
R4. Sc around (8)
R5. Dec, sc 6 (7)
R6. Dec, sc 2, dec, sc 1 (5)
R7. Sc around (5) f/o
I did not add any stuffing to the ears. For the second ear, complete as above then fold the tip over (can sew down to attach), then after completing the ear puffs (below) sew it onto the back of the folded ear as opposed to the tip of the straight ear.
Arms
Make 2 – using Brown:
R1. 5 sc in MR (5)
R2. Inc, Sc 4 (6)
R3. Sc around (6)
R4. Dec, Sc, Dec, Sc (4)
R5-R6. Sc around (4) Two times. F/o

Tail
Using brown:
R1. 6 sc in MR (6)
R2. Sc around (6)
R3. Dec, sc, dec, sc (4) f/o.
Feet
Make 2. Using white:
R1. 6 sc in MR (6)
R2. Inc, sc 2, Inc, sc 2 (8)
R3-R4. Sc around (8) two times
R5. Dec, sc 2, dec, sc 2 (6) Close loop and f/o.
Ear Puff
The puffs and body (white features) will require using the bobble stitch. In this pattern, I had 4 loops on my hook before pulling through to make each bobble.. Please reference this video for a thorough explanation on how to make the bobble stitch, but keep in mind instead of doing incomplete ‘double crochets’ as in this video I did ‘incomplete’ single crochets to make my bobbles (see video in post below for modification.) 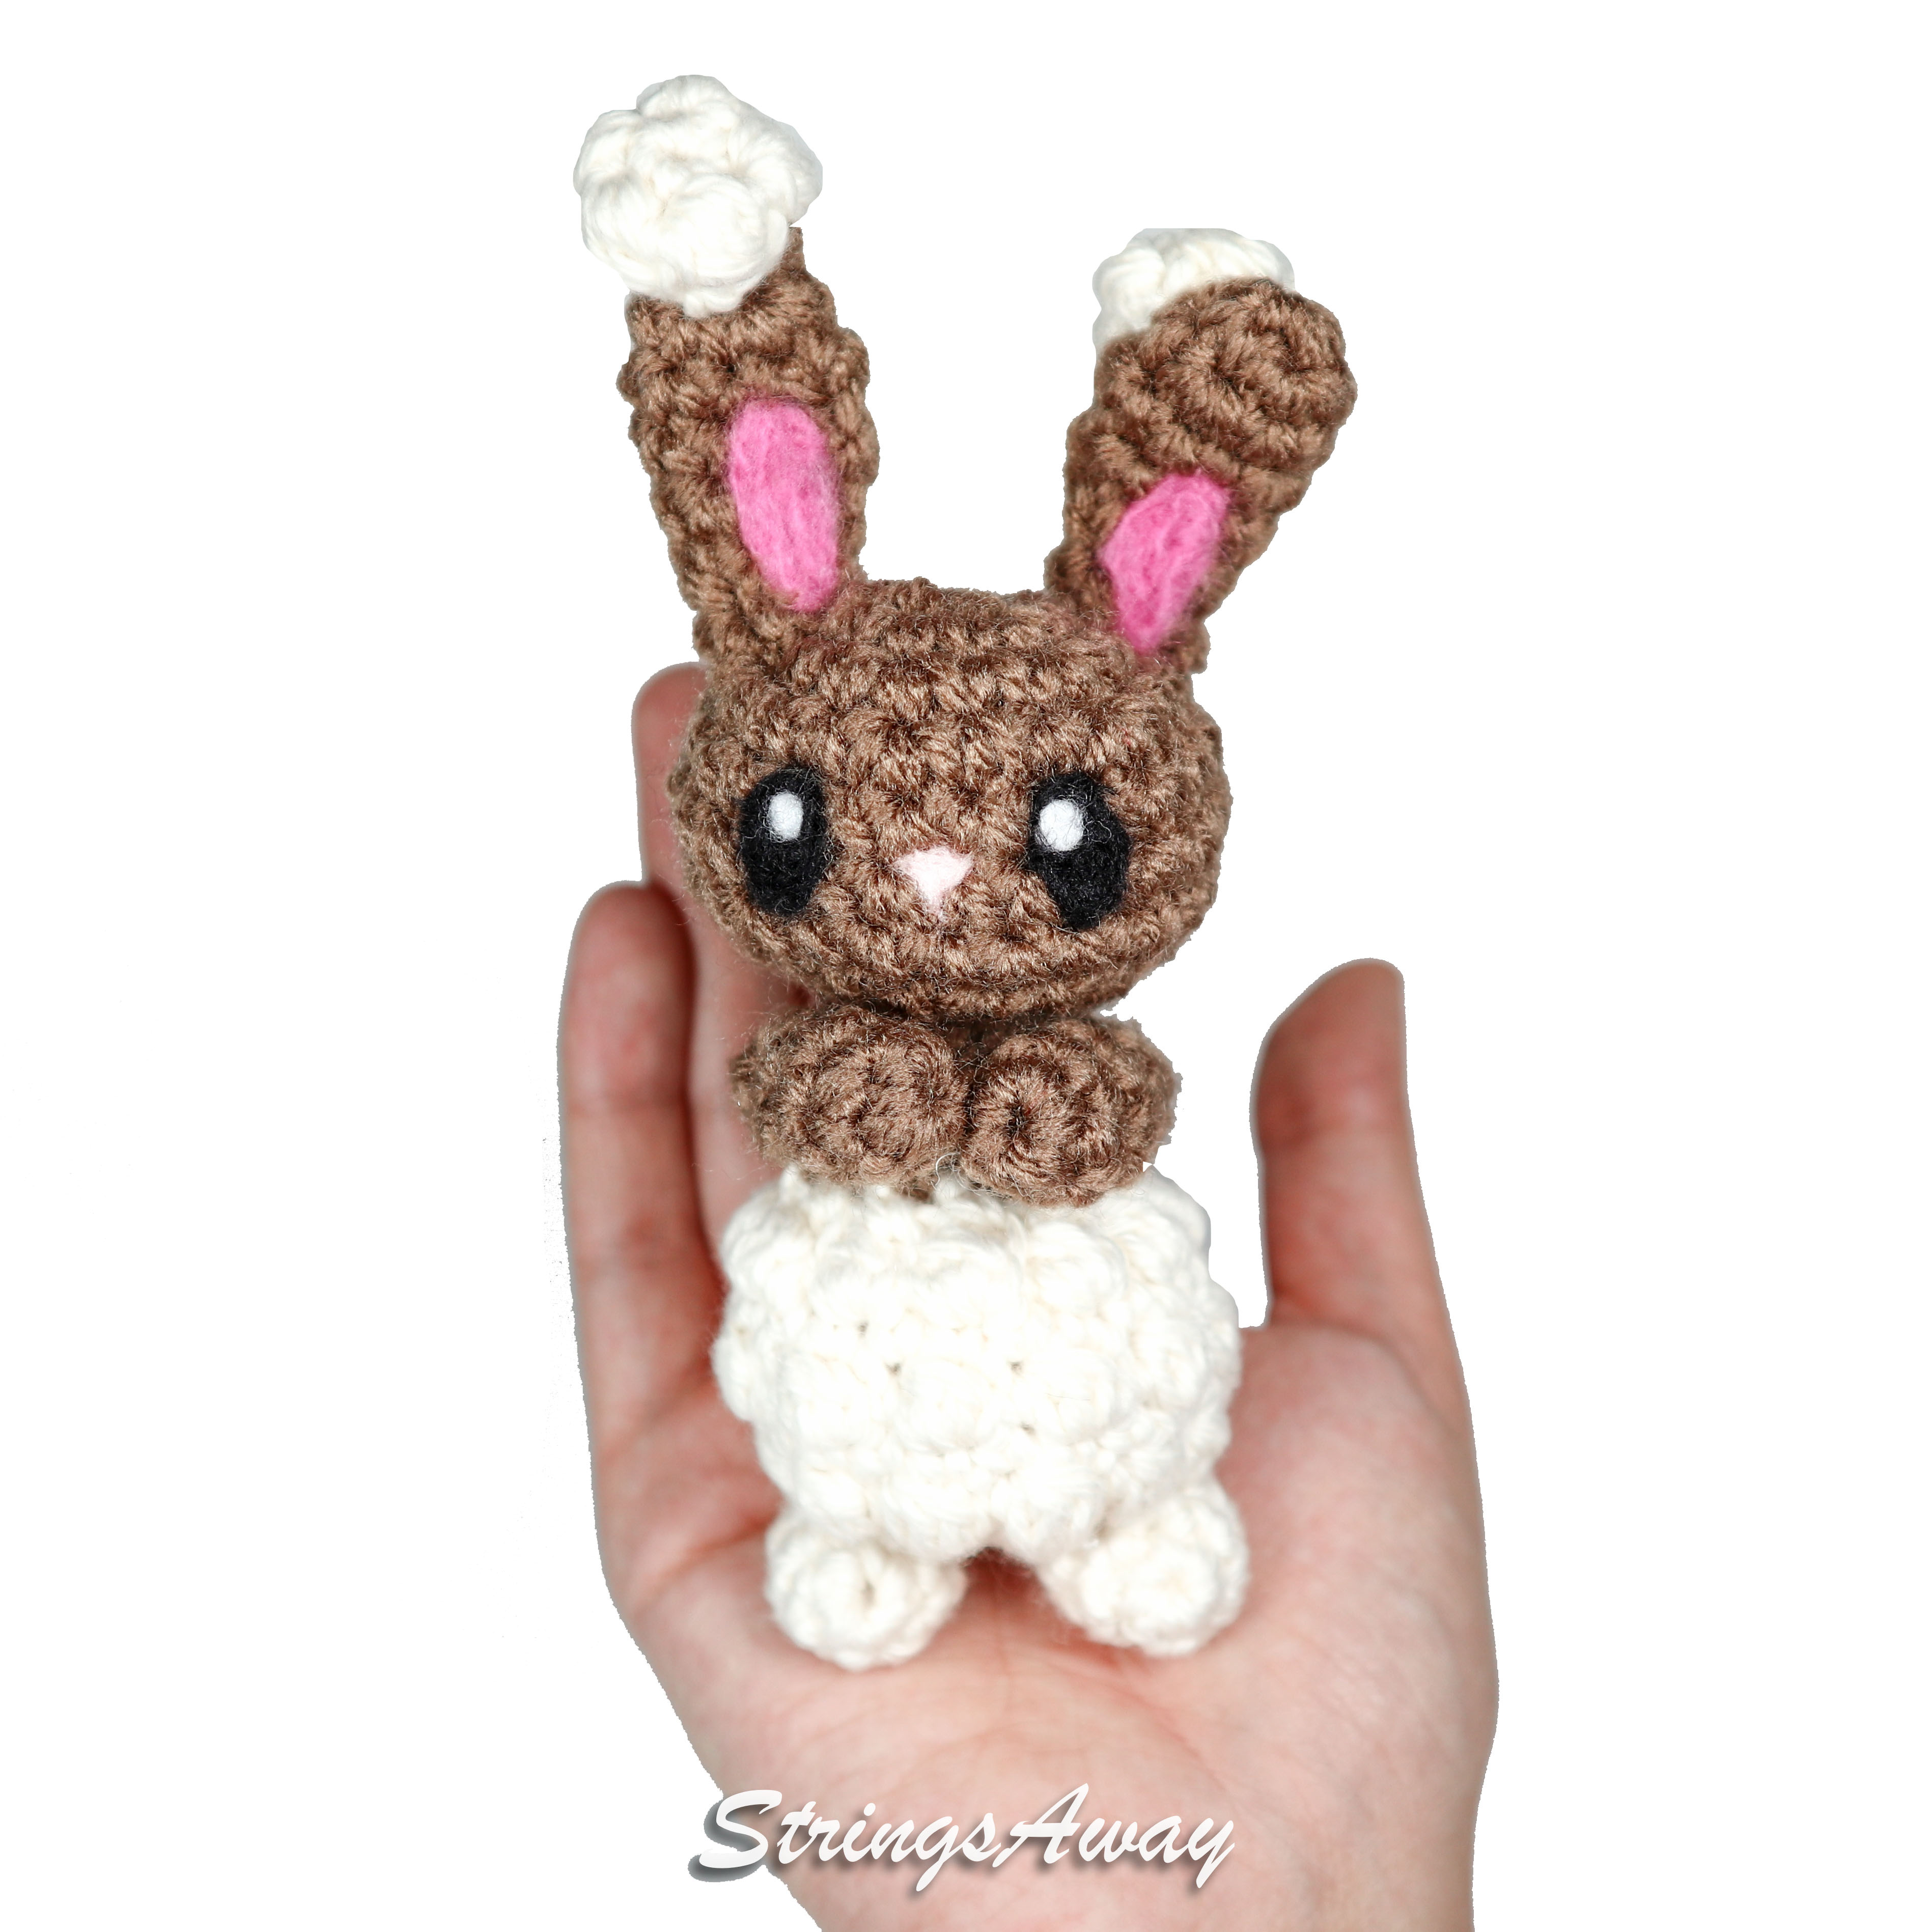
R1. 5 sc in MR (5)
R2. 5 Bo in each stitch (4 incomplete sc in same foundation space, then pull yarn through all 4 loops- per bobble) when finishing the final bobble, join with sc onto the first sc of this round (10)
R3. Dec around (5)
f/o leave a tail for sewing.
Body
Begin with white:
R1. 6 sc in MR (6)
R2. 6 Bo in each stitch (4 sc-leaving loops on hook in same space- then pull yarn through al 4 loops to complete the bobble) when finishing the final bobble, join with sc onto the first sc of this round (13)
R3. Add another sc into the first sc (ie- inc in the first sc) and inc around (24)
R4. 12 Bo as follows: in first loop of round: sc. In second loop of round 3 “incomplete” sc (leaving loops on hook), pull yarn through all 4 loops to make one bobble. Repeat around – so in this round, each bobble takes up the space of two loops instead of making the bobble in just one loop, around. (24)
R5. Sc around (24)
R6. 12 Bo (as in R4.) (24)
R7. Sc around (24)
R8. 12 Bo (as in R4.) (24)
R9. Dec around (12)
Switch to brown yarn:
R10-R12. Sc around (12) three times
F/o leaving open and a very long tail for attaching to the head
Assembly
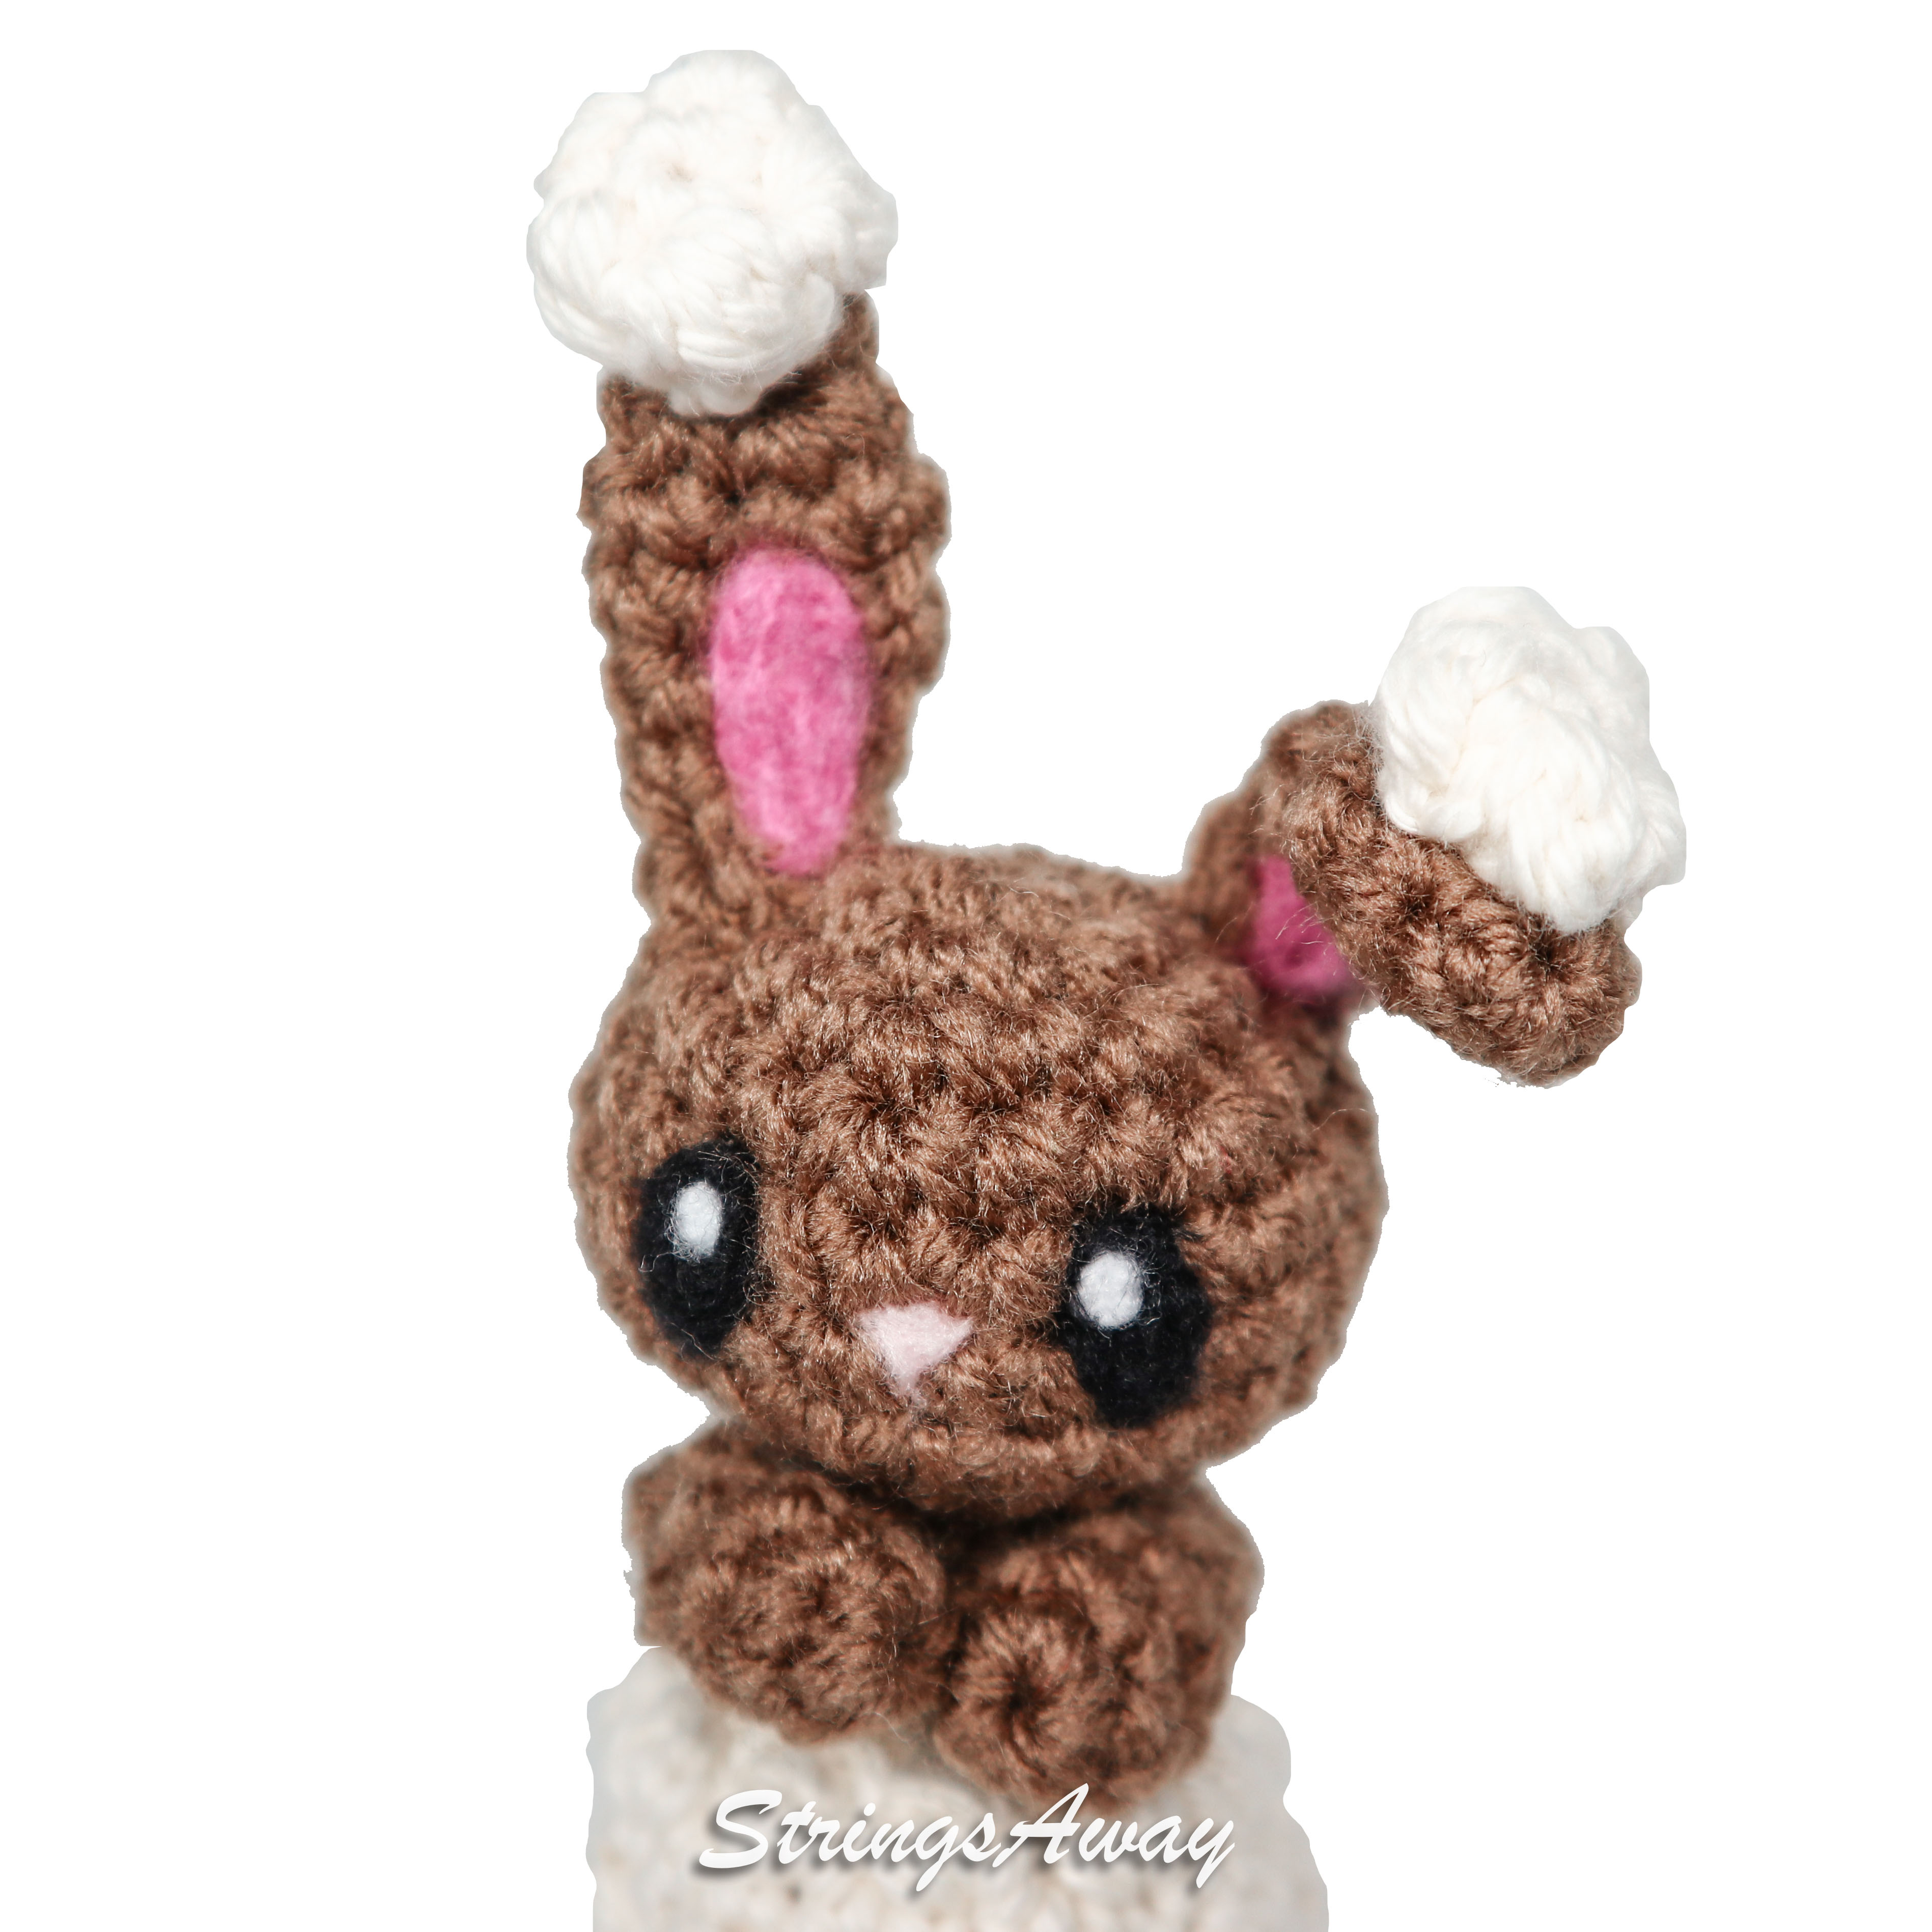
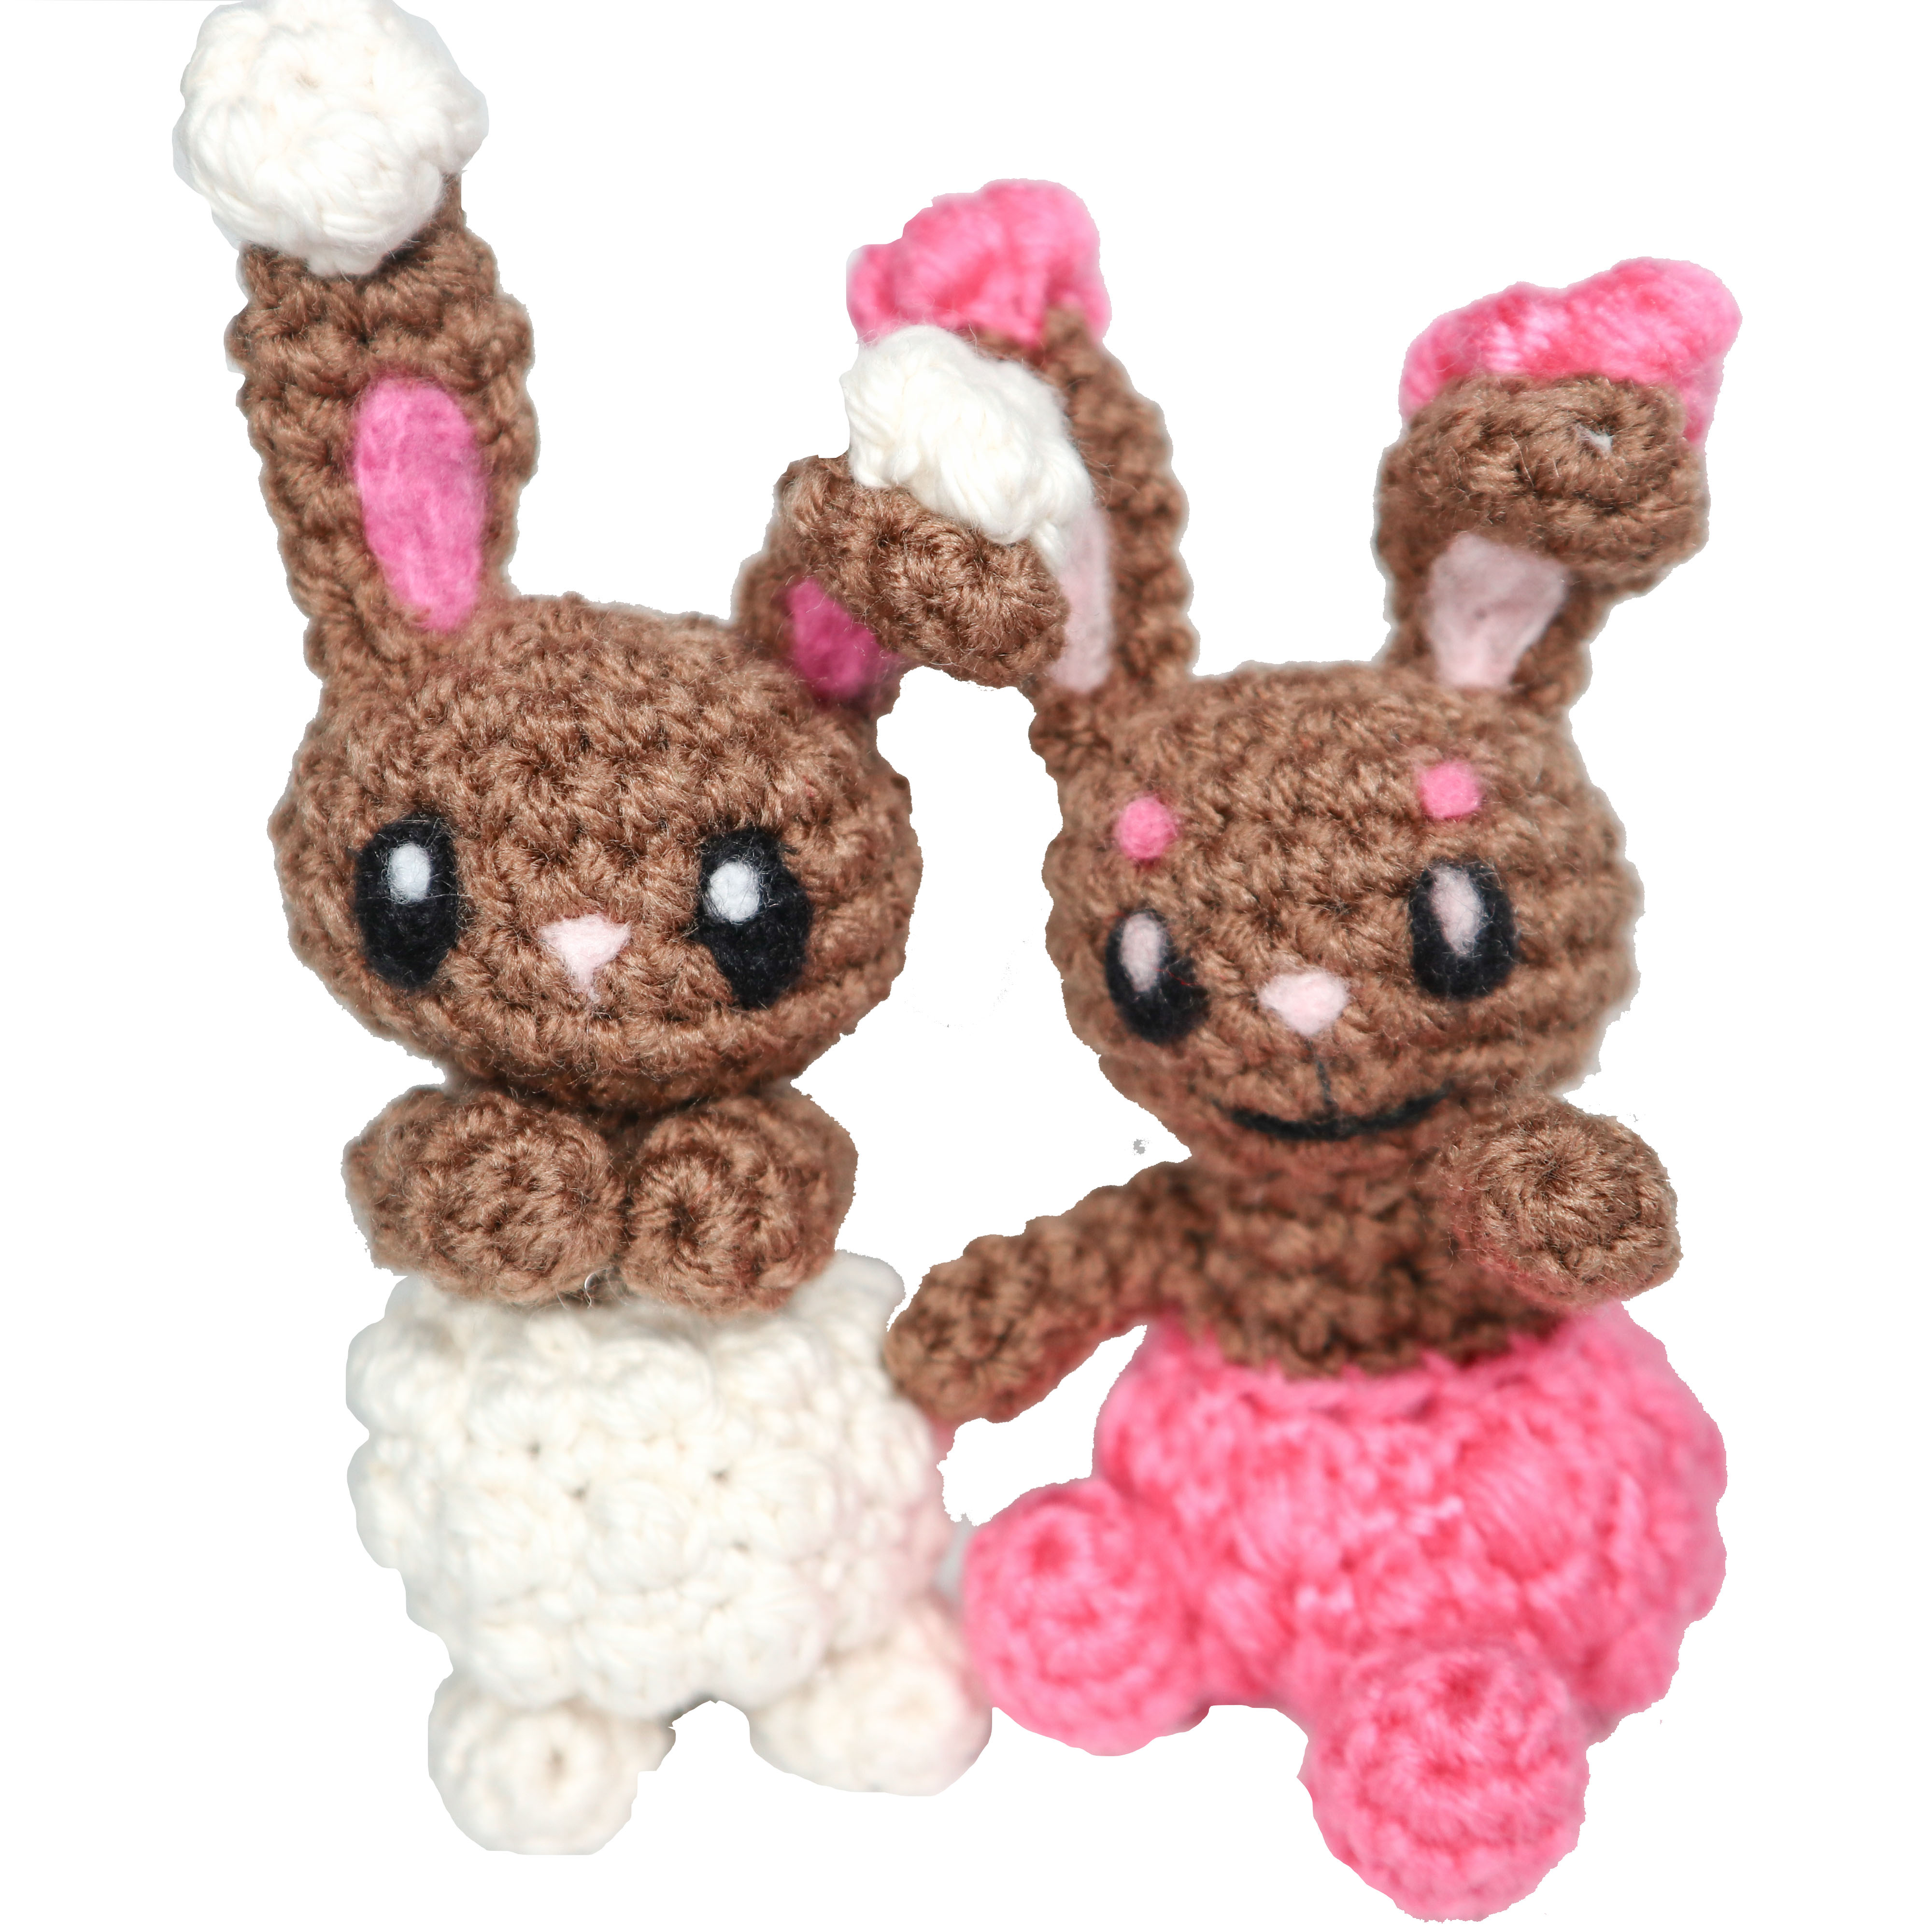
Attach head to the body using whip stitch. Attach feet to body and then the tail- arranging the tail in a low enough position that Buneary can stand on its own balancing on the feet and tail (if desired.) Attach arms to body. Attach ear puffs to tips of ears – angling slightly forward on the upright ear and attaching the puff to the backside of the folded ear. Finally add details (eyes, nose, inner ears, eyebrows- which I actually forgot on the white Buneary’s on these pictures- oops) and mouth if desired by felt pieces, embroidery, or needle felting. I hope you enjoy your amigurumi Buneary!
Thank you for trying this pattern – I hope you enjoy your Amigurumi Buneary!
Click here to purchase a downloadable version of this pattern
This pattern by StringsAway is for personal use only. Please do not sell or redistribute the pattern as your own.