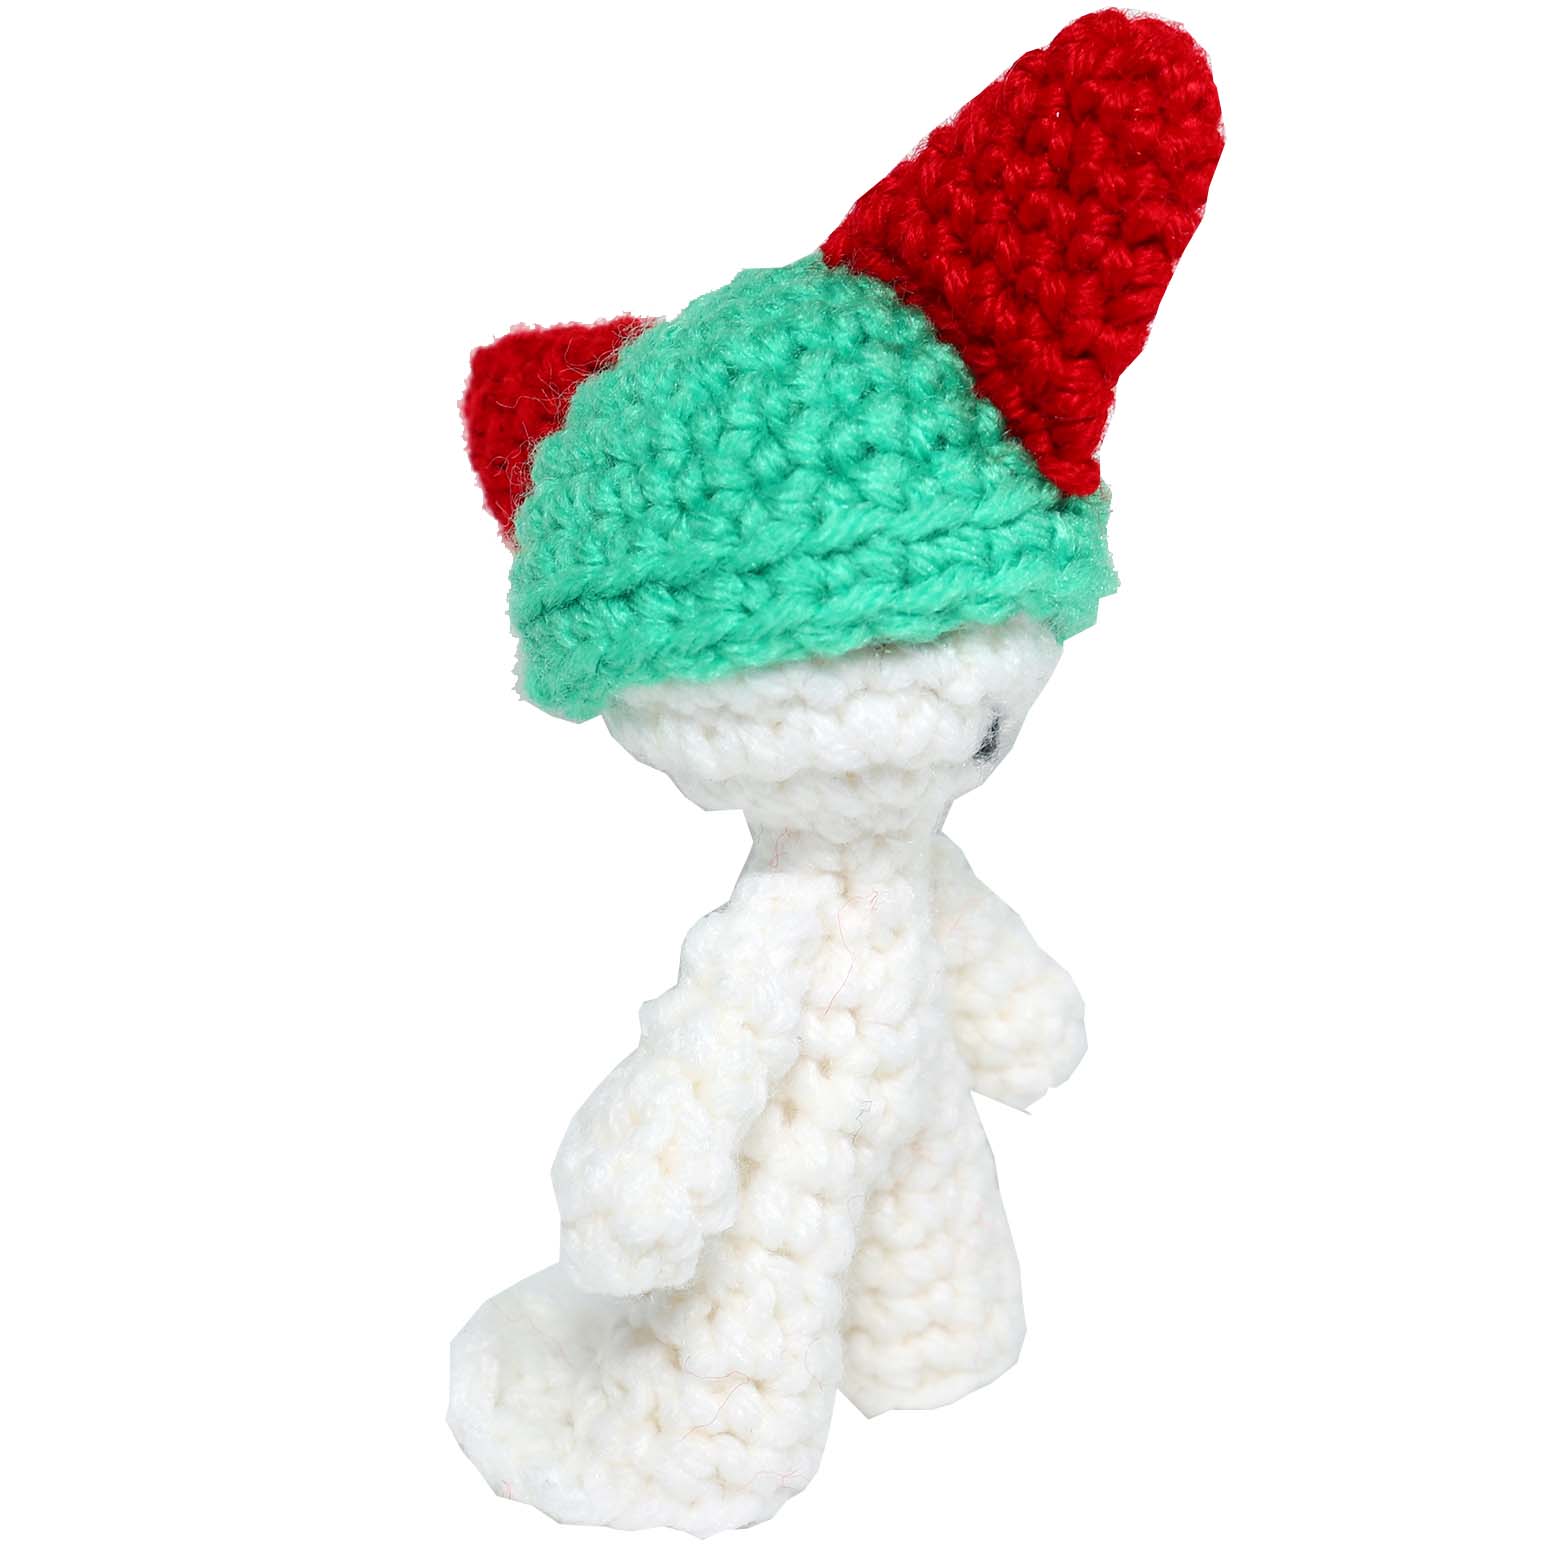
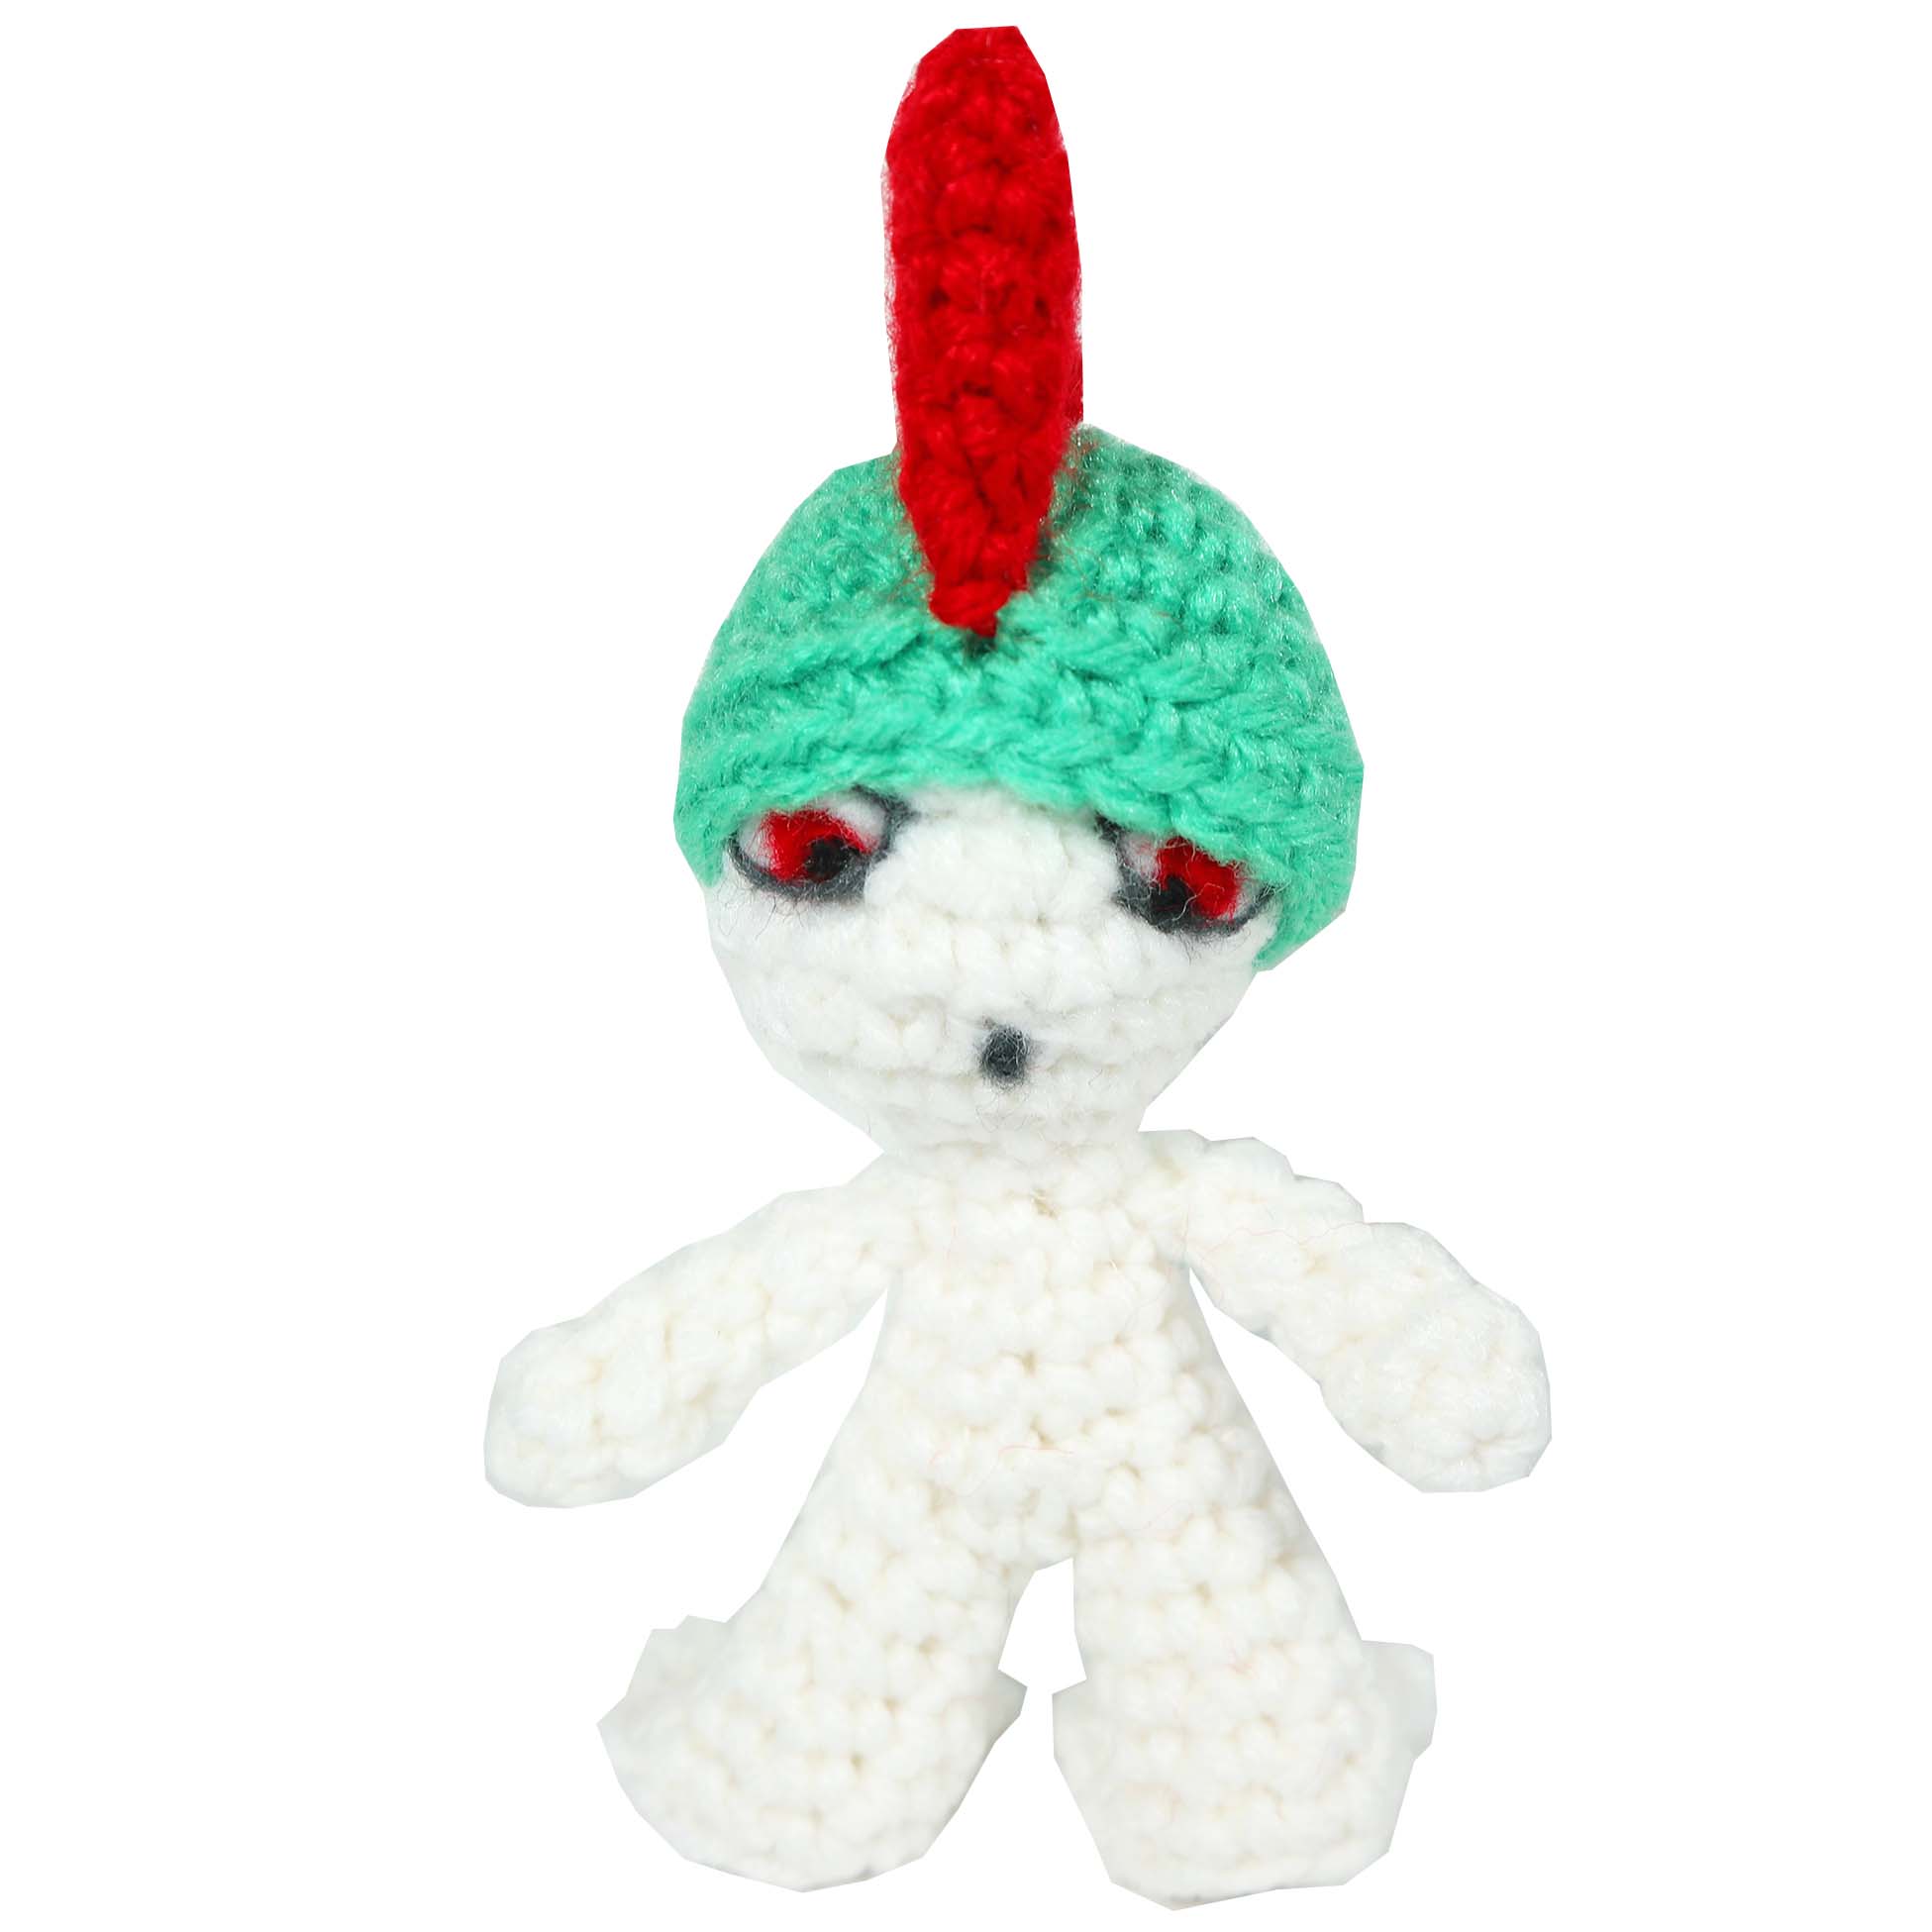
The announcement has been made- Ralts is the next featured Pokemon for community day this August 2019! To celebrate the occasion I’ve released a free Ralts crochet pattern! Ralts is a unique fairy and psychic-type Pokemon. To me, it looks like an alien wearing a green helmet.
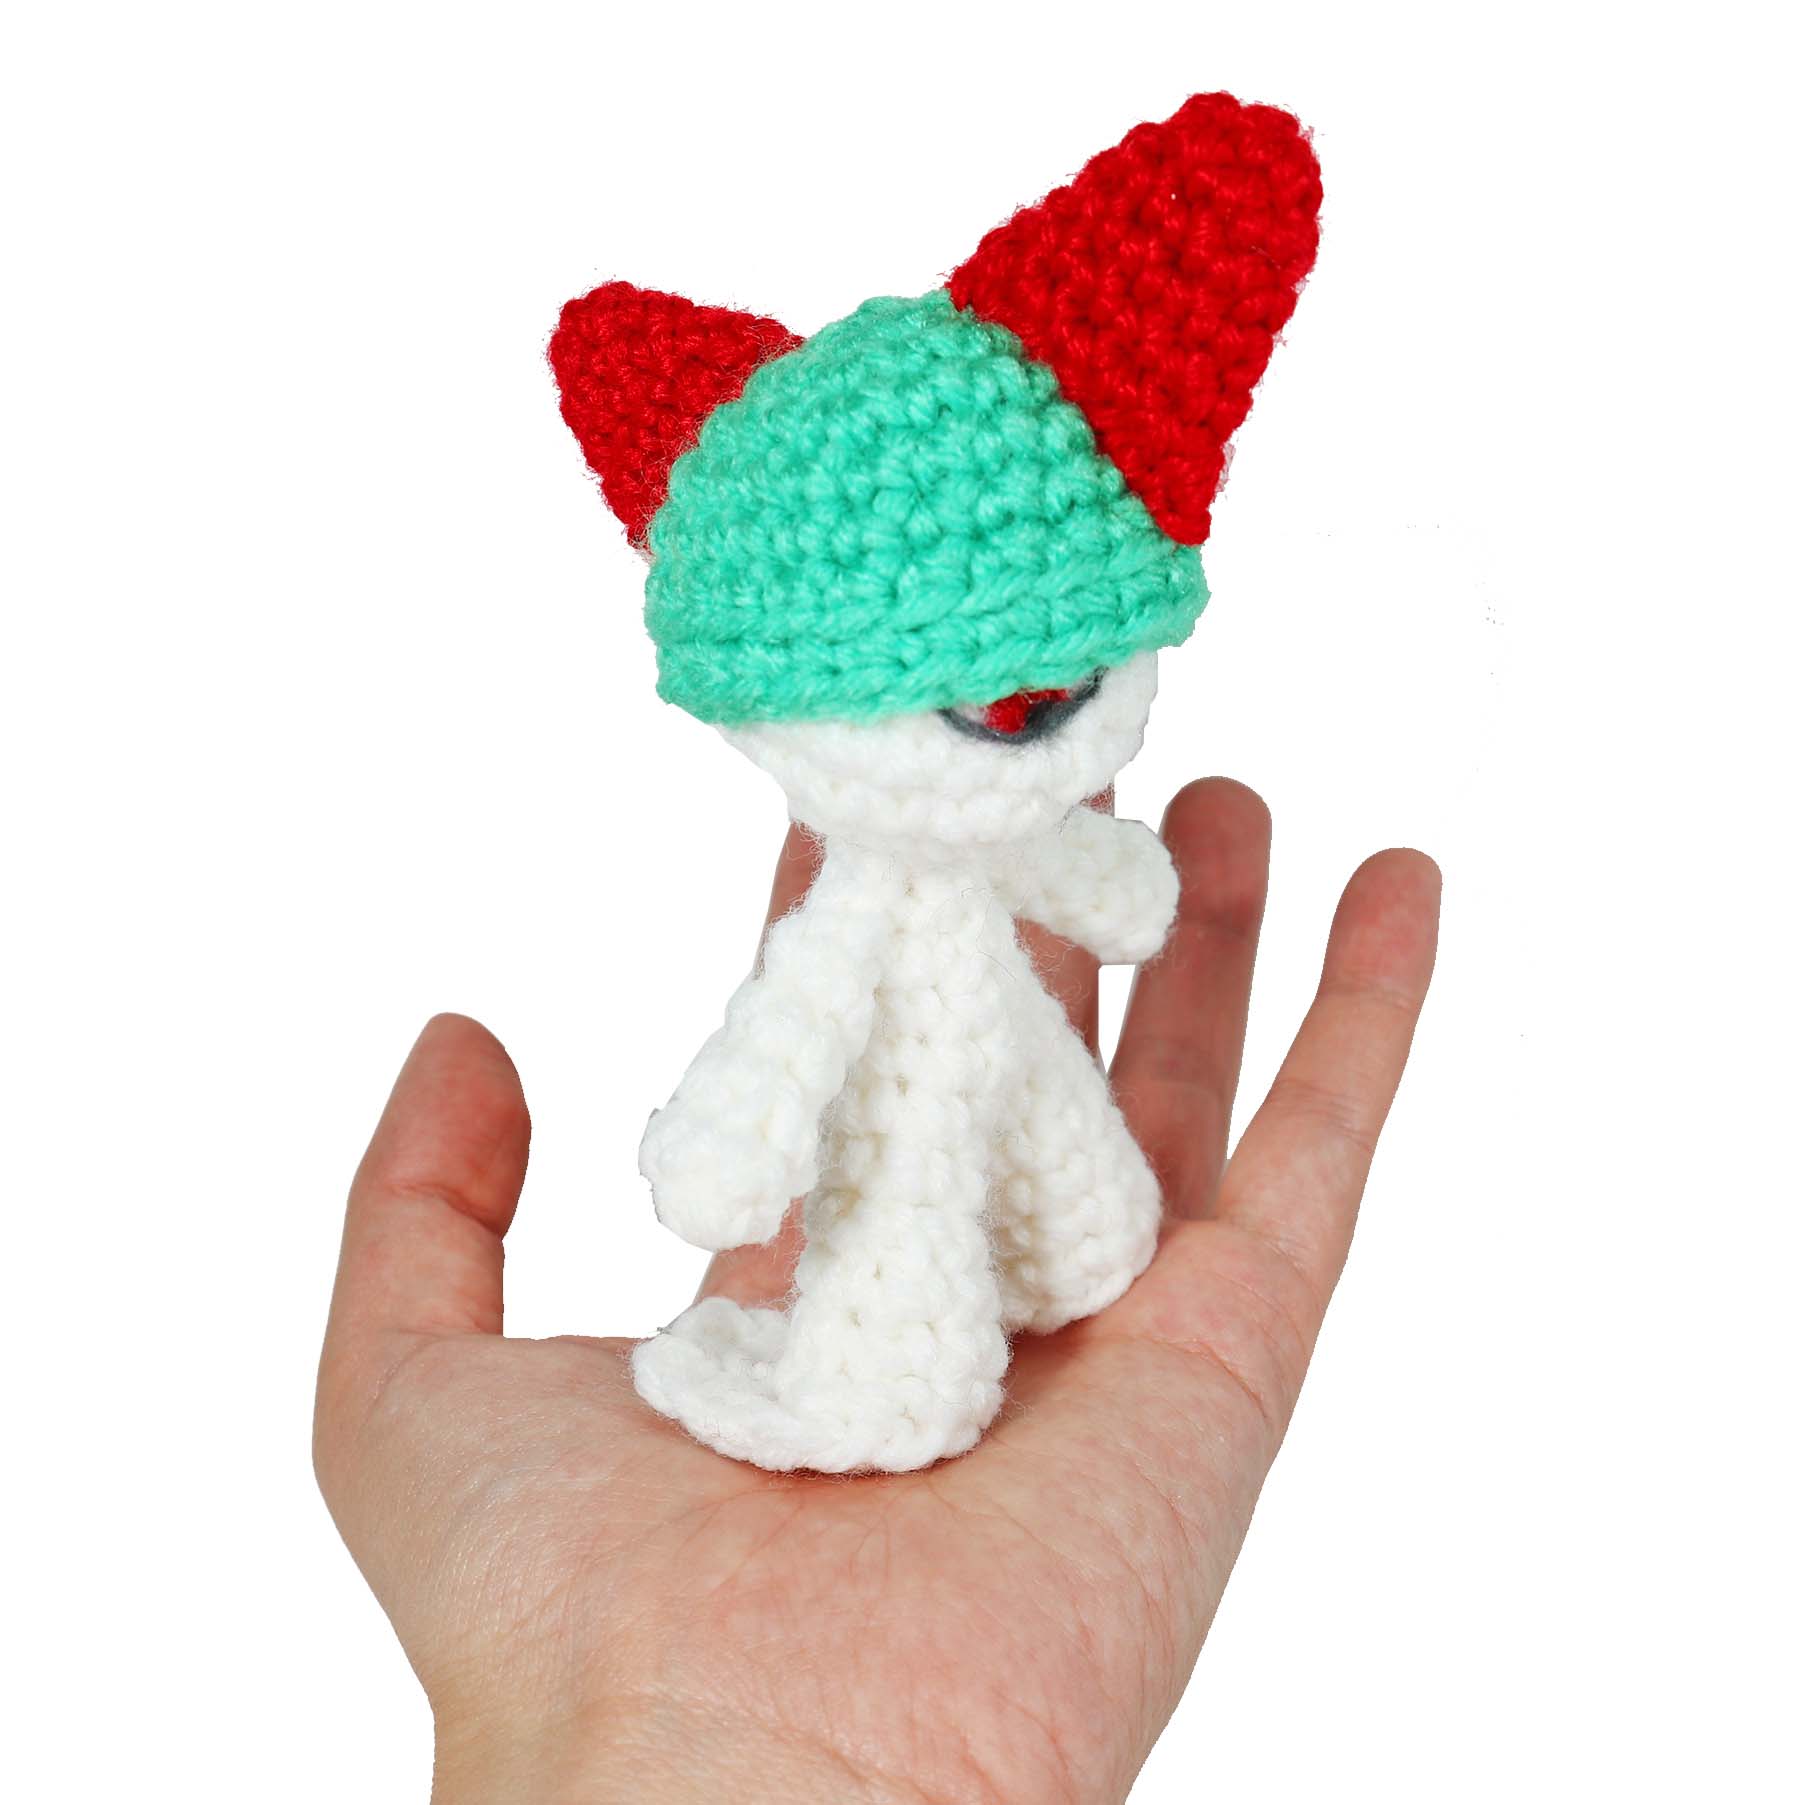
When completed, crochet Ralts is approximately 4 inches tall and 2 inches wide (he fights right in your palm!)
If you prefer to work by paper – you can purchase a pdf copy of this pattern here.
Materials
- Yarn: White, green, red (medium ~ply 4 yarn was used for white and green, thin weight yarn was used for the red fins)
- 3.5 mm crochet hook – fiber-fill stuffing
- Felt: black, white, red (for the eyes- if desired), felting needle if desired
- Scissors, yarn needle for assembly
Abbreviations
R(#): Round number
MR: magic ring
Sc: single crochet
Inc: increase (2 sc in same stitch)
Hdc: half double crochet
Dc: double crochet
Dec: decrease (decrease 2 sc into one)
I recommend using Invisible Decrease
Ch: chain
f/o: fasten off
Check out my Learn to Crochet page for video tutorials on how to do the types of stitches listed above.
Legs, Body, and Head
This Ralt’s is made continuously from the legs all the way to the head! Begin with one leg:
R1. 6 sc in MR (6)
R2. ‘Sc 2, inc’ around (8)
R3. In this first 3 sc, work in the outer loops only (back of Ralts’ leg)
In 1st Sc outer loop: Sc, ch 3, Hdc
In 2nd Sc outer loop: Dc, ch 2, Dc
In 3rd Sc outer loop: Hdc, ch 3, Sc
Sc 5 (in both loops as usual) to complete the round (8)
R4. 3 Sc in the 3 ‘inner loops’ that were left unworked in R3, then Sc 5 (in both loops as usual) to complete the round (8).
R5. Dec, Sc 6 (7)
R6. Sc around (7)
R7. Dec, Sc 5 (6)
R8. Sc around (6)
At this point if you’re making the first leg: stuff leg and f/o (do not close loop.)
Repeat the above instructions to make the second leg, but do not f/o and immediately continue to make the body:
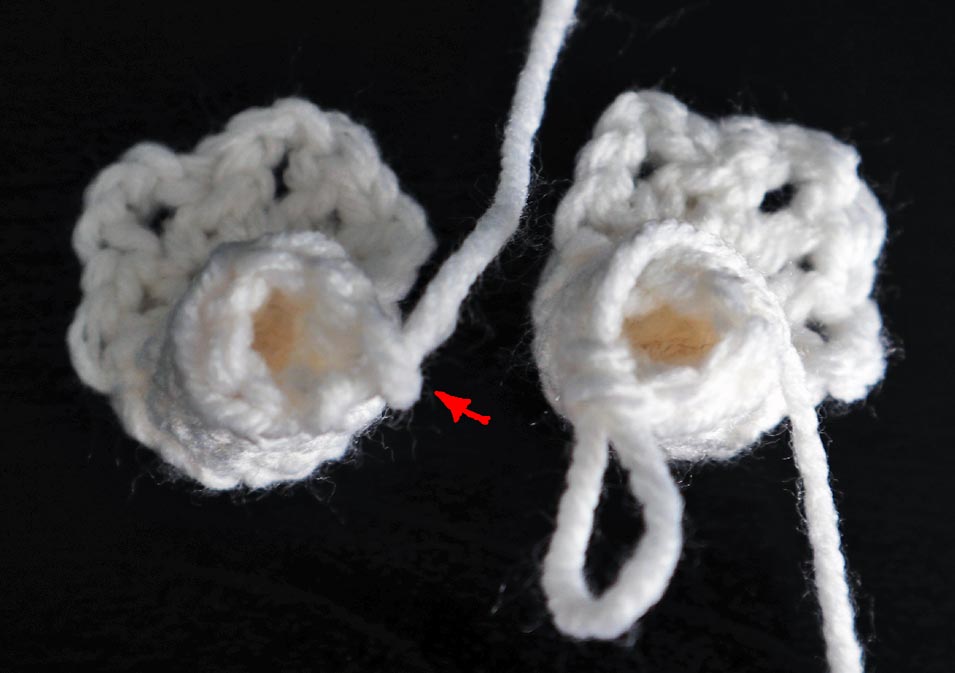
R9. Join the two legs by doing 12 Sc (working in all available sc on each leg.) Ensure that when joining the legs the frills on the feet are both oriented in the same direction/ make sure Ralt’s is not bow-legged. (12)
R10. ‘Dec, Sc 4’ around (10)
R11. ‘Dec, Sc 3’ around (8)
R12. Sc around (8)
R13. ‘Dec, Sc 2’ around (6)
R14. Sc around (6)
R15. Inc around (12)
R16. ‘Sc 1, inc’ around (18)
R17. ‘Sc 5, inc’ around (21)
R18-19. Sc around (21) two times
R20. ‘Sc 5, dec’ around (18)
R21. ‘Sc 1, dec’ around (12)
R22. Dec around (6)
F/o and close loop.
Arms
Make 2 -Using White:
R1. 6 sc in MR (6)
R2. Sc around (6)
R3. ‘Dec, Sc’ around (4)
R4-5. Sc around (4) two times
F/o and close loop.
Helmet
Using Green
R1. 6 sc in MR (6)
R2. Inc around (12)
R3. ‘Sc 1, inc’ around (18)
R4. ‘Sc 2, inc’ around (24)
R5-7. Sc around (24) three times
R8. In inner loops only: Sc around (24)
F/o leave a long tail for sewing.

Fins
Make 2- Using Red:
R1. 6 sc in MR (6)
R2. ‘Sc 2, inc’ around (8)
R3. Sc around (8)
R4. ‘Sc 3, inc’ around (10)
R5. Sc around (10)
R6. ‘Sc 4, inc’ around (12)
F/o and press flat.
Assembly of Crochet Ralts
Body: Attach the arms to either side of Ralt’s body below the head. Remember- the frills on the feet are on the -back- of Ralts.
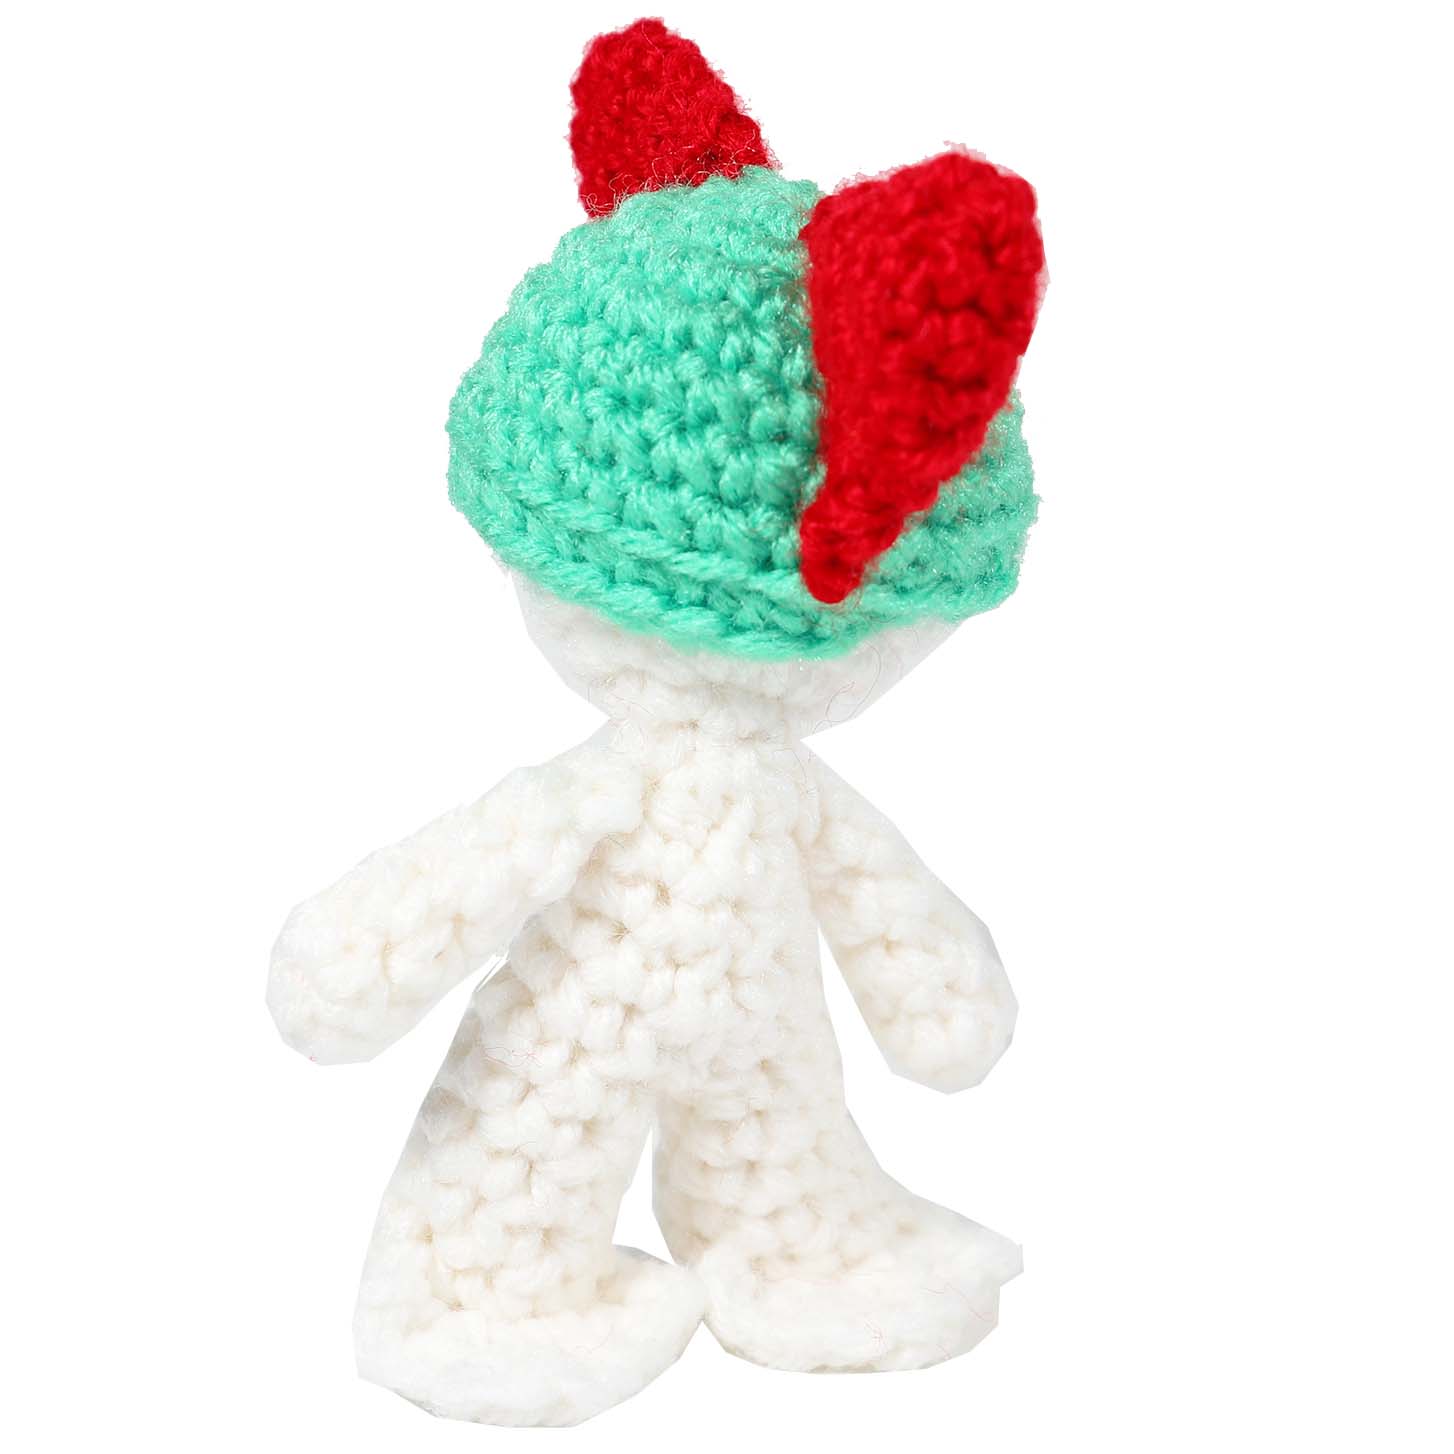
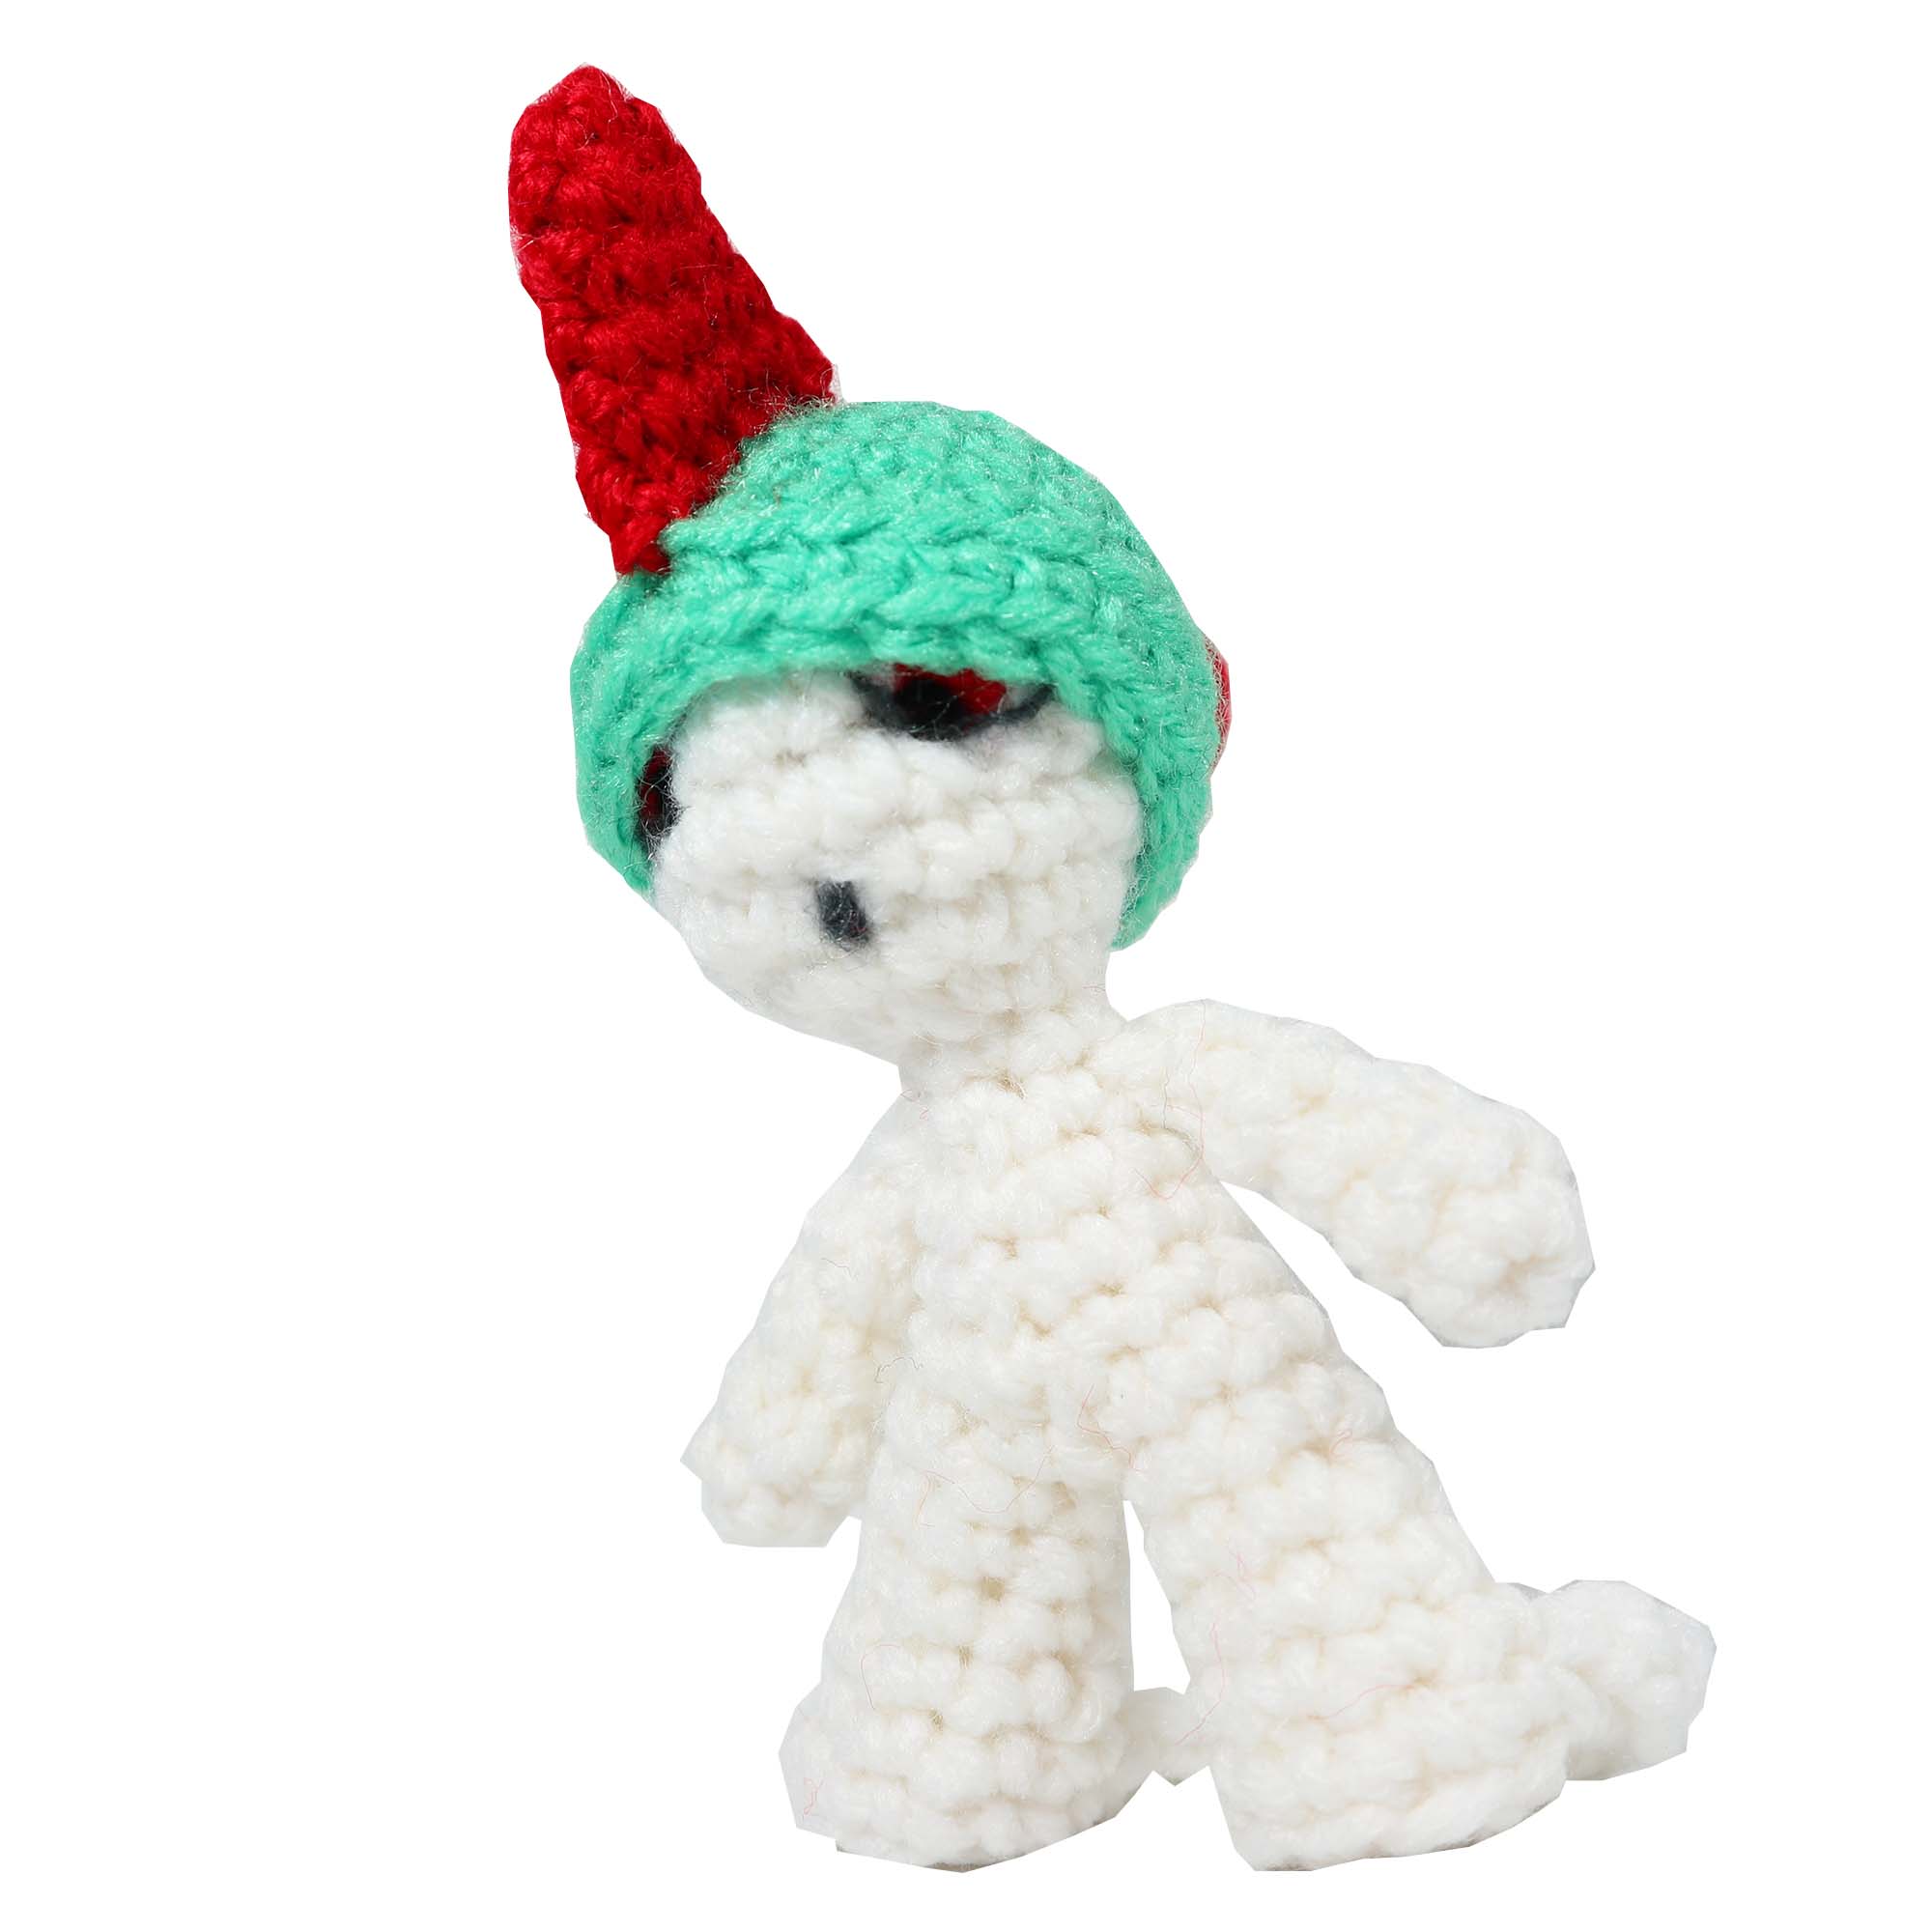
Head: If you like – add some eyes to Ralts before attaching the Helmet. This was done with needle felting but felt pieces could also be used. Attach the fins one to the front of the helmet and one to the back. Finally attach the Helmet to the head such that it partially obscures the eyes (or entirely obscures them if you chose not to make eyes.) Add a surprised ‘O’ mouth and you are finished! That was quick, eh!?
I hope you enjoy your amigurumi Ralts!
Click here to purchase a downloadable version of this pattern
Thank you for trying this pattern – I hope you enjoy your Amigurumi Ralts!
This pattern by StringsAway is for personal use only. Please do not sell or redistribute the pattern as your own.
9 Responses
Daphne Davenport
Thanks, made a couple and they turned out nicely.
Lisa
Yay I’m glad! Thanks for trying out the pattern!
Scia
This is the cutest thing i have ever made, my yarn was pretty small so it turned out tiny and so cute! I wish I could send a picture!
Kate
Hi, love this pattern, but as a beginner I’m finding it too small to work on, the leg was closed up by R6!
How would I make it a bit bigger?
Thanks
Lisa
Hi! Thanks for trying the pattern – I know mine do tend to run really small. My suggestions are: try to have really loose yarn tension while working (try not to pull too snug when doing each stitch), you could try using a bigger hook size with thinner yarn (which would make more space within and between the stitches), or you could try just working your stitches out of the ‘outer most loop’ of each stitch in the round instead of working through both loops. Those would be my only suggestions I guess! Good luck, I hope it works out!
Rebekah Day
I love it! Is there a way to make it in a bigger size? Any tips? Thank you!
Lisa
Hmm my only tip would be to use really thicker “ply” yarn (like “Jumbo”?) and then of course a larger hook size to match. Thanks for checking out the pattern!
Debbie
I would like the pattern of the Pokémon character you are holding Lisa
Lisa
Hi Debbie, the one I’m holding (in the ‘about me’ sidebar) is Alolan Sandslash. It’s a much more detailed pattern available for download from my shop : https://stringsaway.ca/product/alolan-sandslash-amigurumi-premium-pdf-crochet-pattern