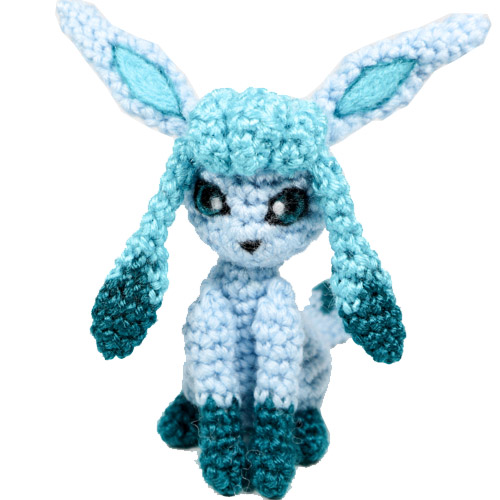
Up next is Glaceon, the ice-type Eeveelution. Some facts about Glaceon: Eevee evolves into Glaceon when exposed to an Ice Stone or Ice Rock. By controlling its body temperature, it can create ice or snow in the air around it. It can freeze it’s fur into icicles and attack it’s prey. Now that’s a cold little Pokemon!
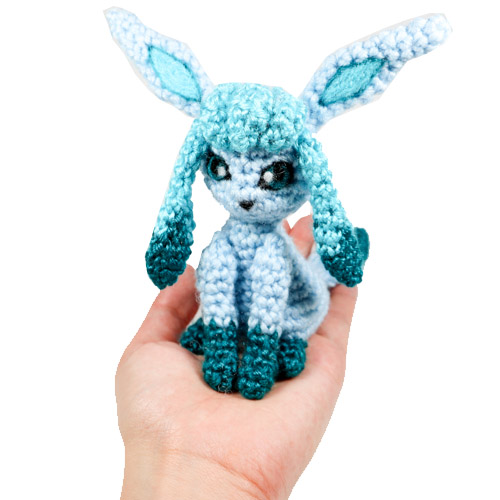
When completed, Glaceon fits in the palm of an adult sized hand. I hope you enjoy crocheting this little Glaceon!
Prefer a pdf version to download and print? Buy one from my shop here!
Materials
- Yarn: Three shades of blue. I will describe my colors as Light blue (body color), Teal (feet color), and Sky blue (head crest color)
- 3.5 mm crochet hook – fiber-fill stuffing
- Felt: Black, white, teal, sky blue (for the eyes, inner ears, and nose) and felting needle if desired
- Scissors, yarn needle for assembly
Abbreviations
R(#): Round number
MR: magic ring
Sc: single crochet
Inc: increase (2 sc in same stitch)
Dec: decrease (decrease 2 sc into one)
I recommend using Invisible Decrease
Hdc: Half double Crochet
f/o: fasten off
Check out my Learn to Crochet page for video tutorials on how to do the types of stitches listed above.
This pattern is worked in continuous rounds. Instructions between ‘ ‘ are repeated as many times in the round as indicated. This pattern assumes that you stuff body parts as they are made before closing.
Head
Using Light Blue:
R1. 6 Sc in MR (6)
R2. Inc around (12)
R3. ‘Sc 1, Inc’ around (18)
R4. ‘Sc 2, Inc’ around (24)
R5-6. Sc around (24) for two rounds
R7. Sc 11, Inc, Inc, Sc 11 (26)
R8. Sc 12, Inc, Inc, Sc 12 (28)
R9. ‘Sc 2, dec’ around (21)
R10. ‘Sc 1, dec’ around (14)
R11. Dec around (7)
F/o and do not close the opening. Leave a yarn tail for sewing onto the top of the body. Stuff.
Body
Using Light Blue:
R1. 6 Sc in MR (6)
R2. Inc around (12)
R3-4. Sc around (12) for two rounds
R5. ‘Sc 3, Inc’ around (15)
R6. Sc around (15)
R7. ‘Sc 4, Inc’ around (18)
R8. Sc around (18)
R9. Sc 7, Inc x 4, Sc 3, Inc x 4 (26)
R10. Sc 7, ‘Sc 1, Inc’ x 3, Sc 5, ‘Sc 1, Inc’ x 3, Sc 2 (32)
R11. Sc around (32)
R12. Sc 14, Dec, Dec, Sc 2, Dec, Dec, Sc 8 (28)
R13. ‘Sc 5, dec’ around (24)
R14. ‘Sc 2, dec’ around (18)
R15. ‘Sc 1, dec’ around (12)
R16. Dec around (6)
F/o, close loop.
Ears
Make 2- using Light Blue:
R1. 3 in MR (3)
R2. Inc, Sc 2 (4)
R3. Sc around (4)
R4. Inc, Sc 3 (5)
R5. Inc, Sc 4 (6)
R6. Sc around (6)
R7. ‘Inc, Sc 2’ around (8)
R8-9. Sc around (8) for two rounds
R10. ‘Sc 2, Dec’ around (6)
R11. Sc around (6)
R12. ‘Sc 1, Dec’ around (4)
F/o, Do not stuff, but instead press flat. The opening does not need to be closed. Leave a tail to sew to head.
Feet
Make 2- using teal:
R1. 4 in MR (4)
R2. ‘Sc, Inc’ around (6)
R3-4. Sc around (6) two times
F/o and do not close opening. Leave yarn a tail for sewing to the body.
Arms
Make 2 -begin with teal:
R1. 4 Sc in MR (4)
R2. ‘Sc 1, Inc’ around (6)
R3 Sc around (6)
R4. ‘Sc 1, Dec’ around (4)
R5-6. Sc around (4) for two rounds
Change to light blue color:
R7-9. Sc around (4) for three rounds
R10. ‘Sc 1, Inc’ around (6)
R11-12. Sc around (6) for two rounds
R13. ‘Sc 1, Dec’ around (4)
F/o, stuff lightly.
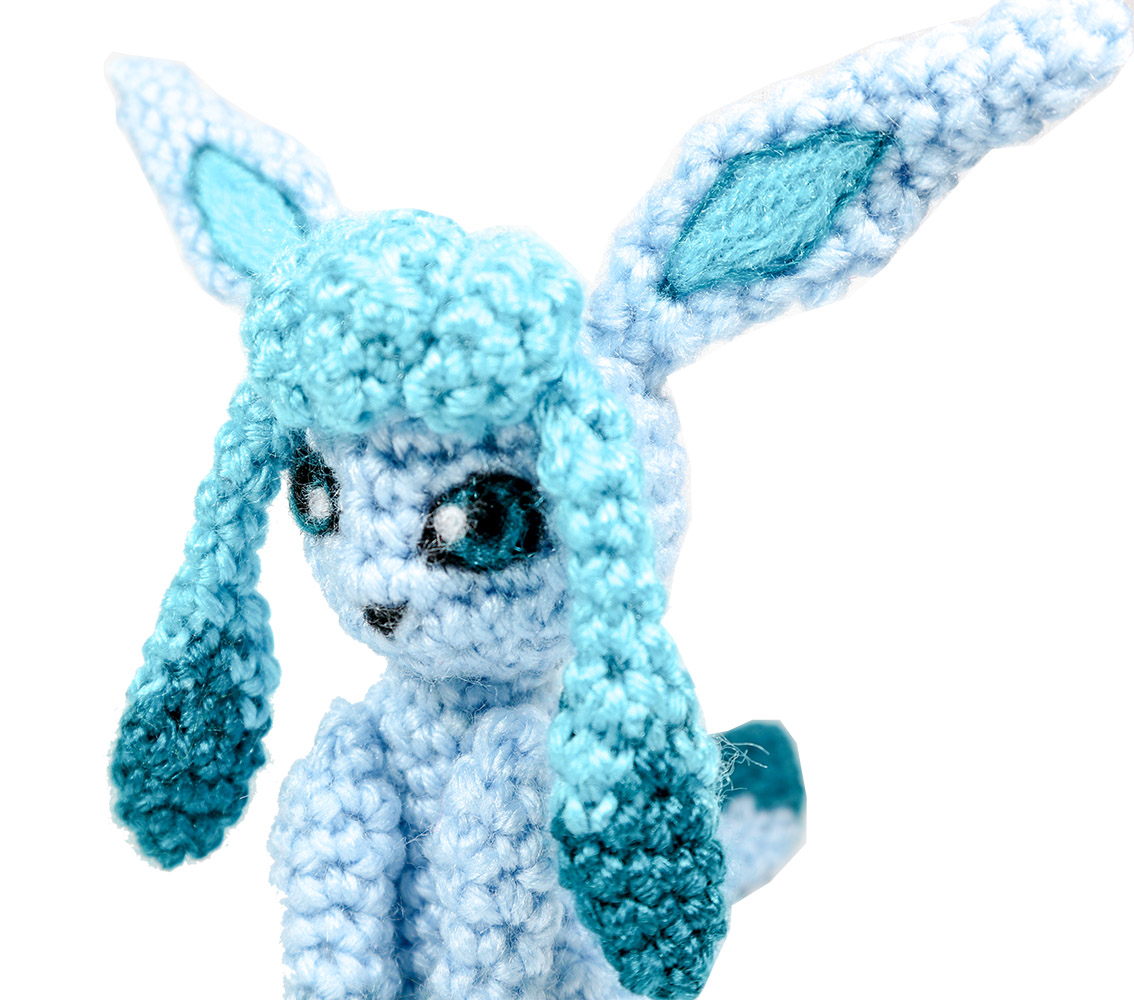
Forehead Crest:
- Middle Piece
Using sky blue:
R1. 4 Sc in MR (4)
R2. ‘Sc 1, Inc’ around (6)
R3. ‘Sc 2, Inc’ around (8)
R4. Work in Back loops only: ‘Sc 2, Dec’ around (6)
R5. (In both loops/as usual) ‘Sc 1, Dec’ around (4)
F/o and close opening with magic circle .
- Side Pieces
Make 2- Using sky blue:
R1. 4 Sc in MR (4)
R2. ‘Sc 1, Inc’ around (6)
R3. Sc 3, Hdc 3 (6)
R4. Work in Back loops only: ‘Sc 1, Dec’ around (4)
R5. (In both loops/as usual) Sc around (4)
F/o and close opening with magic circle .
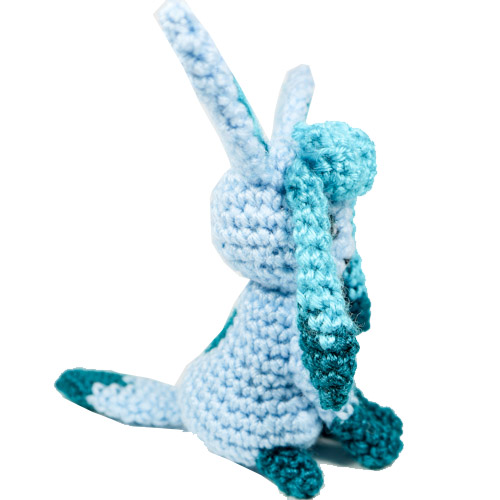
Side Bangs
Make 2. Begin using Teal:
R1. 4 Sc in MR (4)
R2. ‘Sc 1, Inc’ around (6)
R3. ‘Sc 2, Inc’ around (8)
R4. Sc around (8)
Begin changing colors as directed:
Note: ‘Sky blue’ should be the same color used for the head crest.
R5. Sky blue: Sc 1, Teal: Sc 2, Sky Blue: Sc 2, Teal: Sc 2, Sky blue: Sc 1 (8)
R6. Sky blue: Sc 2, Teal: Sc 1, Sky Blue: Sc 3, Teal: Sc 1, Sky blue: Sc 1 (8)
Continue in Sky Blue color:
R7. Dec around (4)
R8-13. Sc around (4) for six rounds
F/o, leave a tail for sewing to the head.
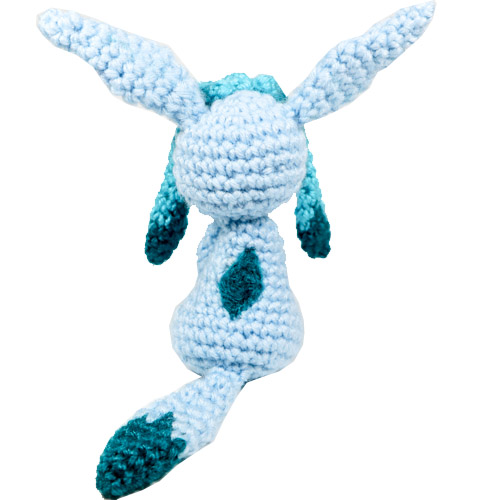
Tail
Begin using Teal:
R1. 4 Sc in MR (4)
R2. ‘Sc 1, Inc’ around (6)
R3. ‘Sc 2, Inc’ around (8)
R4. ‘Sc 3, Inc’ around (10)
R5. Sc around (10)
Begin changing colors as directed:
Note: ‘Light blue’ should be the same color used for the body.
R6. Light blue: Sc 1, Teal: Sc 3, Light Blue: Sc 2, Teal: Sc 3, Light blue: Sc 1 (10)
R7. Light blue: Sc 2, Teal: Sc 1, Light Blue: Sc 4, Teal: Sc 1, Light blue: Sc 2 (10)
Continue in Light Blue color:
R8. ‘Sc 3, Dec’ around (8)
R9. Sc around (8)
R10. ‘Sc 2, Dec’ around (6)
R11. Sc around (6)
R12. ‘Sc 1, Dec’ around (4)
R13. Sc around (4)
F/o, leave a tail for sewing to the body.
Assembly of Crochet Glaceon
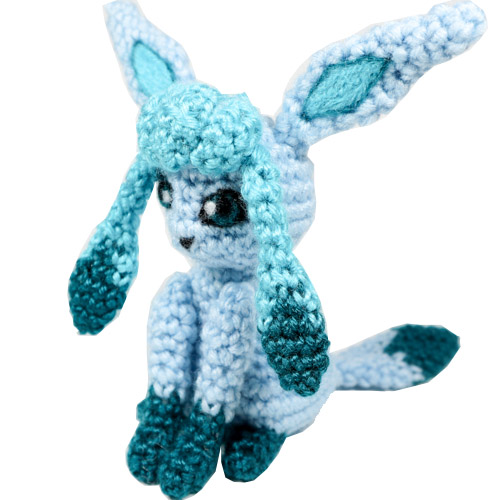
Assemble as shown in pictures- be sure to pin limbs in place before sewing to properly adjust position.
Head: Assemble and sew on the crest at approximately forehead/bangs level. The middle piece of the crest is obviously in the middle, and the side pieces to either side fit snuggly against the middle piece. The side-bangs are then attached adjacent to the sides of the crest- attached at the level of half way down the crest.
Body: The ‘bumps’ on the bottom of the body piece are meant to be thighs. Sew the feet over the bumps angling slightly outward. Attach the arms to the body, placing in between the feet, and so that the tips of the arms just touch the ground, and the top sides of the arms are positioned as ‘shoulders.’ The tail is attached to the back of the body, centered. Attach the head to the top of the body.
The eyes, ear coloring, and back diamond were added by needle felting loose yarn ends . Alternatively, one can cut out and attach colored felt pieces.
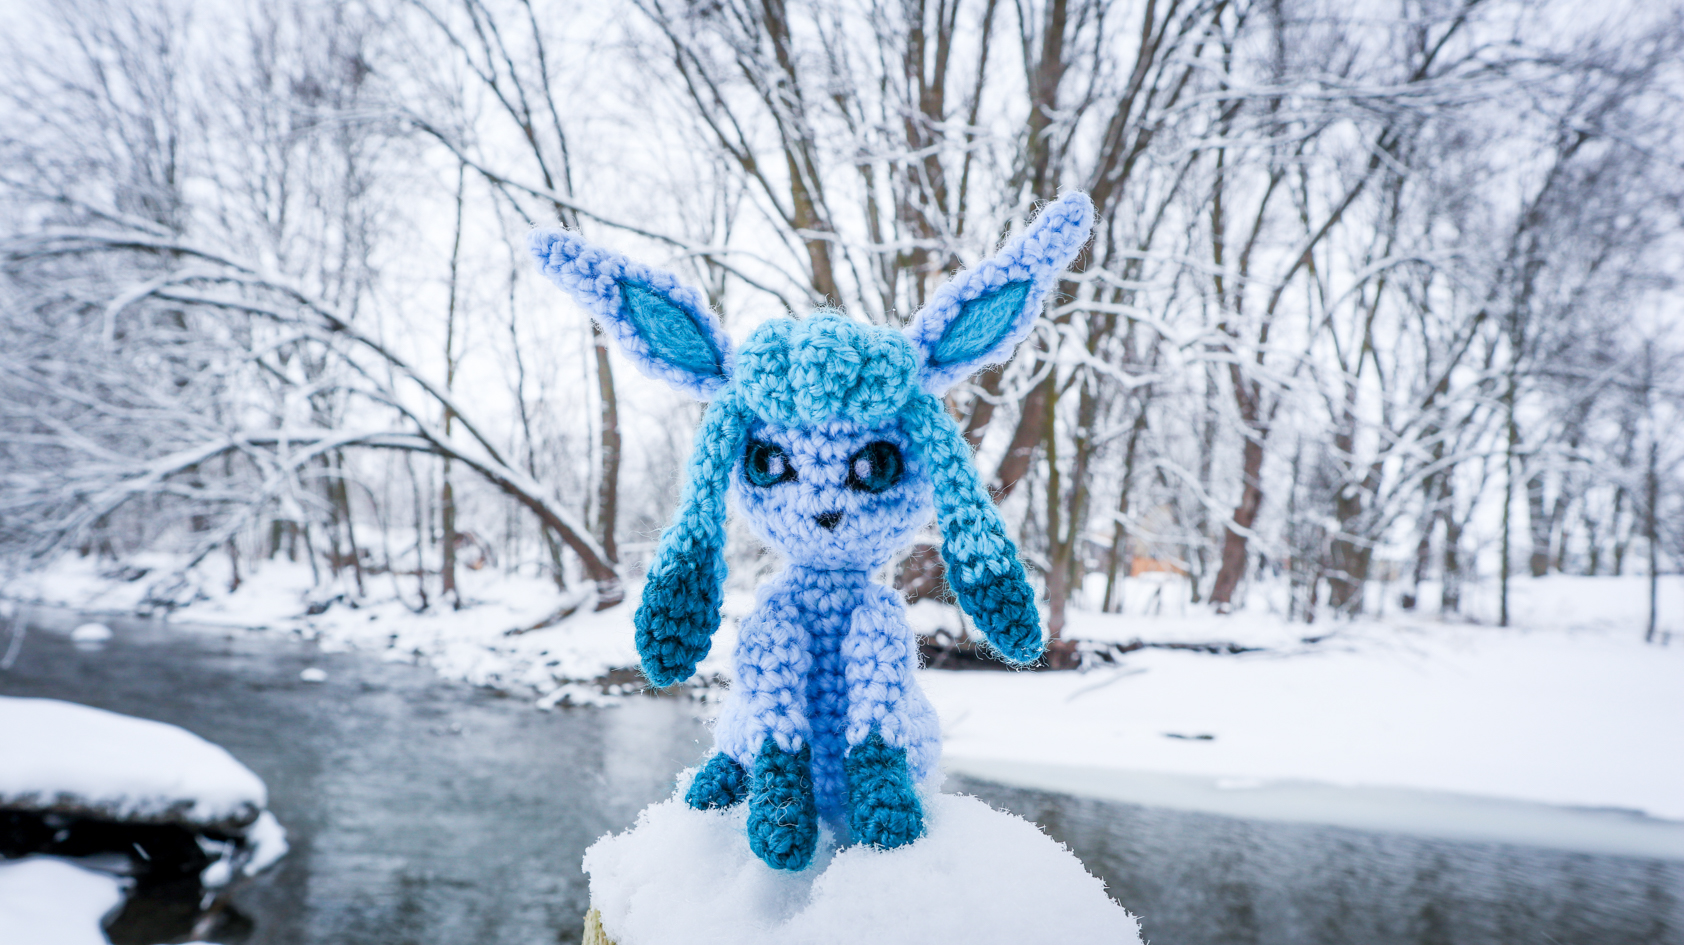
Thank you for trying this pattern – I hope you enjoy your Amigurumi Glaceon!
Click here to purchase a downloadable version of this Glaceon crochet pattern!
This pattern by StringsAway is for personal use only. Please do not sell or redistribute the pattern as your own.
